
Introduction
If you are deploying business-critical applications in Oracle Cloud Infrastructure (OCI), it’s crucial to understand and leverage the availability SLA (Service Level Agreement) provided by OCI for optimal uptime and reliability. OCI’s SLA varies based on the deployment strategy you choose:
Deployment across Availability Domains: OCI offers a 99.99% availability SLA when you deploy two or more Virtual Machines (VMs) across different Availability Domains within the same OCI region.
Deployment across Fault Domains: If you deploy VMs across Fault Domains, OCI provides a 99.95% availability SLA. It is important to note that not every OCI region has multiple Availability Domains, so in some regions, deployments across Fault Domains will be your only option.
Single VM Deployment: For deployments involving a single VM, the SLA stands at 99.9%.
This framework means that OCI guarantees a certain level of external connectivity based on how you deploy your VMs:
It’s important to note that the SLA covers the availability of the VM itself, not the applications or services running on it. To ensure application availability, additional measures such as application monitoring, recovery planning, data replication, and transactional replication (for databases like SQL Server) are necessary. Strategies might include load balancing, clustering, or data replication to manage application availability effectively.
To meet the criteria for the 99.99% availability SLA in OCI, it’s essential to deploy your VMs across multiple Availability Domains. This post will guide you on designing your OCI infrastructure to facilitate SQL Server Failover Cluster Instances that span Availability Domains, ensuring maximum uptime and reliability for your critical business applications.
Create the VCN and Subnets
In this guide, I assume you have some familiarity with Oracle Cloud Infrastructure (OCI) and a basic understanding of networking concepts. I will illustrate common configuration tasks with descriptions, and where necessary, provide additional guidance to navigate some of the common challenges encountered in OCI networking.
Starting with a well-thought-out network plan is crucial. This document won’t cover the intricacies of cloud network planning, so the following example should be considered just one of many possibilities. Your network configurations may vary significantly. However, an important consideration is to plan for the use of at least three Availability Domains, allocating one for each cluster node and another for the file share witness. The important thing required for clustering is that each Availability Domain MUST be in a different subnet.
Although we are not covering configurations that span Fault Domains instead of Availability Domains, the same applies to clusters that span Fault Domains – all nodes must reside in different subnets.
In our scenario, we will set up three subnets across three different Availability Domains within a single Virtual Cloud Network (VCN) in OCI.
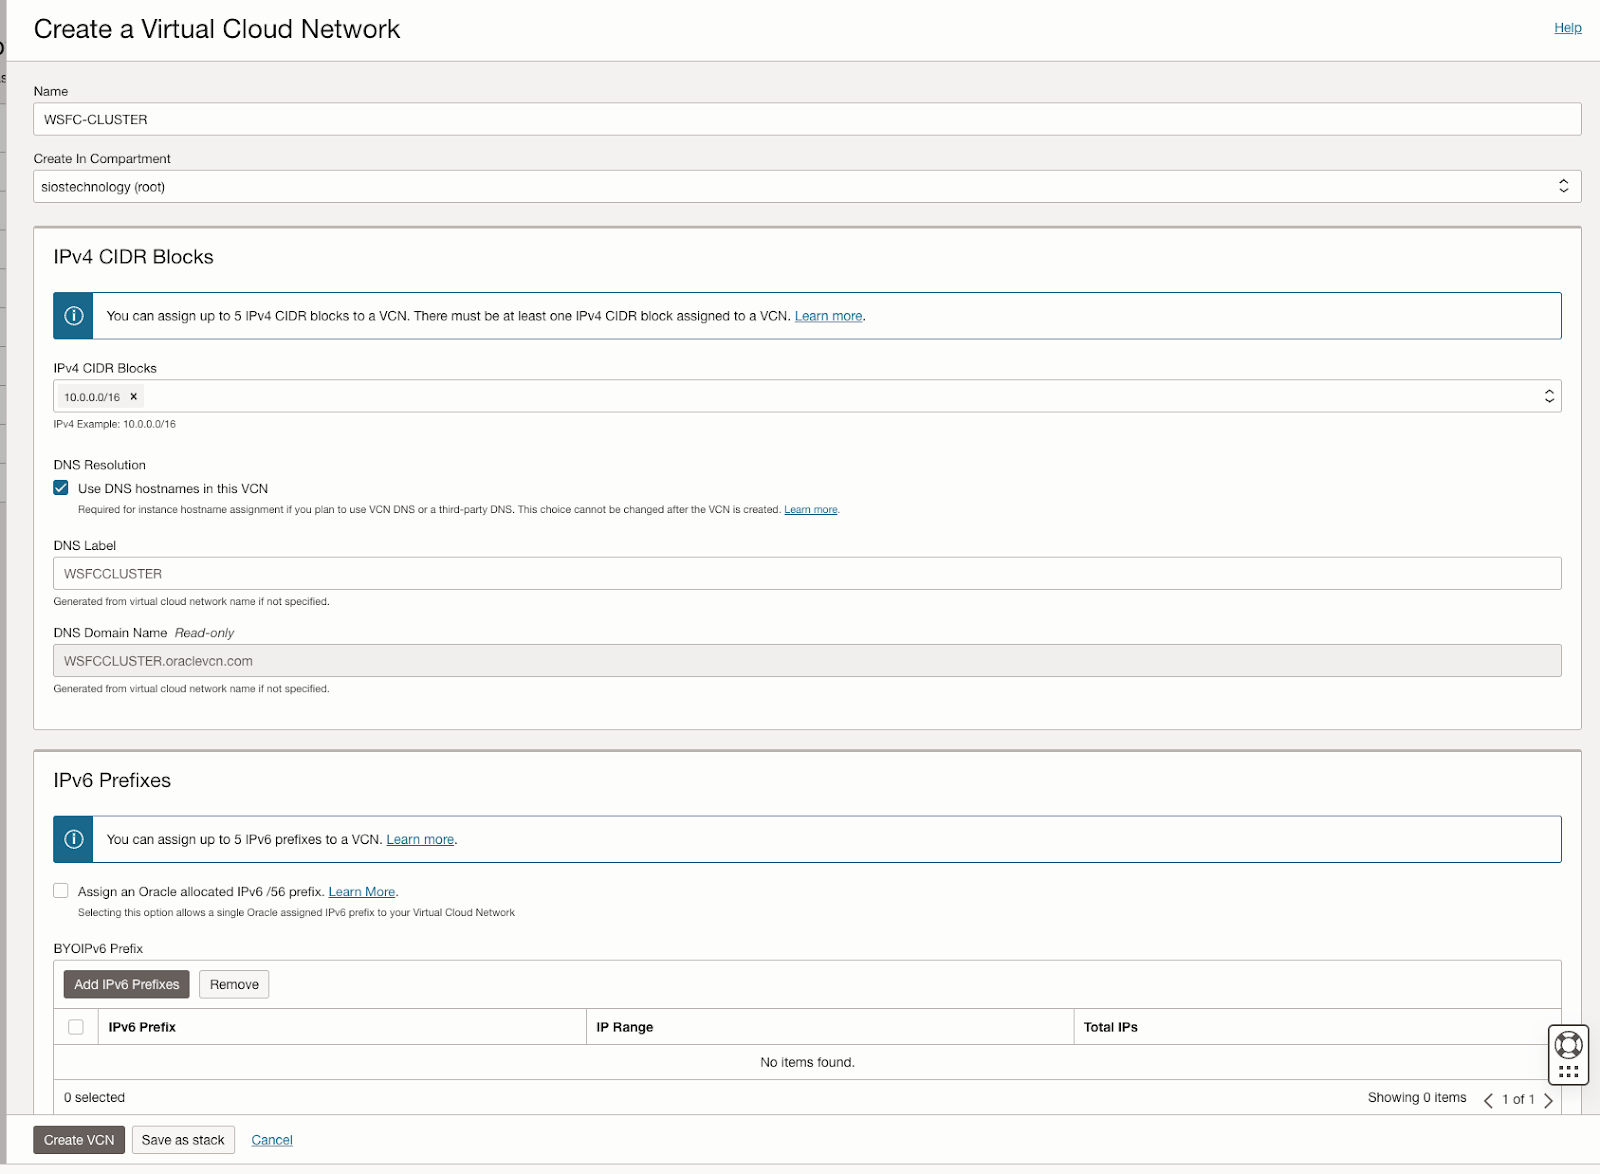
VCN: 10.0.0.0/16
- AD1: 10.0.0.0/18
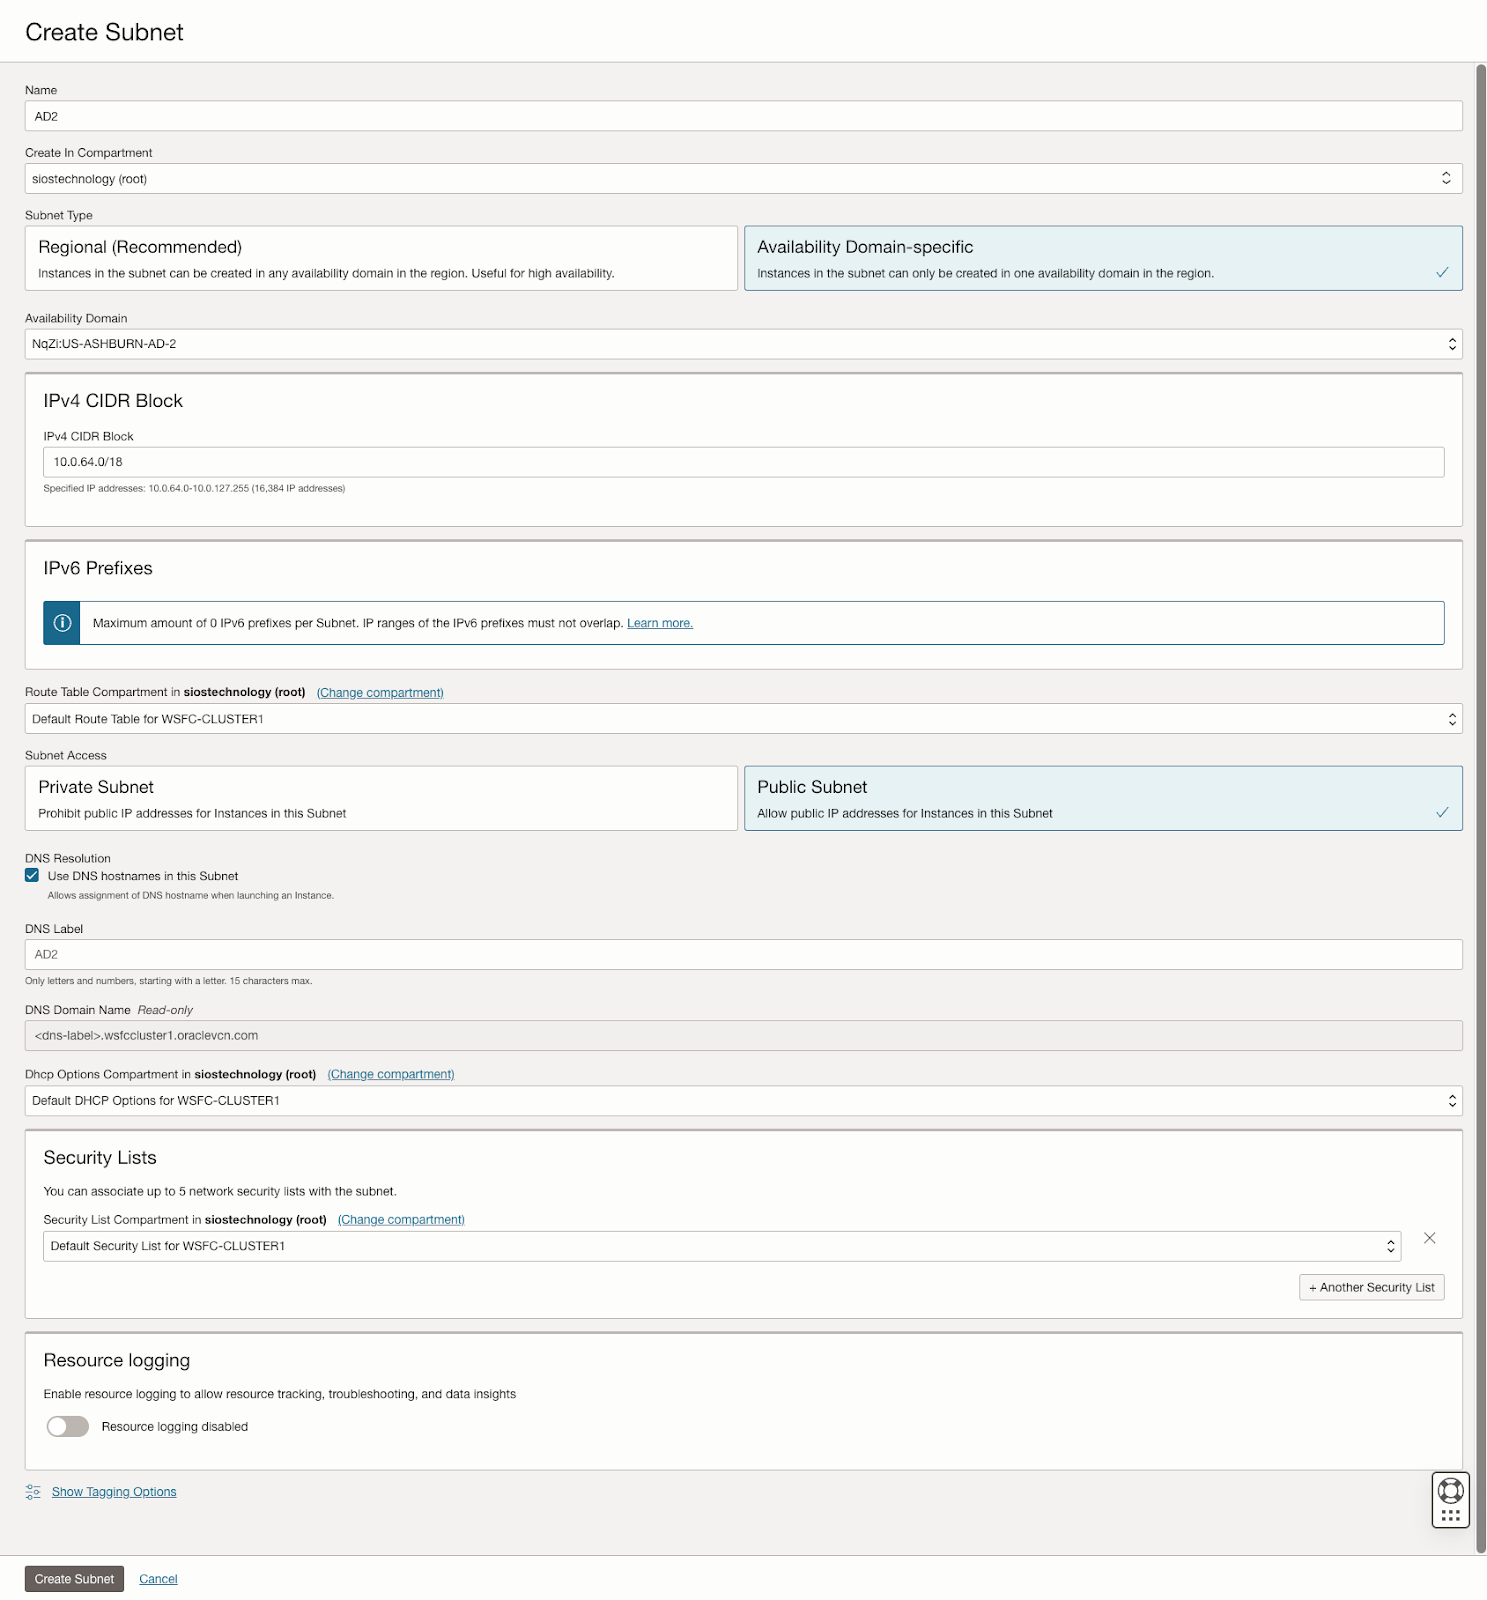
- AD2: 10.0.64.0/18
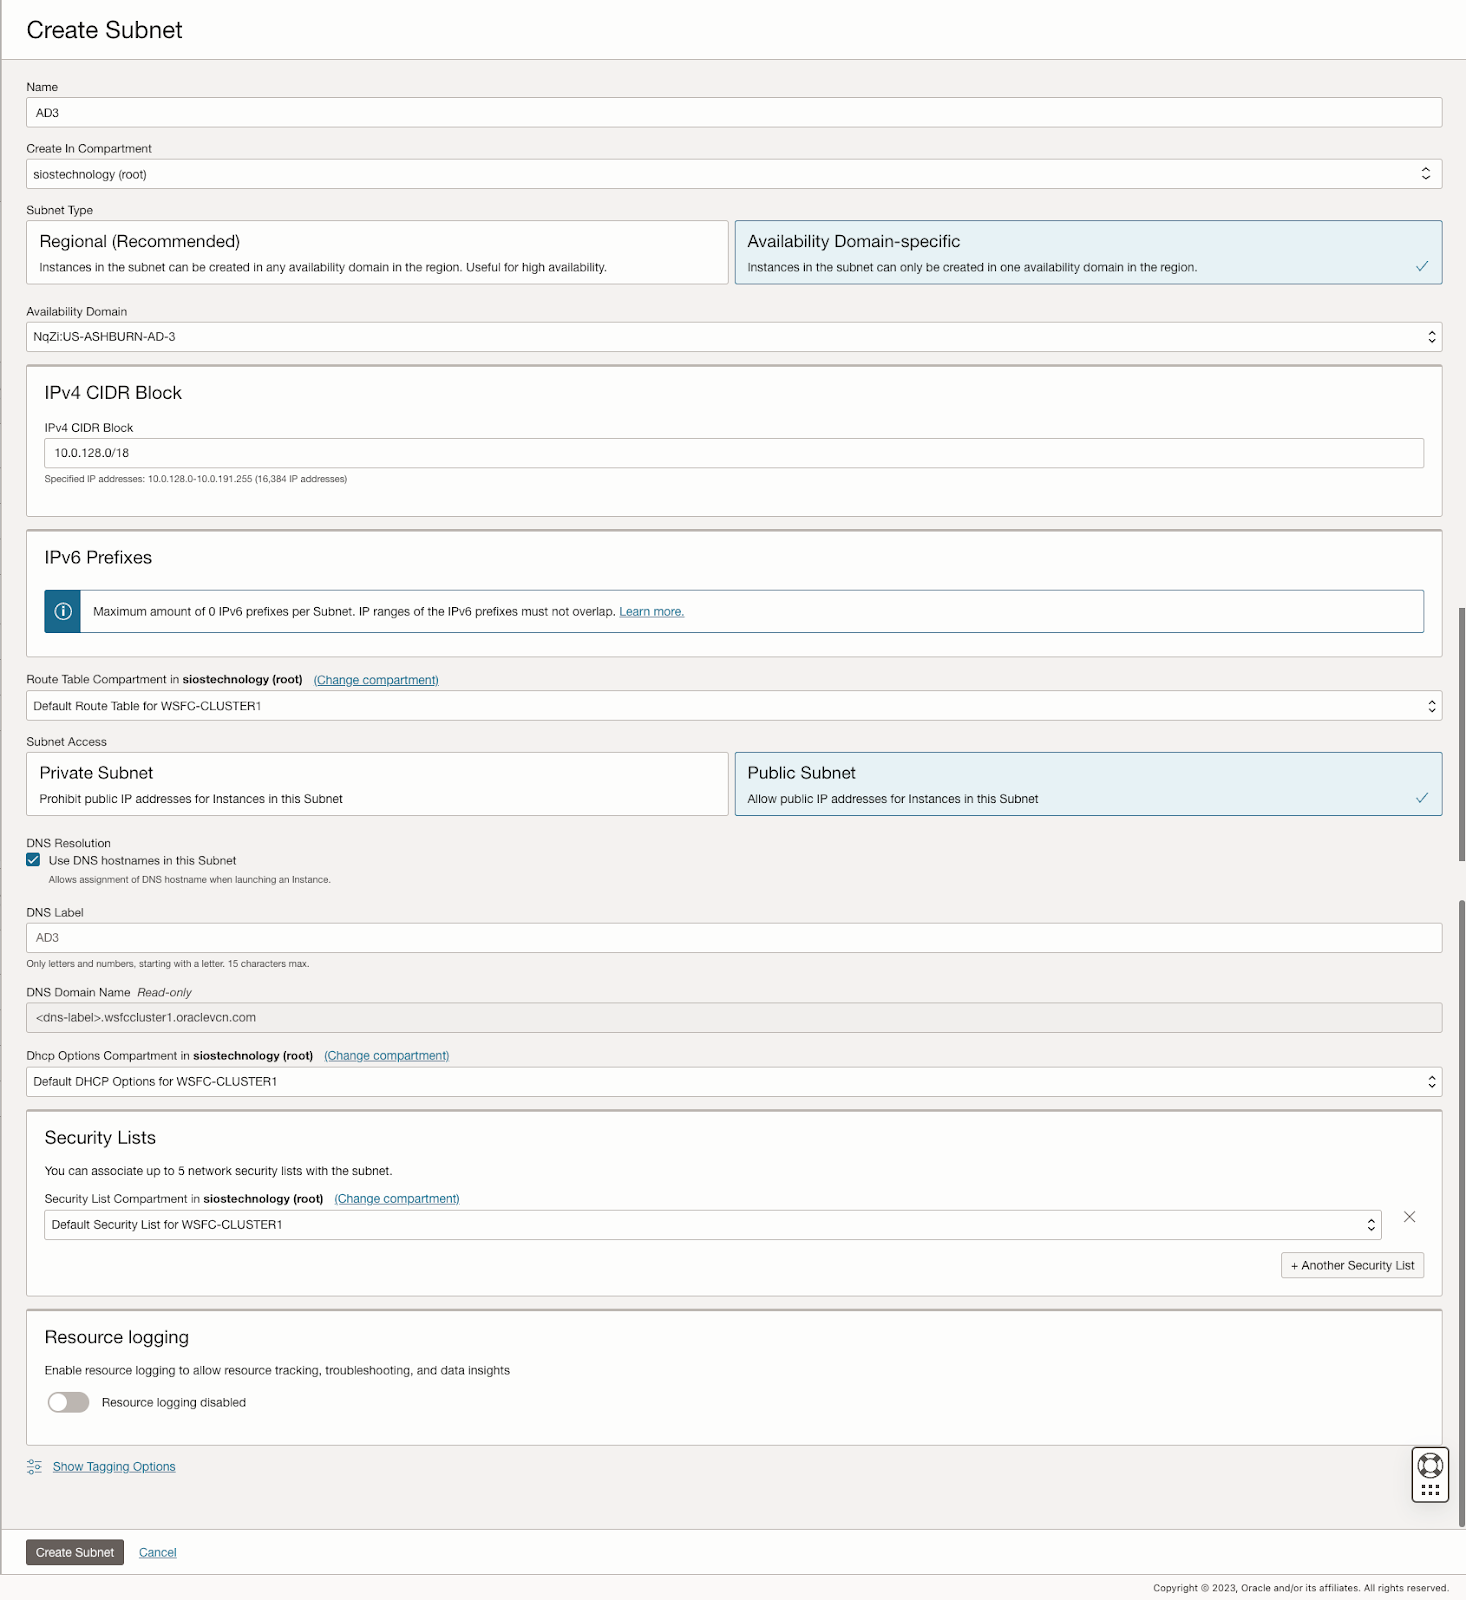
- AD3: 10.0.128.0/18
OCI’s user interface can change, but at the time of writing, the process for creating a new VCN and three subnets is straightforward in the OCI console. The specifics can be found in OCI’s documentation or through its user interface, which guides you through the necessary steps for VCN and subnet creation.
Create the VCN
Create three subnets in the VCN

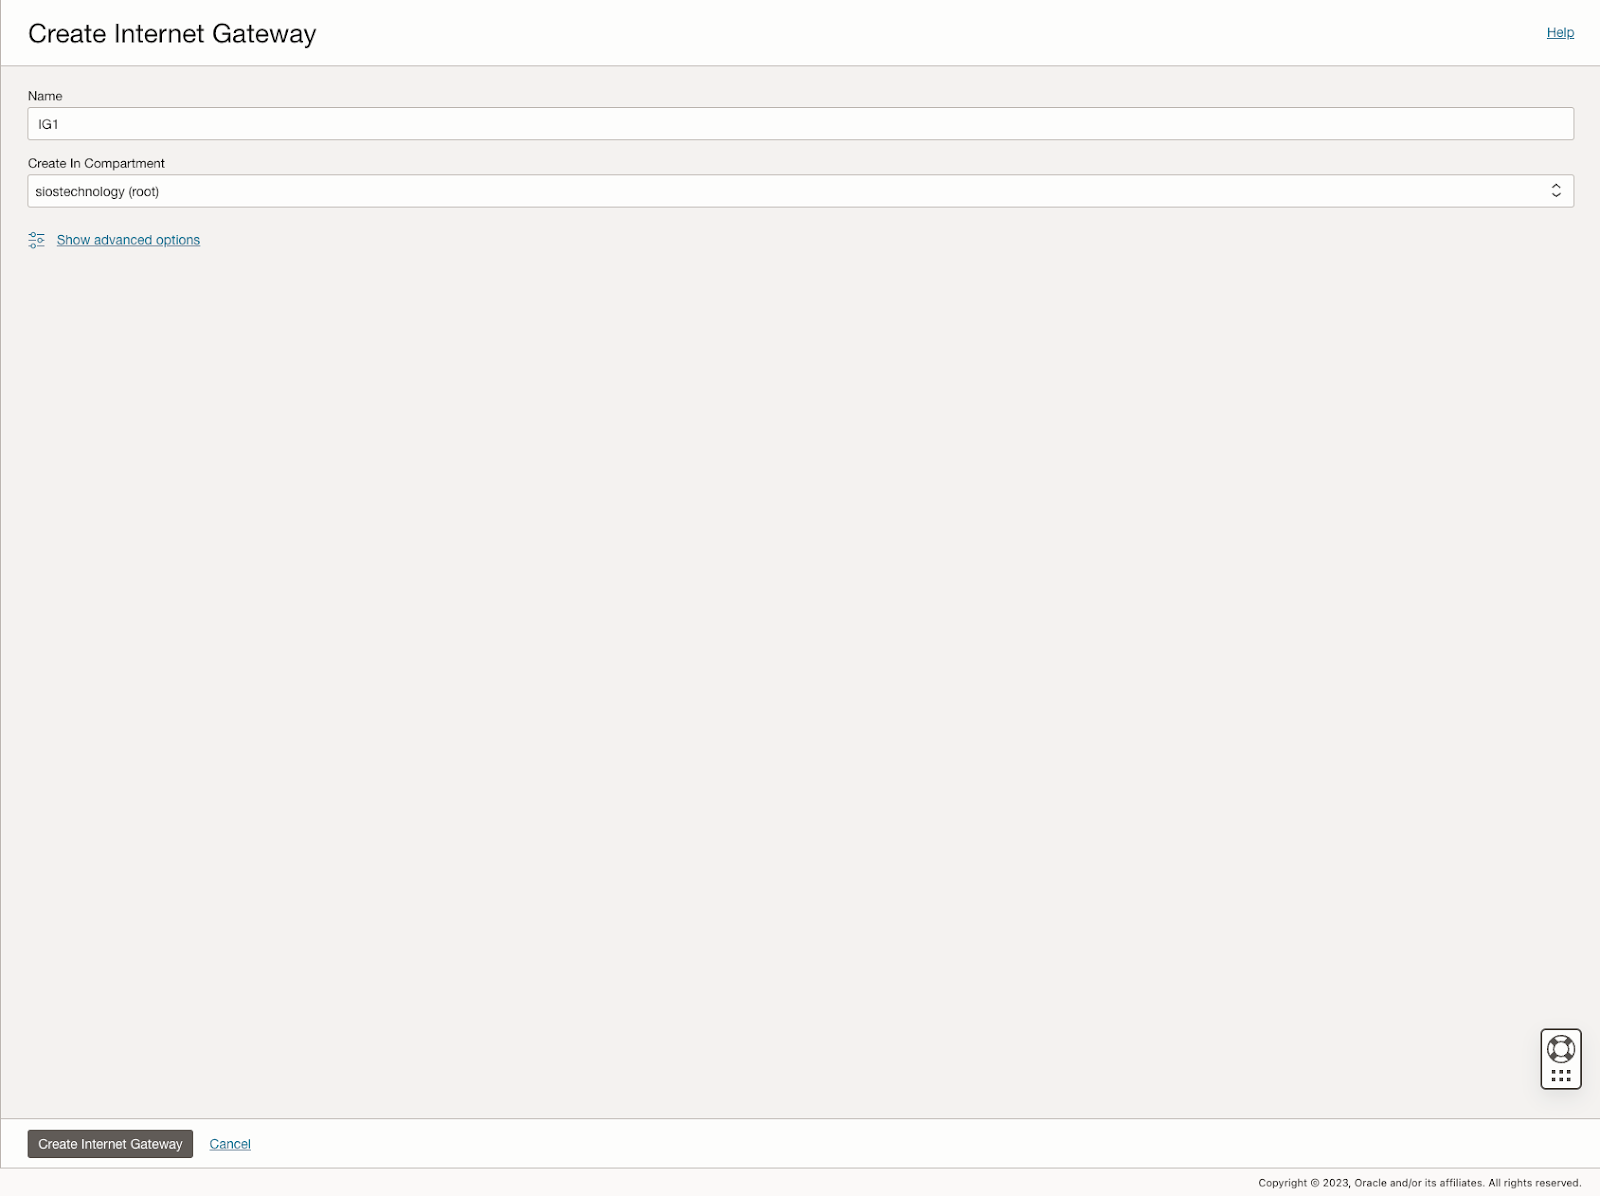
Create the Internet gateway
The internet gateway is how our instances will gain access to the internet. In your network you may not want your instances to be able to access the internet, but for this example we will enable it and add it to our default route table.
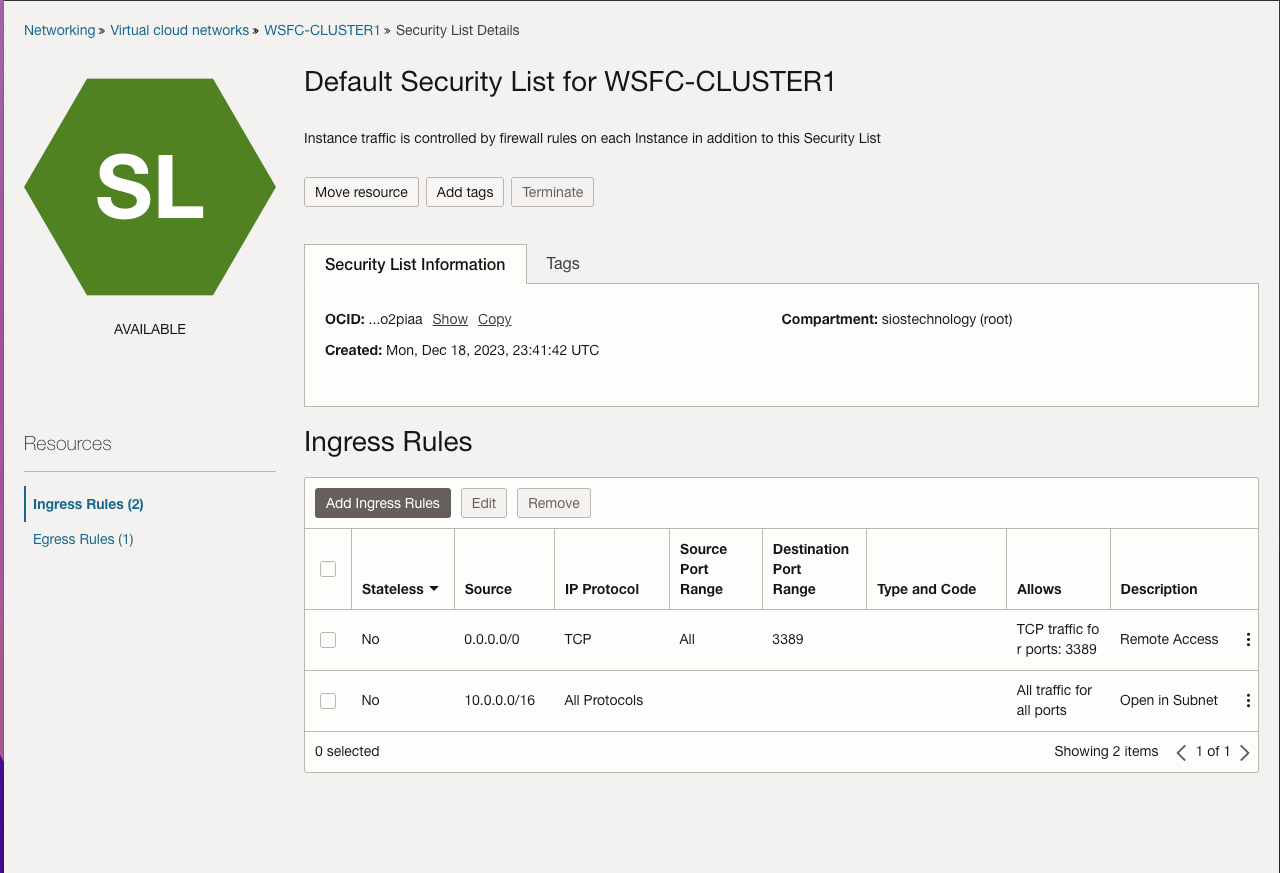
Edit the Default Security List
Edit the route table
Edit the route table so that all traffic destined for outside the VCN is routed through the internet gateway.

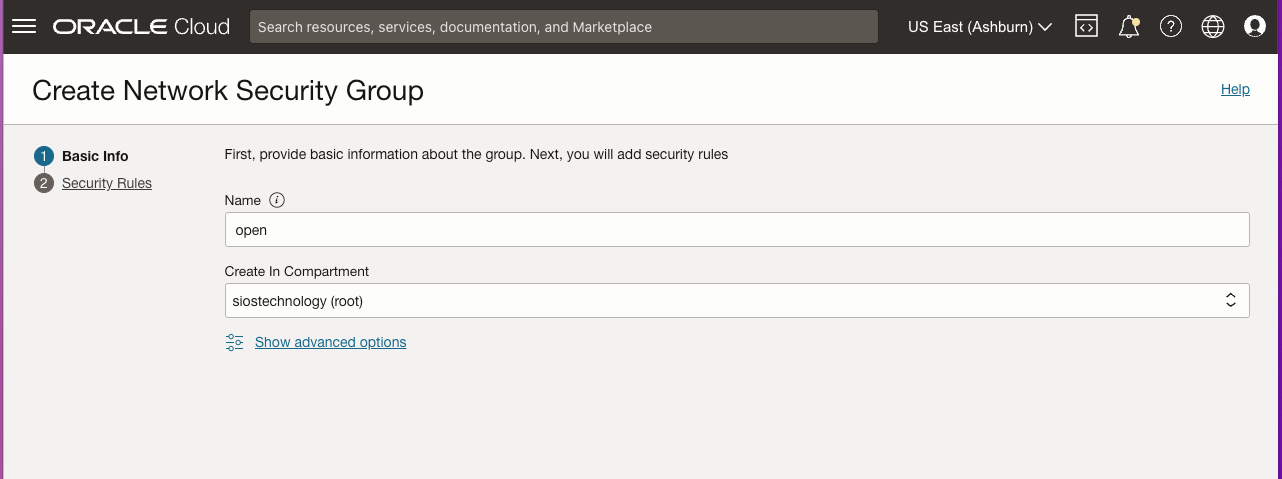
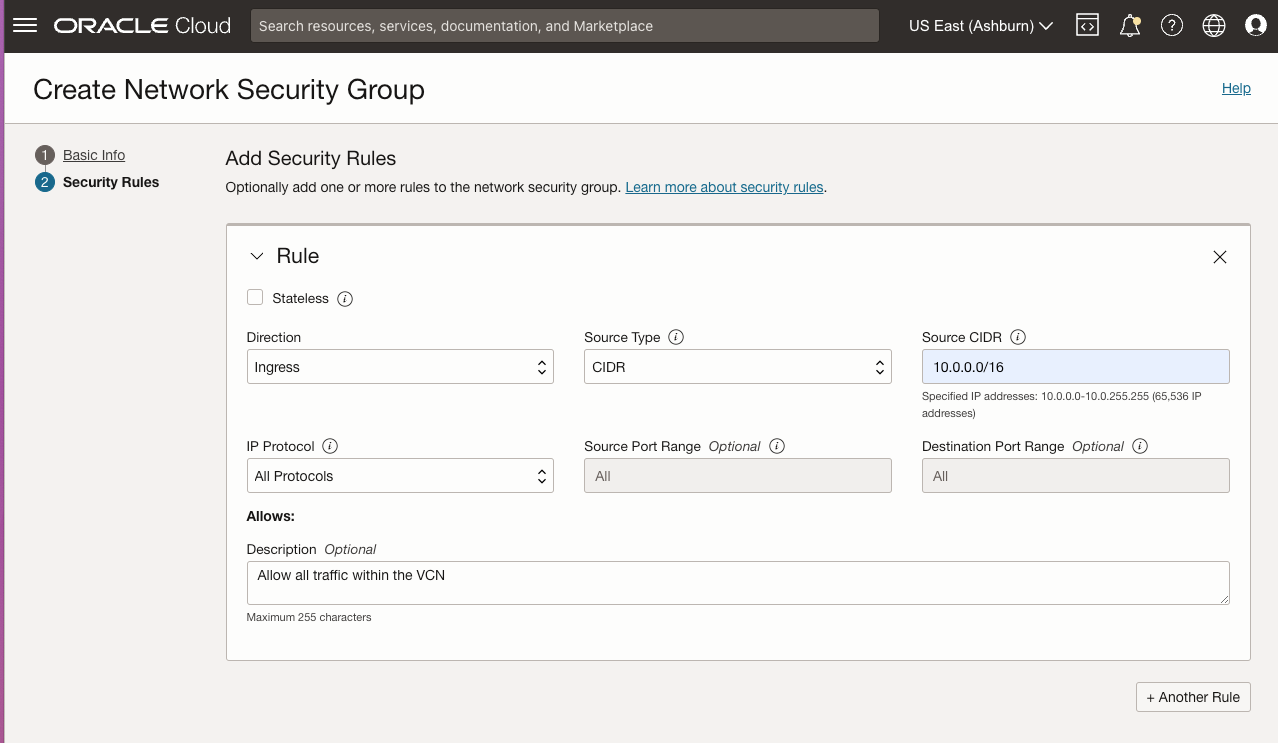
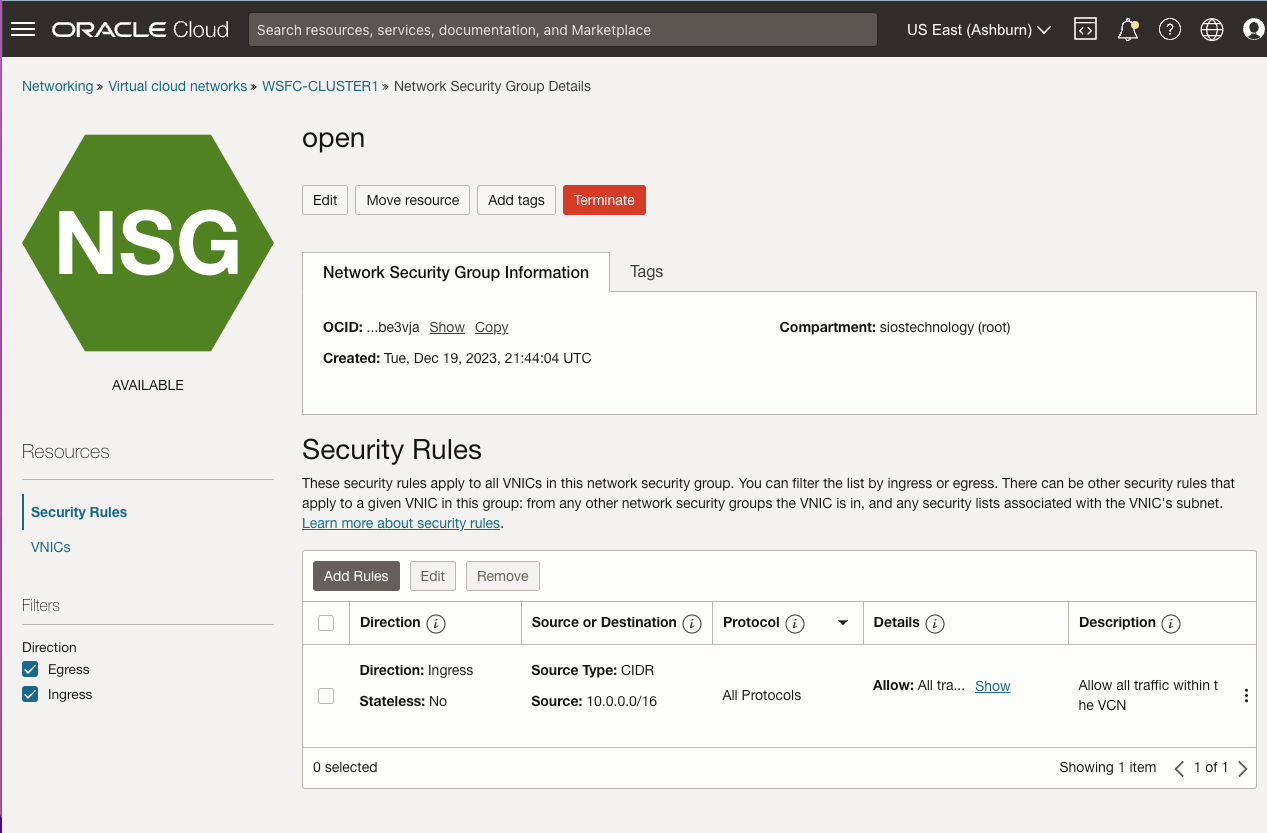
Create Network Security Group
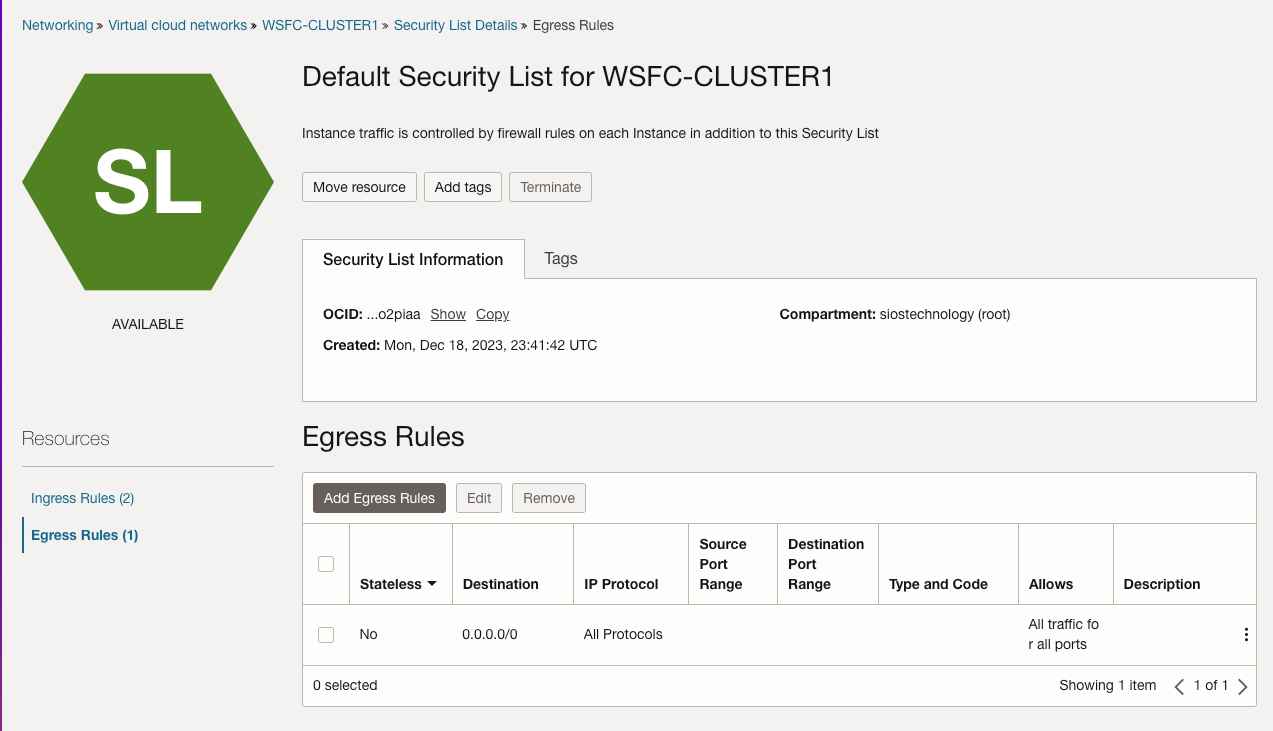
Edit the security list
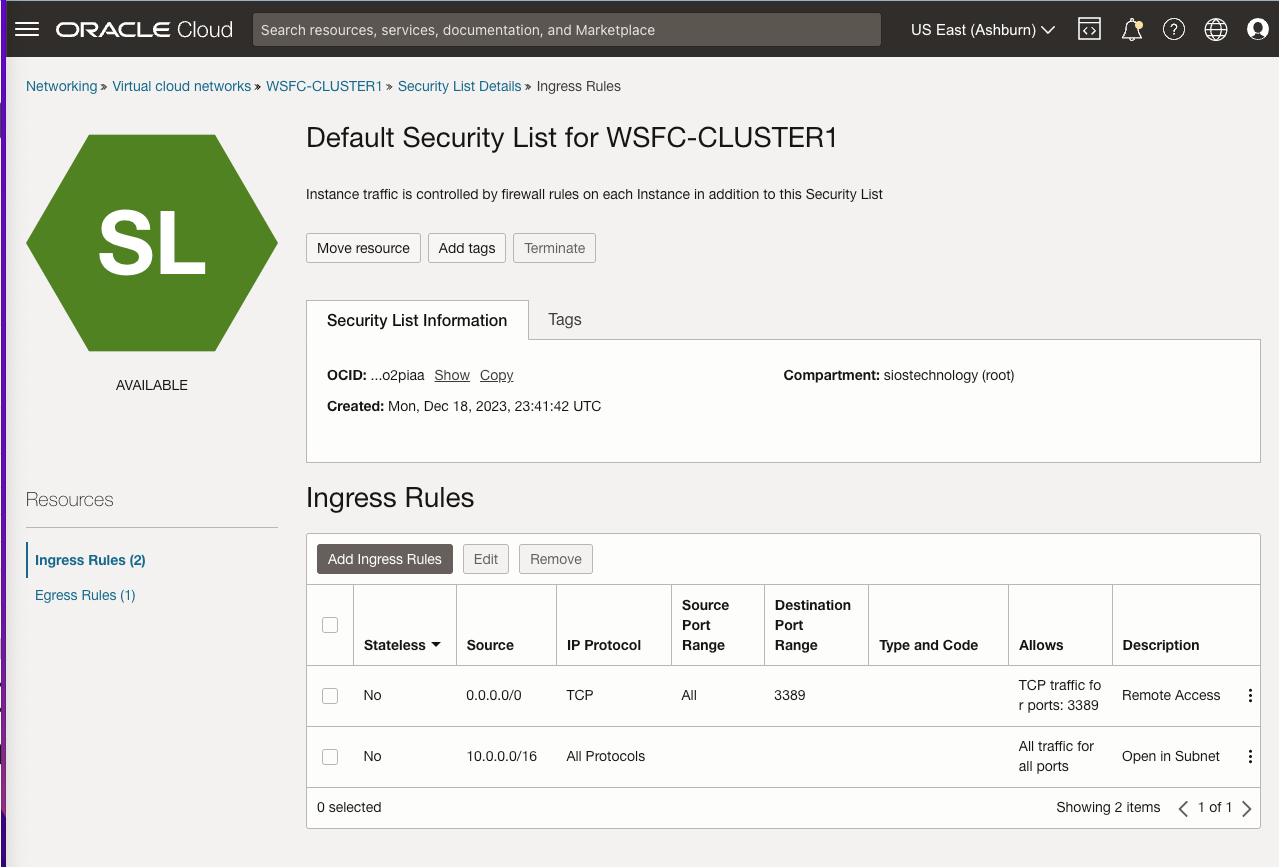
These settings allow unfettered access across availability domains, and allows RDP access from anywhere. You may consider limiting which IP addresses can RDP to your instances or even setting up a “jump VM” used exclusively for RDP access from the public network.
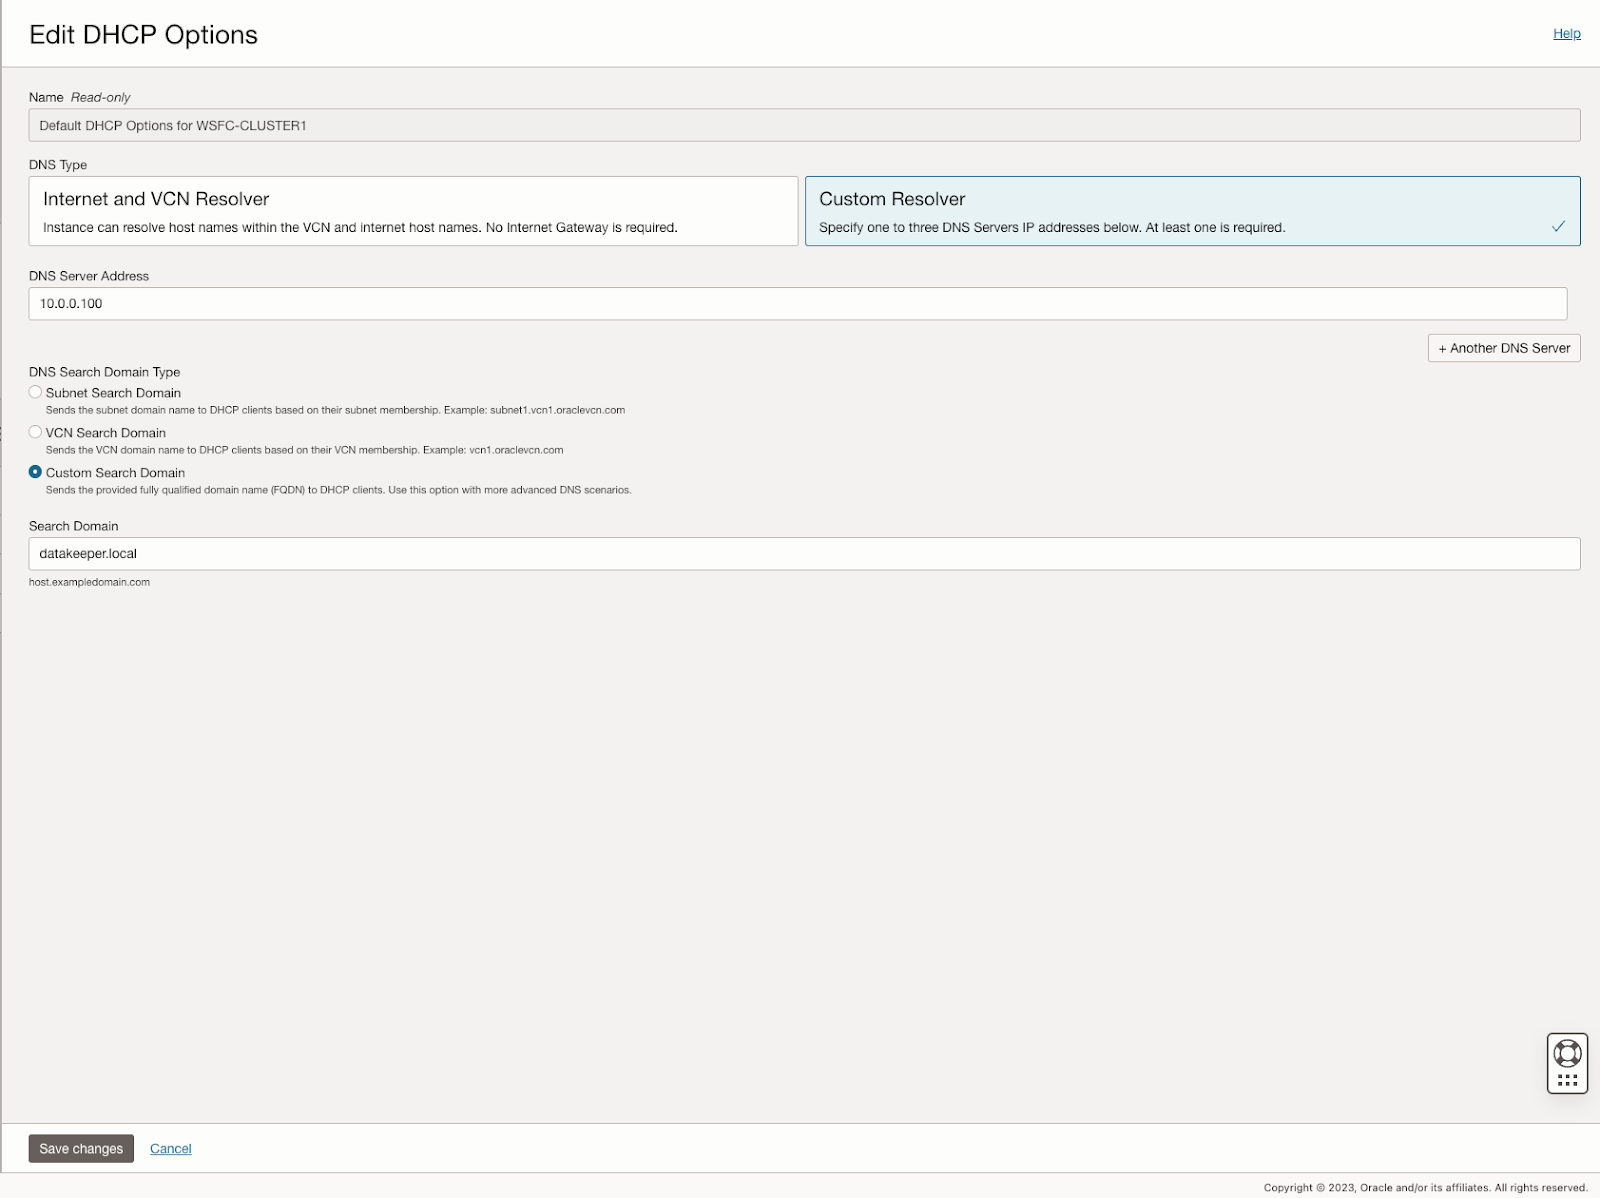
Edit DHCP options
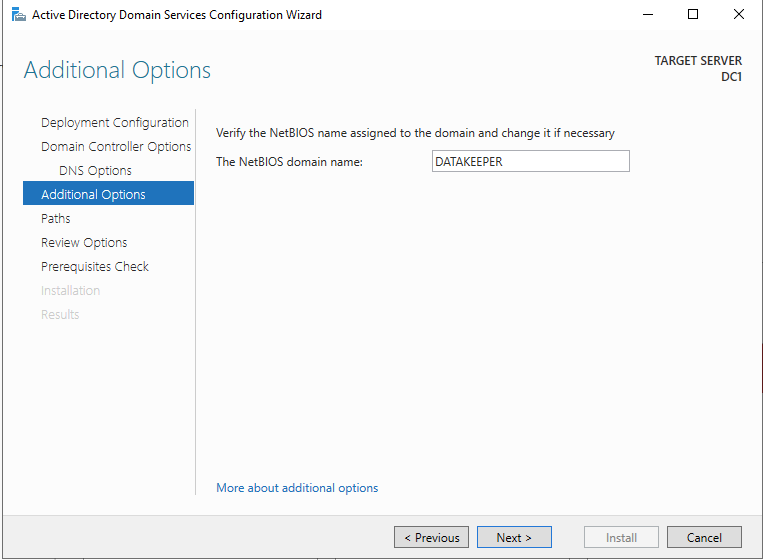
For active directory to work correctly, you must set the DC1 as the primary DNS server in the DHCP options as shown below. In this case, we set it to 10.0.0.100, which is the static IP of the domain controller we are configuring. You should also add your domain to the custom search domain. In this case, we will use the domain called datakeeper.local, which we will build later when we configure our domain controller.
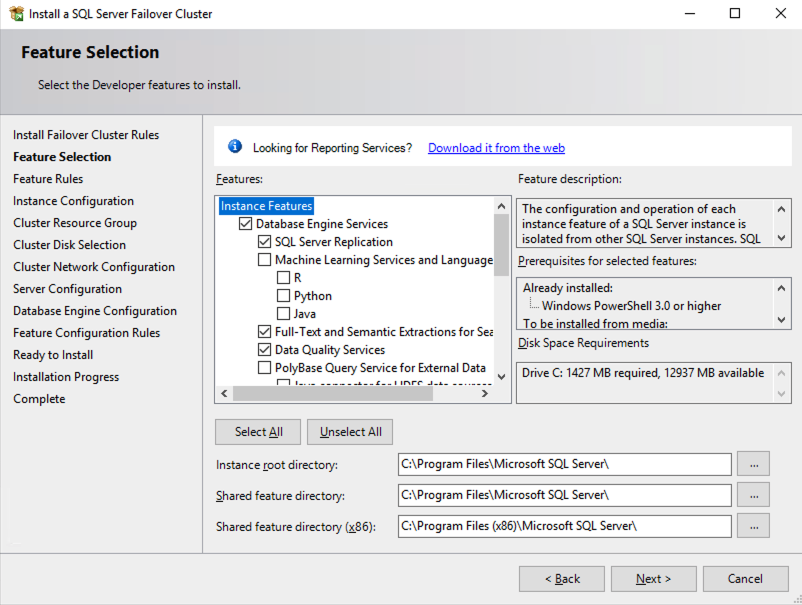
Provision the VMs
Now that the VCN is configured, it is time to start provisioning the VMs. In this example we are going to use Windows Server 2022 and SQL Server 2019. However, the steps described in this article are almost identical across all versions of Windows Server and SQL Server, so you shouldn’t have any issues regardless of which version of Windows or SQL Server you plan to use.
Before you begin, it is once again important to start with a plan. In this case you will want to plan your server names, IP addresses and their availability zone placement. As mentioned earlier, each cluster node and the file share witness must each reside in a different availability zone.
In the example configuration, we will deploy active-directory in an instance (DC1) that will also act as a file share witness.
AD1 – DC1 (10.0.0.100)
AD2 – SQL1 – (10.0.64.100, 10.0.64.101, 10.0.64.102)
AD3 – SQL2 – (10.0.128.100, 10.0.128.101, 10.0.128.102)
You may have noticed that each of the cluster nodes (SQL1, SQL2) have three IP addresses. The first address is the private IP address of the instance. The other two IP addresses will be added as secondary addresses on each instance. These IP addresses account for the core cluster IP address and the virtual IP address associated with the SQL Server FCI network name resource.
When we provision the cluster nodes we will use the base Windows Server 2022 images with no SQL Server software included. Instead we will download the SQL Server installation media and use a perpetual SQL Server license instead of the “pay-as-you-go” licensing available on the Marketplace.
The following sections illustrate the process of provisioning the three VMs used in this example.
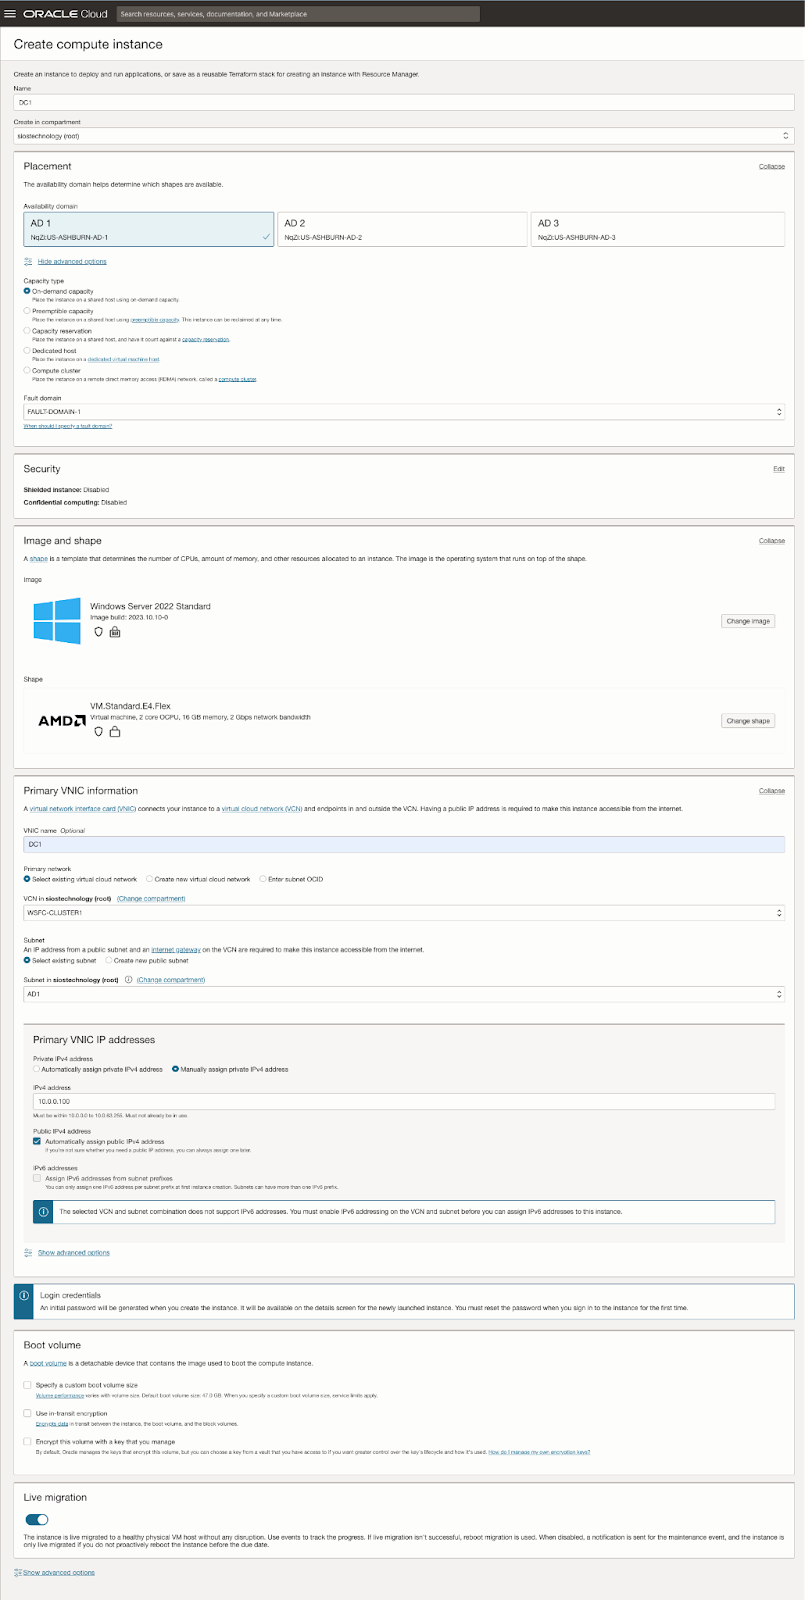
Provision DC1 in FD1
When choosing an instance type you must size it properly for the workload. This is similar to what you would do if you were sizing a physical server to use on-premise, but the difference is that you can adjust the size easily if you over-provision, or under-provision the first time, or if your workload increases or decreases over time.
When specifying the instance details, make sure you choose the right VCN and the subnet for proper placement. On this first screen you also specify the static IP you want to associate with this instance.
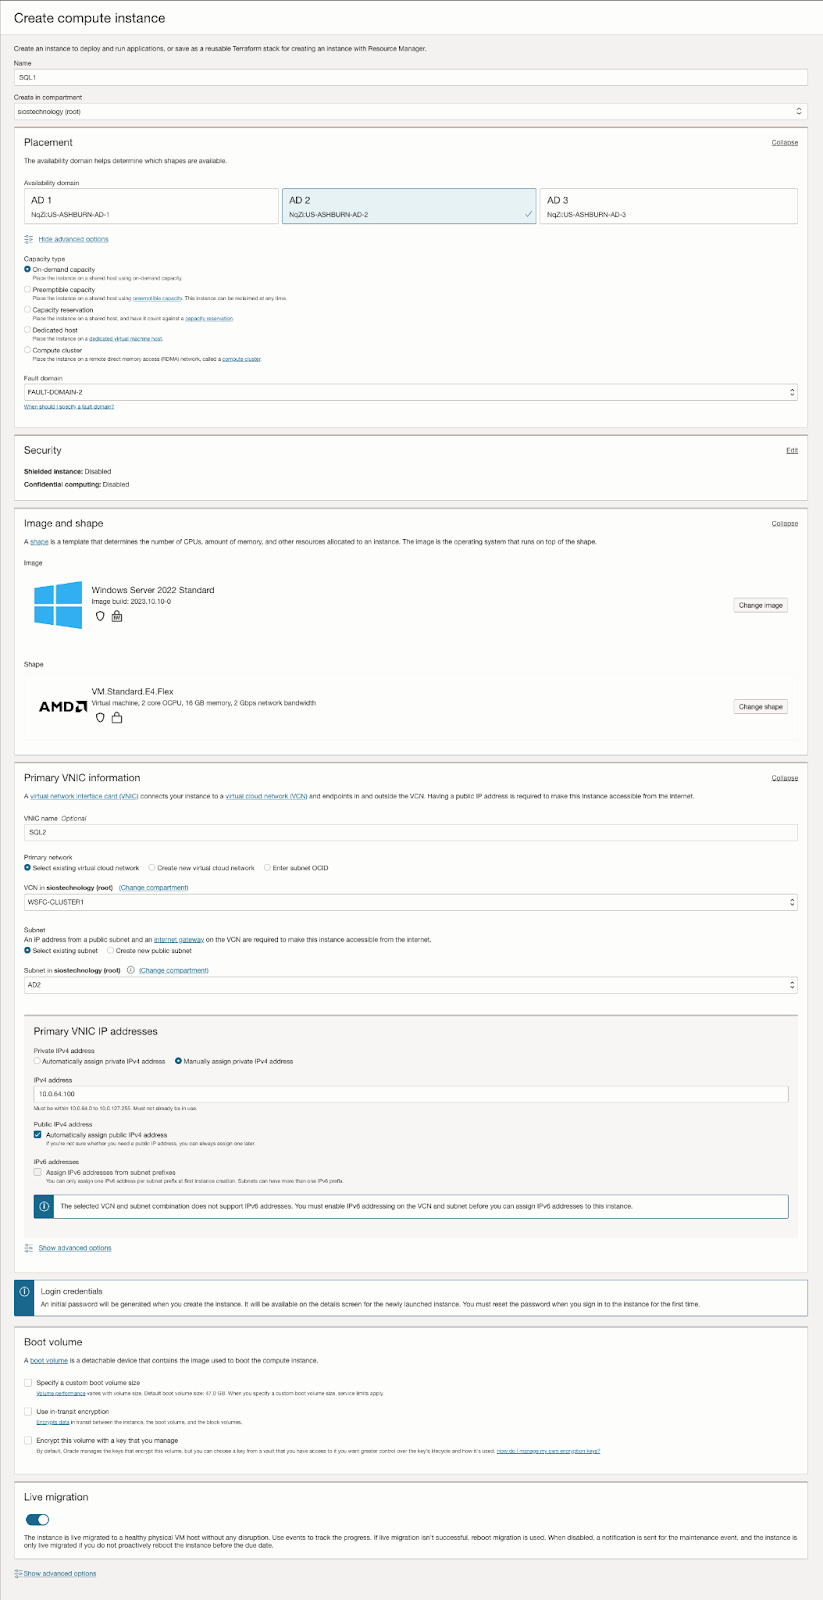
Provision SQL1 in FD2
As discussed earlier, this example uses the base install of Windows Server 2022. SQL Server 2019 will be downloaded later and used for the SQL Server FCI installation.
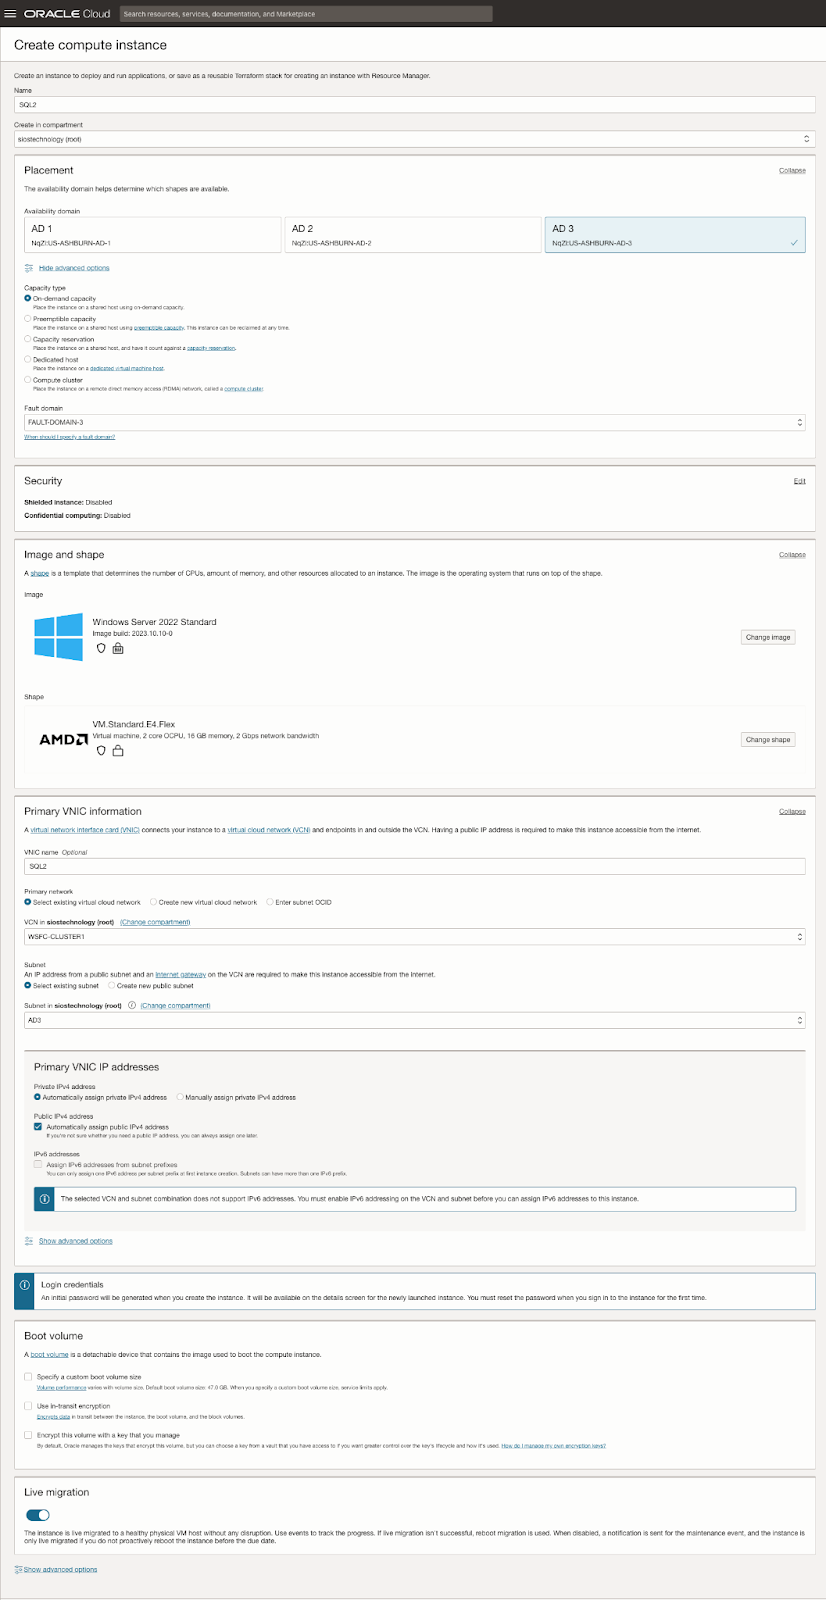
Provision SQL2 in FD3
Adding Additional Volumes
Each server in the cluster requires at least one additional volume. These volumes are crucial for the storage needs of the SQL Server FCI and are replicated by SIOS DataKeeper.
Multiple Volumes
You can add multiple volumes to separate your data, logs, and backups.
Storage Types: Various storage types are available to suit different requirements.
Attachment Methods
There are multiple ways to attach storage to your servers.
Example Configuration
Below, we have included screen captures demonstrating one of the many possible storage configurations. This serves as a practical example to aid in understanding the setup process. This process should be completed on SQL1 and SQL2.
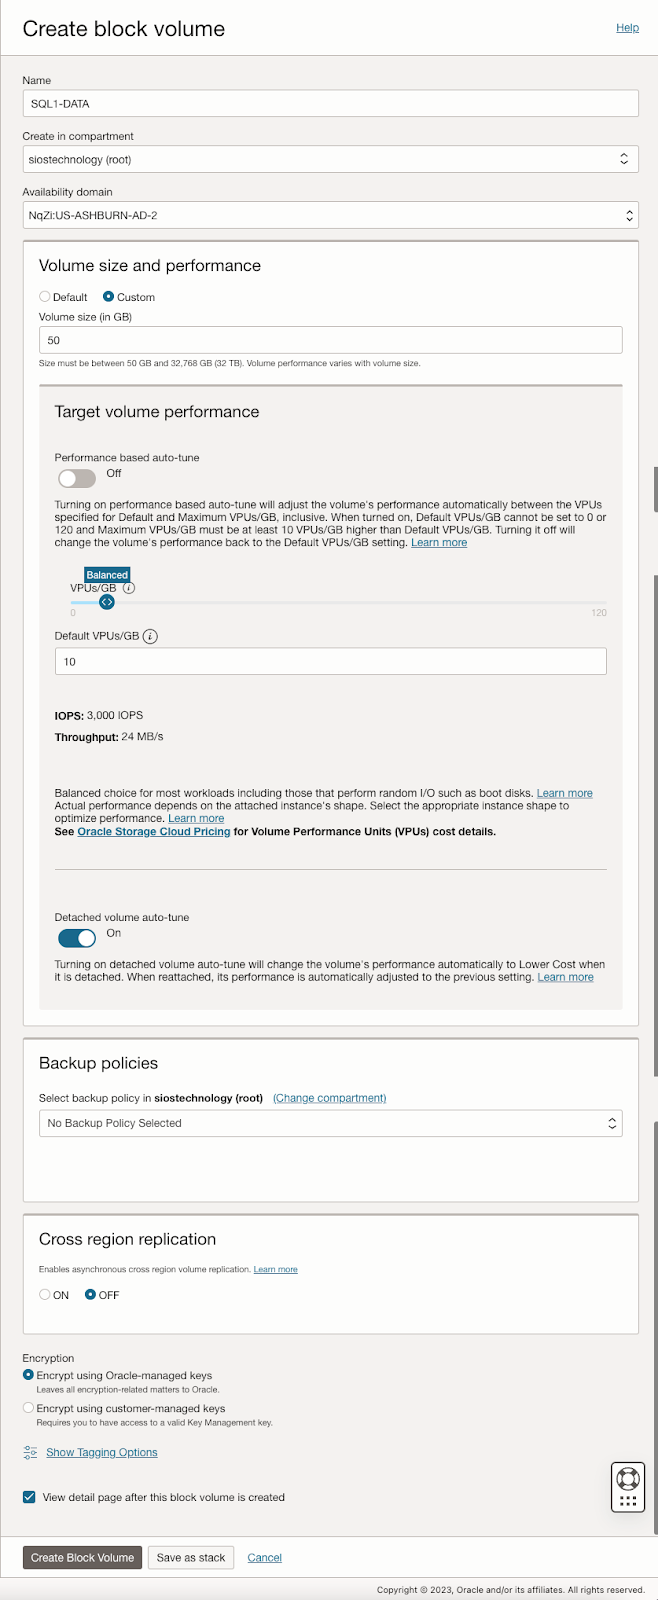
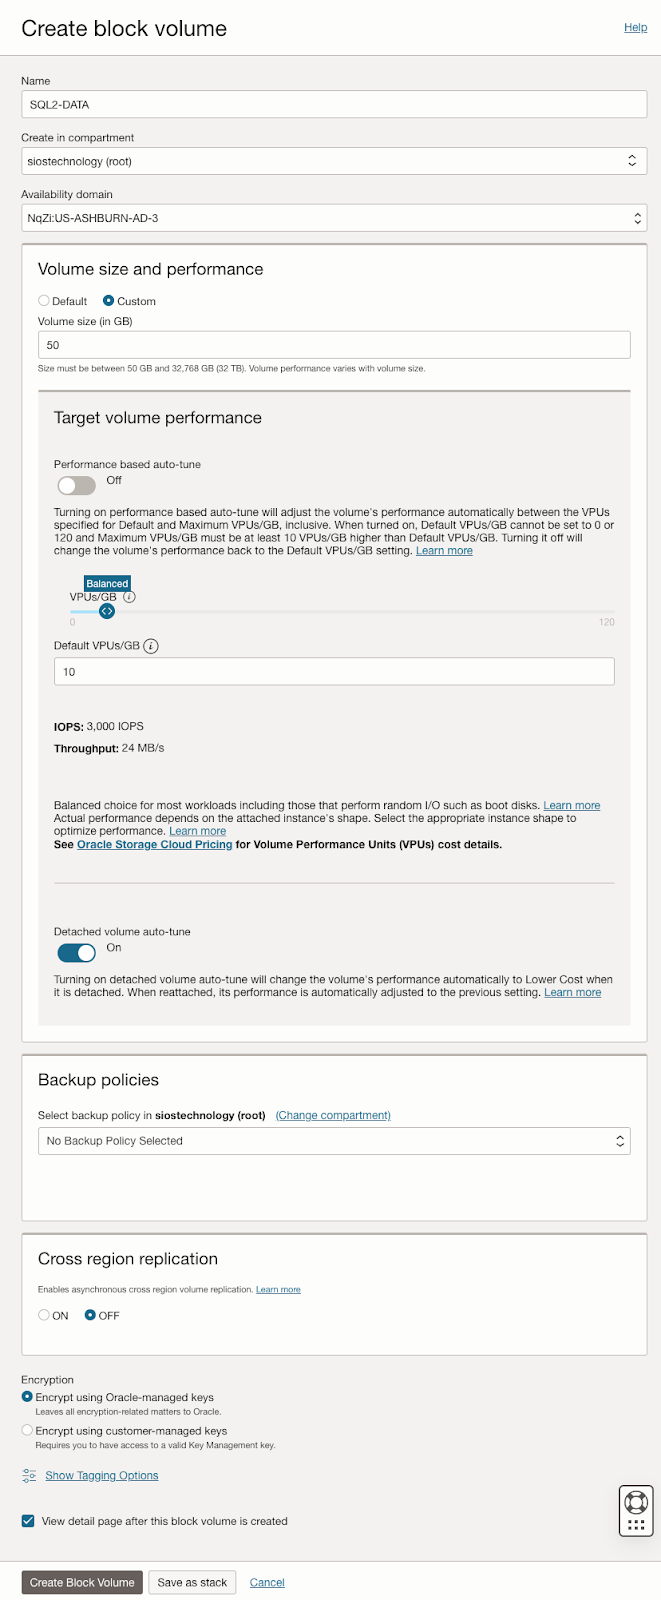
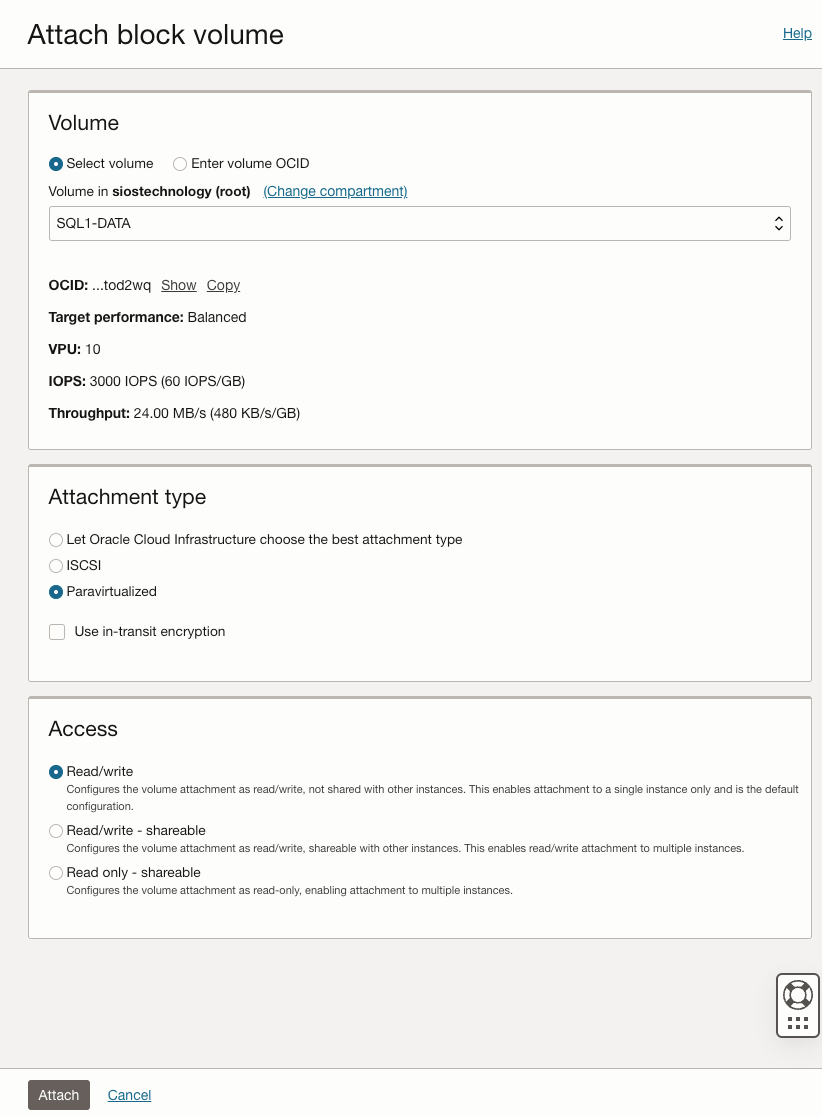
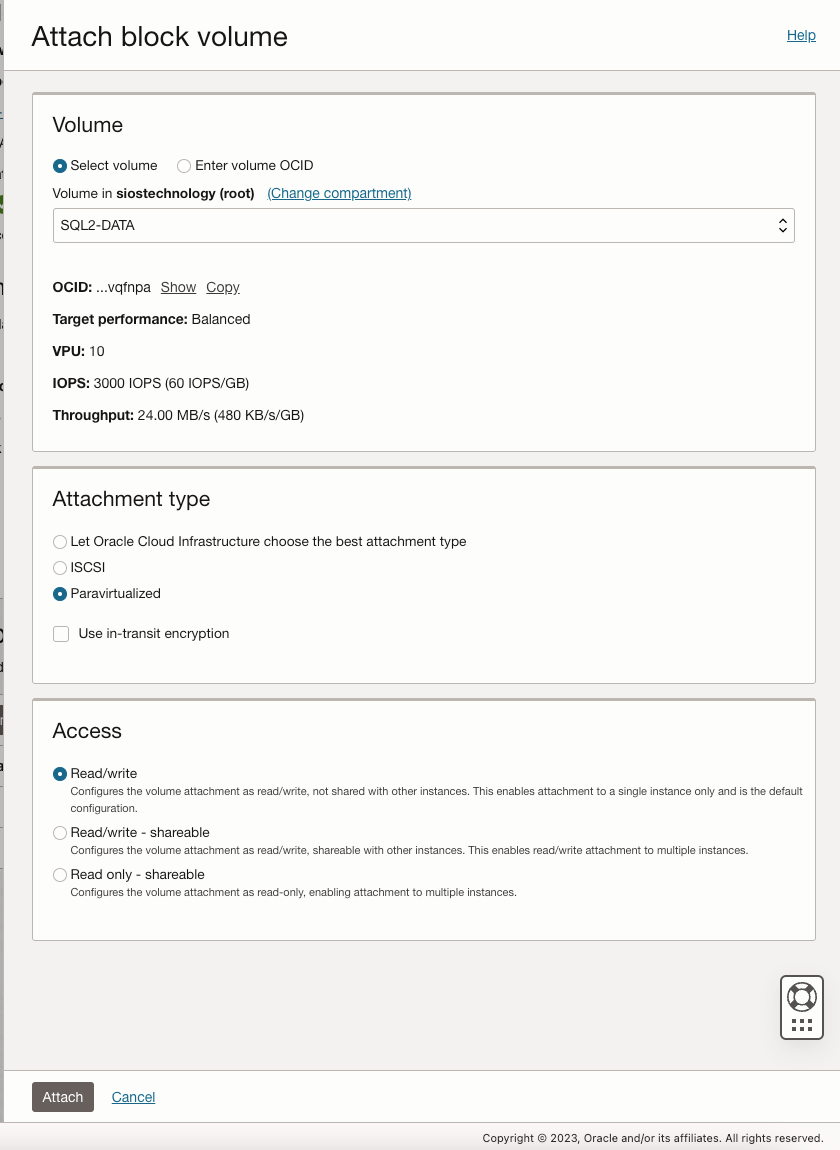
Create Block Volumes
First, create the block volumes in the right Availability domain for SQL1 and SQL2.
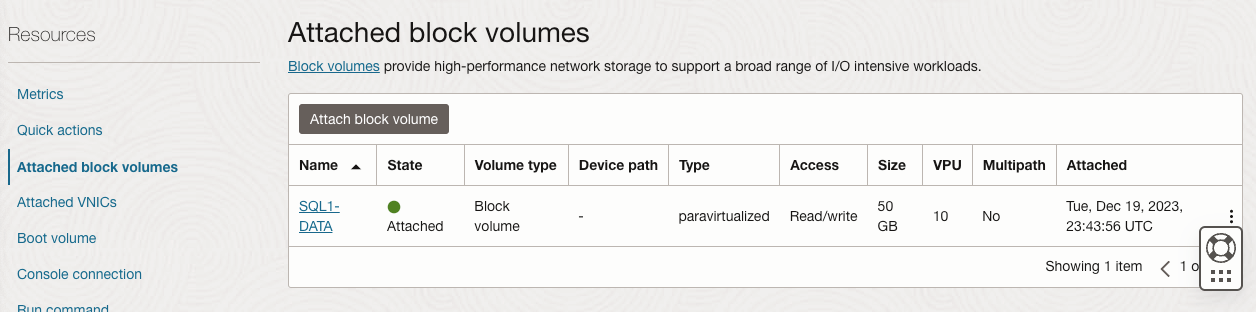
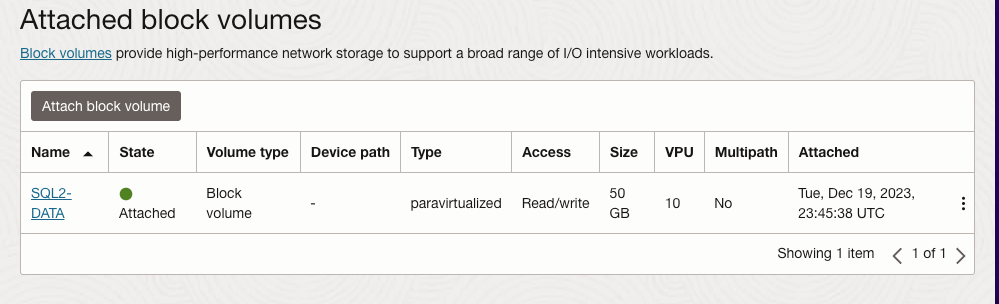
Attach Volumes
Now that the volumes have been created, you must attach them to the instances.
Key Points to Remember
The setup is flexible. You can configure one or more volumes based on your specific needs.
Consider different storage types and attachment methods available for your configuration.
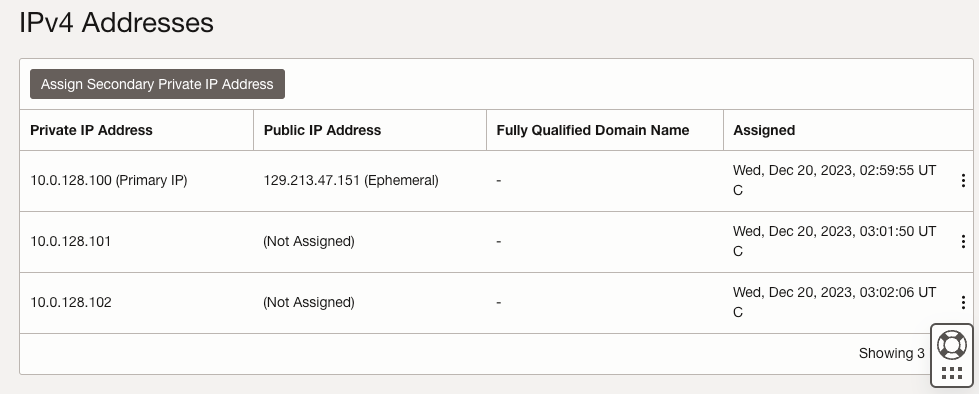
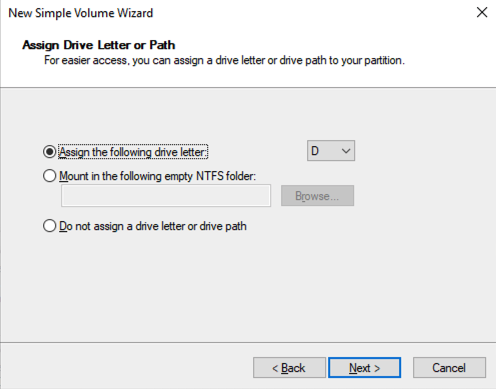
Add the Secondary IP Addresses
In order for Windows Server Failover Clustering to work properly in OCI, you have to add the cluster IP address as secondary address on the virtual network interface (VNIC) attached to SQL1 and SQL1. As you recall, we discussed using the following IP addresses on each of our cluster nodes.
| SQL1 | SQL2 | |
| Primary Address | 10.0.64.100 | 10.0.128.100 |
| Cluster IP 1 (core cluster resource) | 10.0.64.101 | 10.0.128.101 |
| Cluster IP 2 (SQL Server Cluster IP) | 10.0.64.102 | 10.0.128.102 |
On both SQL1 and SQL2, edit the attached VNIC to add the secondary addresses.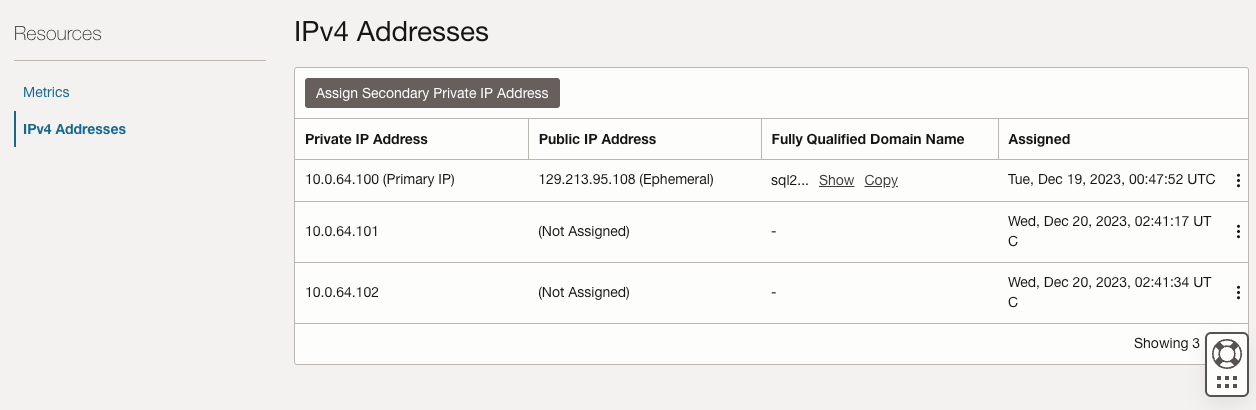
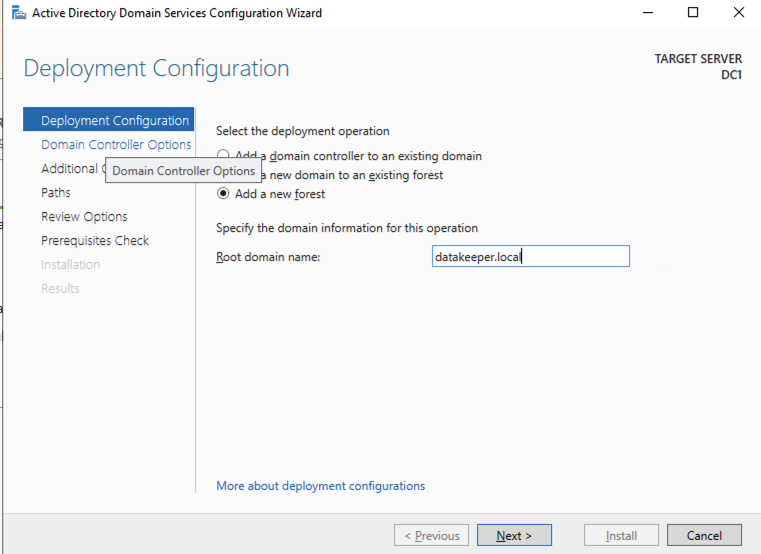
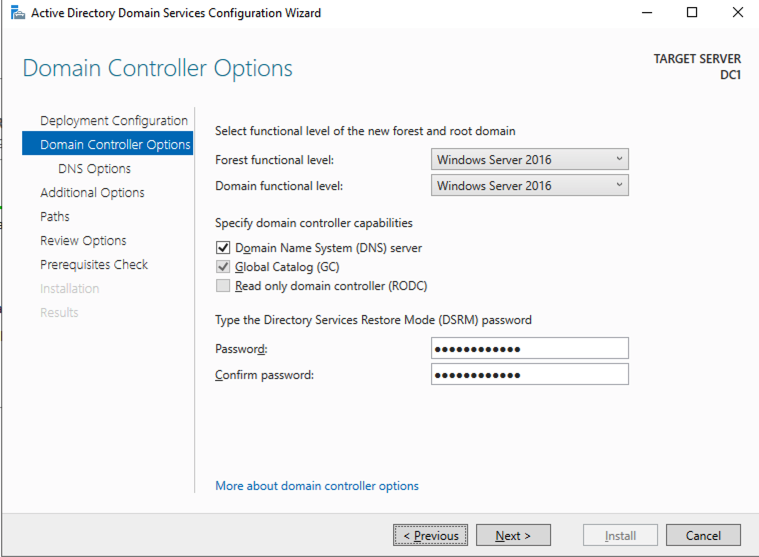
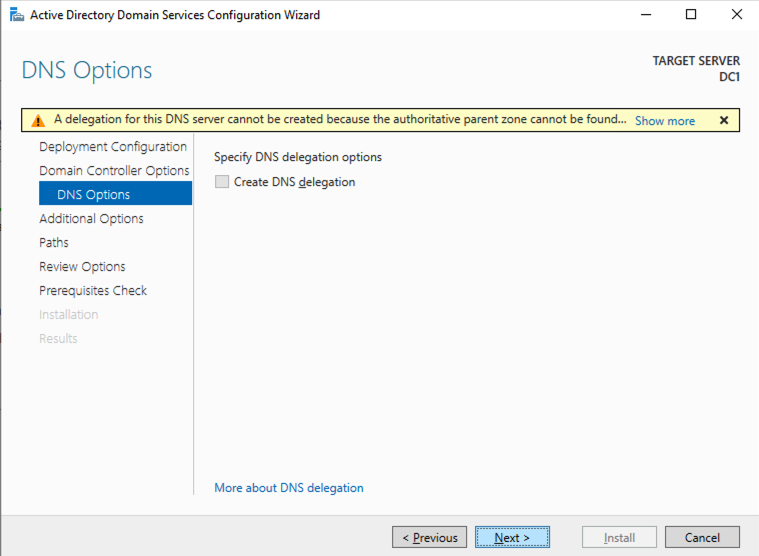
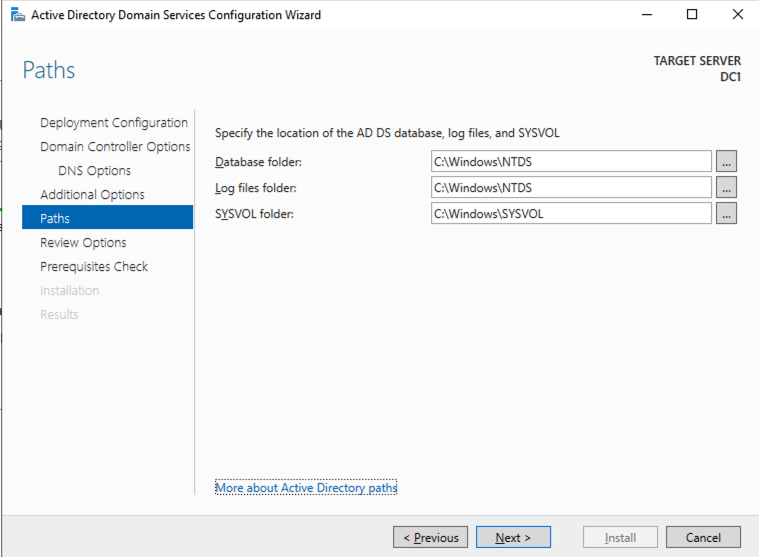
Create the Domain
For resilience, you should provision multiple AD controllers across different availability zones, but for the purposes of this guide, we are just going to provision one AD controller. Follow the screenshots below to configure AD on DC1.
Log on using the credentials listed in the Instance Details section. You will be prompted to reset your password.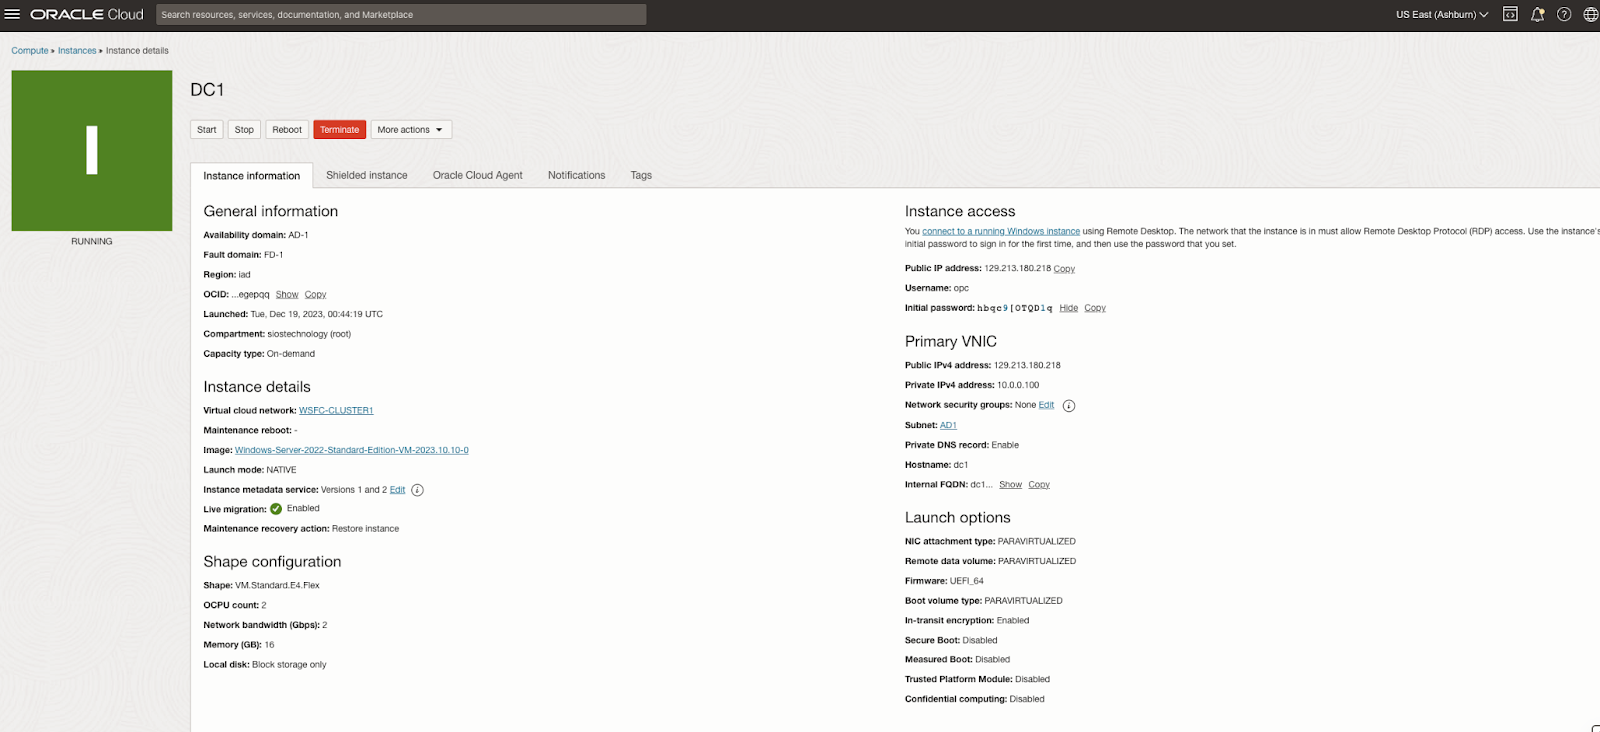
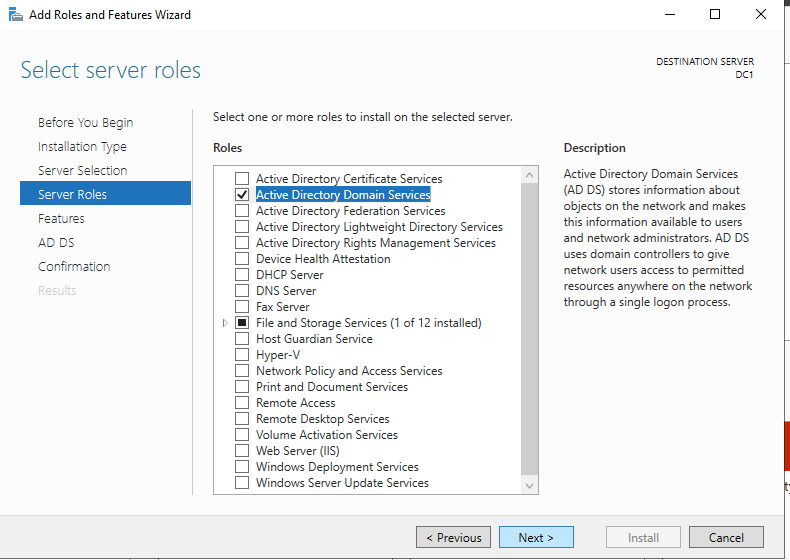
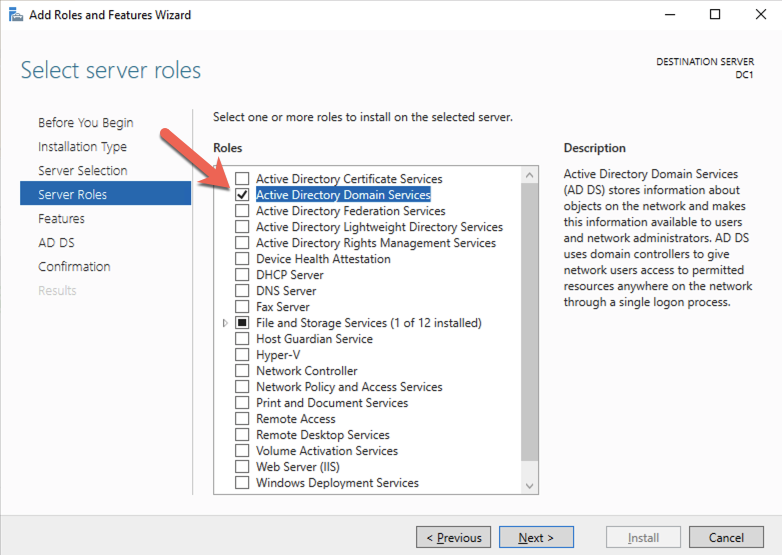
Enable Active Directory Domain Services
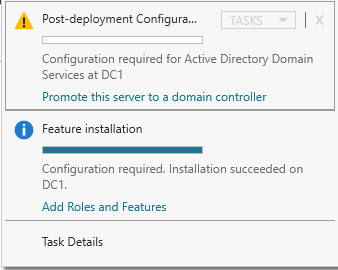
Promote Server to Domain Controller
Before you begin this process, enable the local Administrator account on the server and set the password. If you don’t, you will receive this message when you try to promote the domain controller.
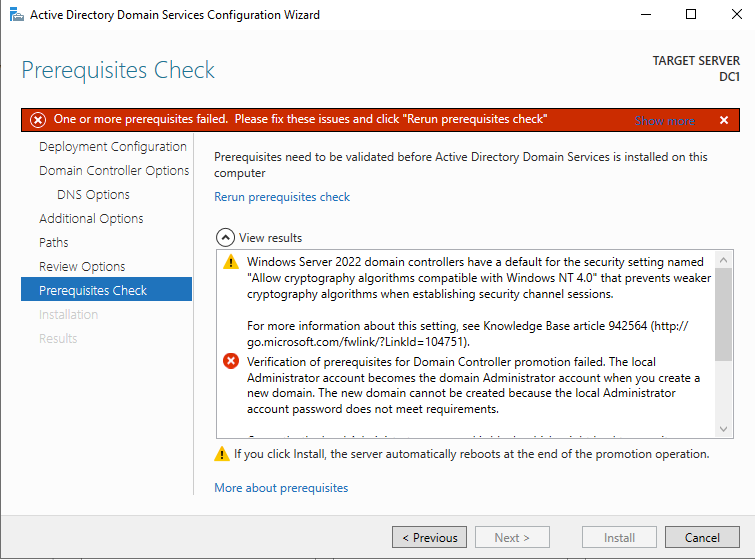
Once you have the Administrator account enabled and the password set, proceed with the Post-Deployment Configuration
Before enabling Active Directory Domain Services, you must enable the local Administrator account and log on with that account.
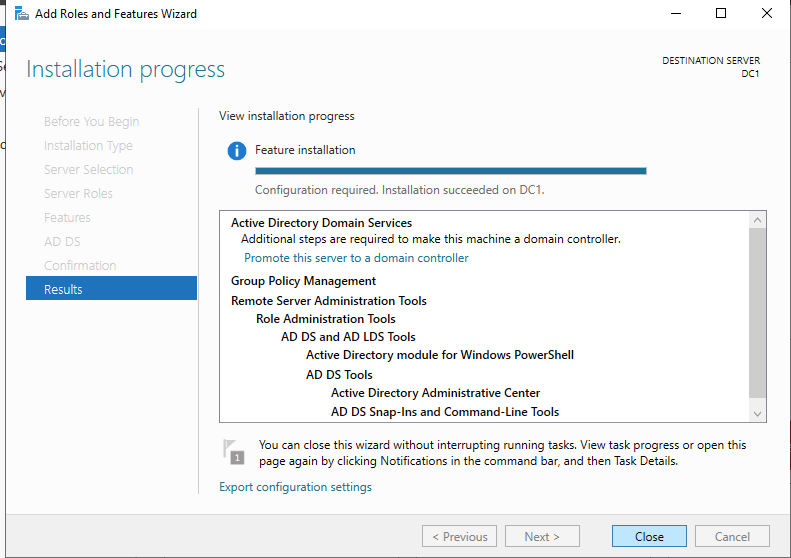
Using your favorite RDP program, connect to DC1 using the public IP address associated with the instance. Add the Active Directory Domain Services role.
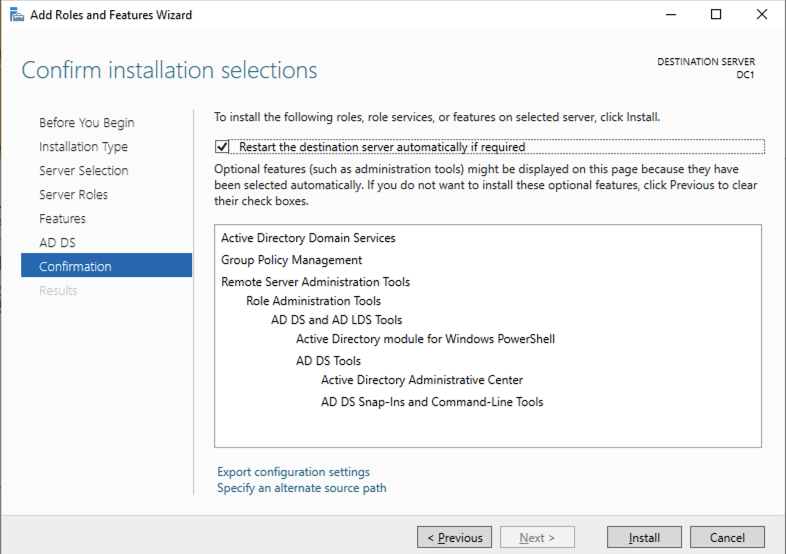
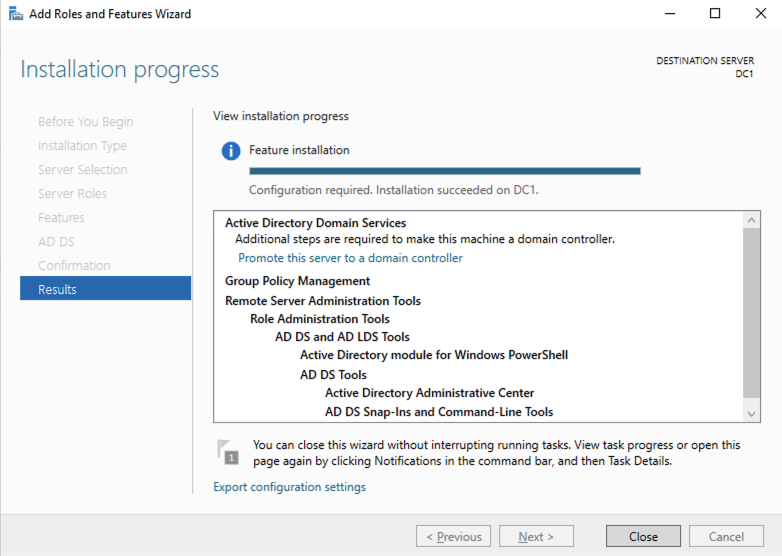
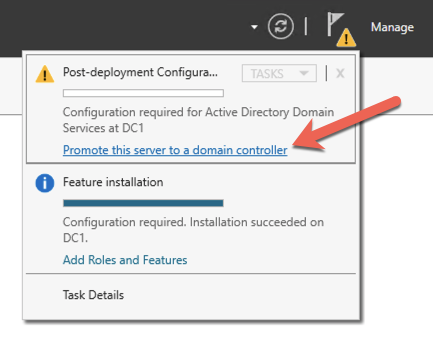
After the installation completes, promote this server to a domain controller.
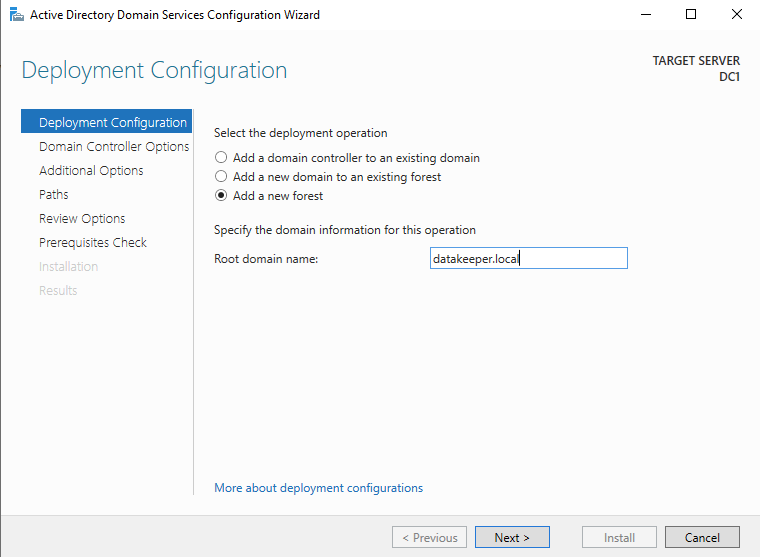
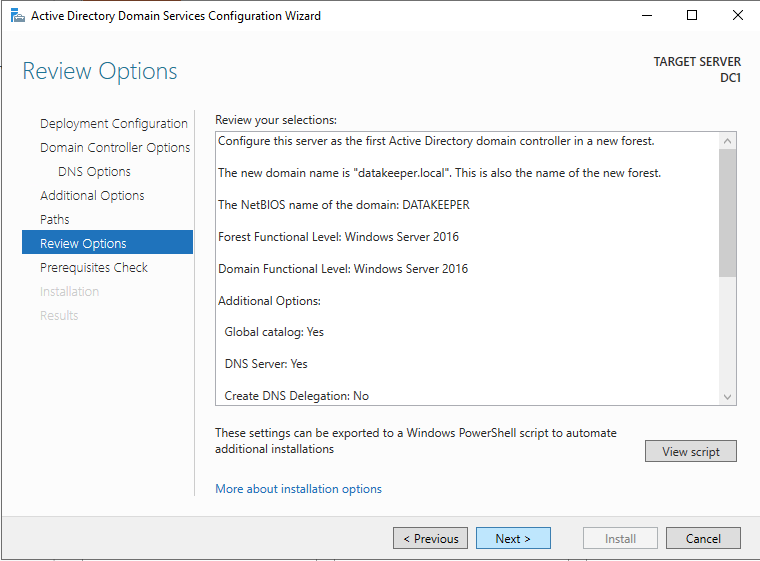
For our purposes we are going to create a new domain.


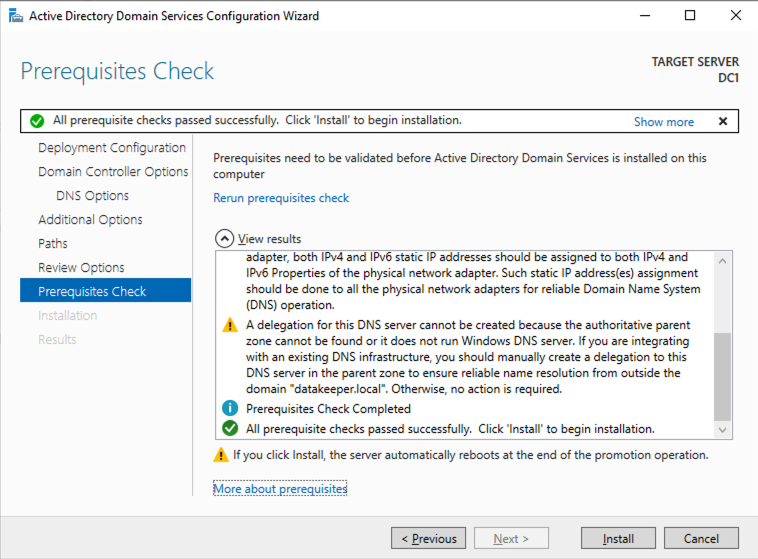
Reboot DC1 and move on to the next section.
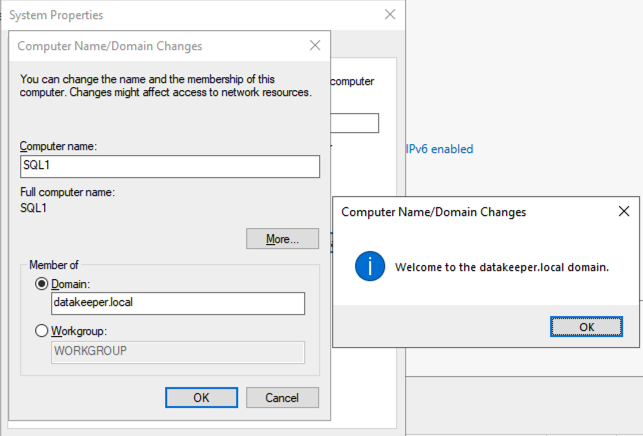
Join SQL1 and SQL2 to the Domain
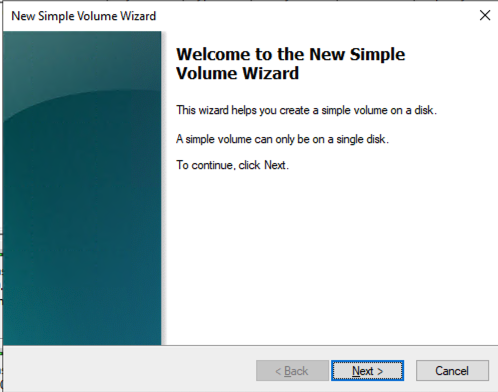
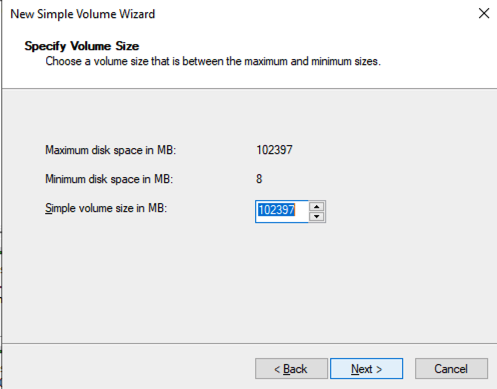
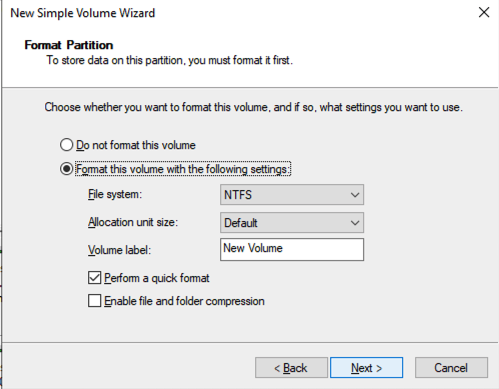
Prepare the Storage
Once SQL1 and SQL2 are added to the domain, connect to the instances with the Domain Admin account you created to complete the rest of the configuration steps. The first thing you need to do is to attach and format the EBS volumes that we added to SQL1 and SQL2 as shown below.
Configure Failover Clustering Feature
Enable the Failover Clustering feature on both SQL1 and SQL2.
Run this PowerShell command on SQL1 and SQL2
Install-WindowsFeature -Name Failover-Clustering -IncludeManagementTools
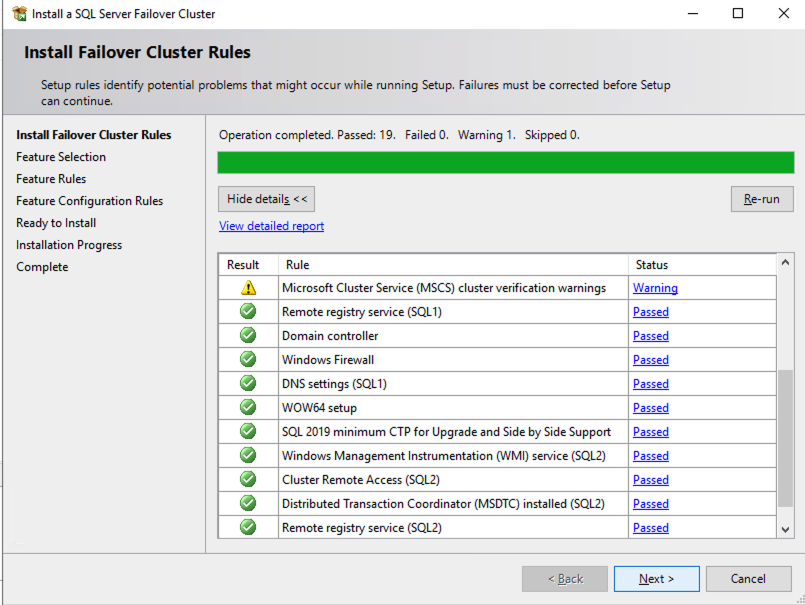
Validate your Cluster
Run this PowerShell command from SQL1 or SQL2
Test-Cluster -Node sql1,sql2
Depending upon the version of Windows Server you are using, you will see some warnings about Network and possibly storage. The network warning will likely tell you that each cluster node is accessible via a single interface. Earlier versions of Windows will warn you about the lack of shared storage.
You can ignore both of those errors as they are expected in a cluster hosted on OCI. As long as you have received no Errors, you can proceed with the next section. If you receive any errors, fix them, then run validation again and continue on to the next section.
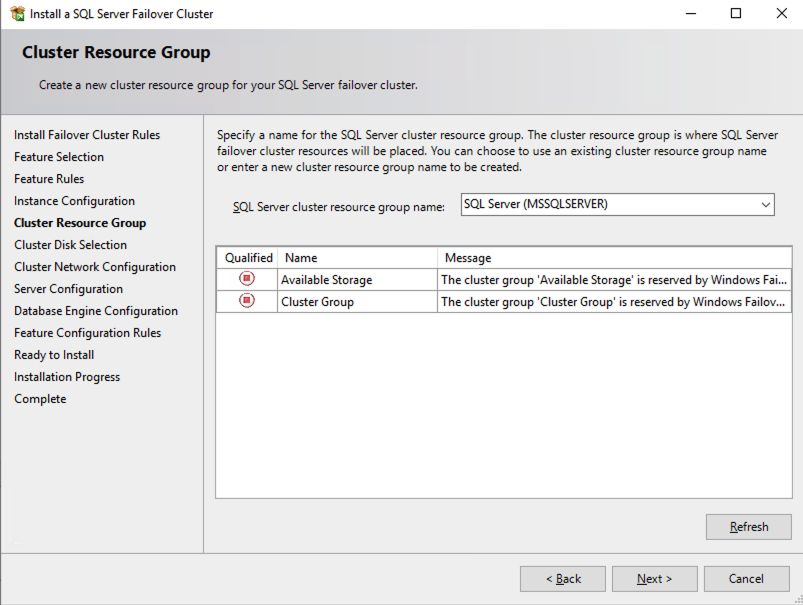
Create the Cluster
Next, you will create the cluster. In the example below, you will notice I use the two IP addresses we planned to use, 10.0.64.101 and 10.0.128.101. You can run this Powershell from either cluster node.
New-Cluster -Name cluster1 -Node sql1,sql2 -StaticAddress 10.0.64.101, 10.0.128.101
Please Note: do NOT try to create the cluster via the WSFC GUI. You will find that because the instances are using DHCP, the GUI will not give you the option to assign IP addresses for the cluster and instead will hand out duplicate IP addresses.
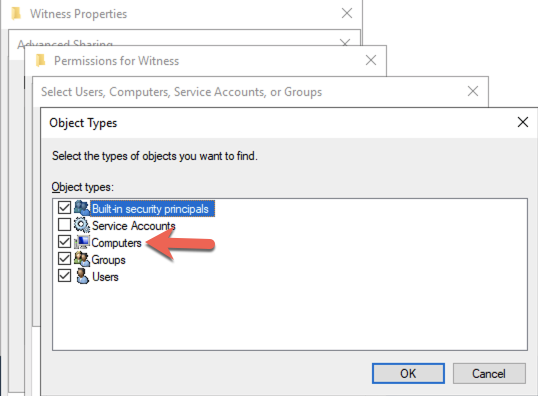
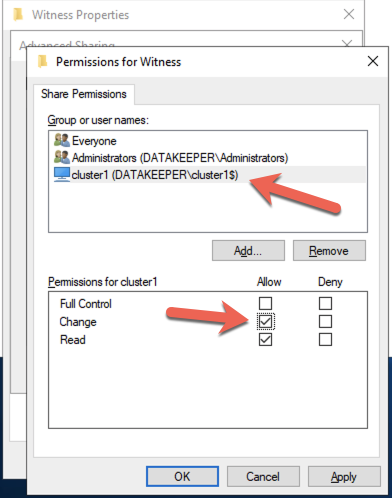
Add the File Share Witness
To maintain the cluster quorum, you need to add a witness. In OCI, the type of witness you will want to use is a File Share Witness. The file share witness must reside on a server that resides in a different Fault Domain than the two cluster nodes.
In the example below, the file share witness will be created on DC1, which resides in FD1.
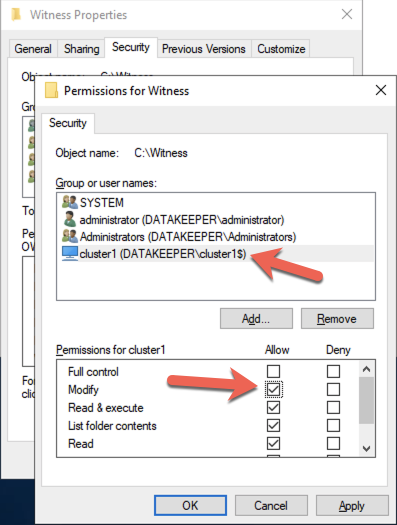
On DC1, create a file share and assign the cluster name object (CNO) read-write permissions on the folder. Add permissions for the CNO on both the Share and Security tab of a folder that you created, In the example below I created a folder called “Witness”.
Once the folder has been created and the appropriate permissions have been assigned to the CNO, run the following PowerShell command on SQL1 or SQL2.
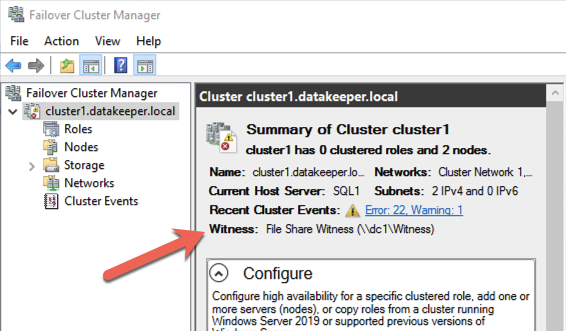
Set-ClusterQuorum -Cluster cluster1 -FileShareWitness \\dc1\Witness
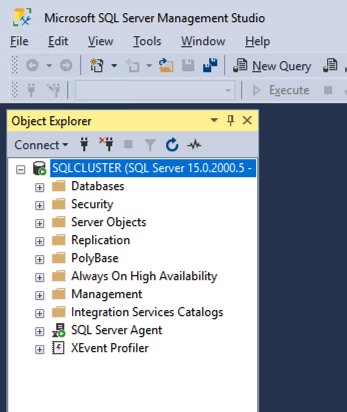
Your cluster should now look like the following when you launch the Failover Cluster Manager on SQL1 or SQL2.
Creating the SQL Server FCI
Install DataKeeper Cluster Edition
Before you can move on with the next steps, you will need to install DataKeeper Cluster Edition on both SQL1 and SQL2. Download the setup executable and run the DataKeeper setup on both nodes. Refer to the SIOS documentation for specific guidance on the installation.
Create the DataKeeper Volume Resource
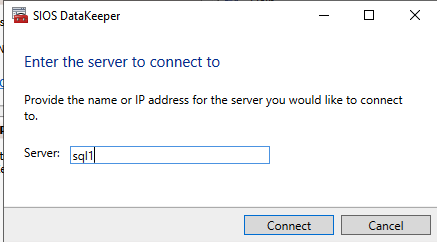
Launch the DataKeeper UI on either of the cluster nodes and create your DataKeeper Volume Resource as shown below.
Connect to both servers, first SQL1 and then SQL2
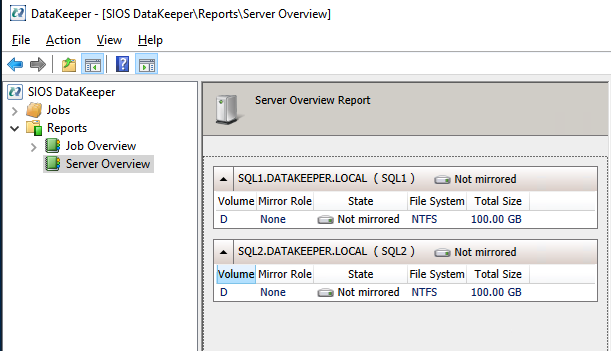
If you have connected to both servers and the storage is configured properly, the Server Overview Report should look something like this.
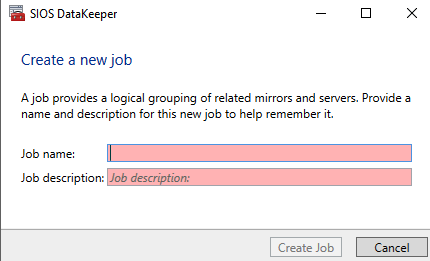
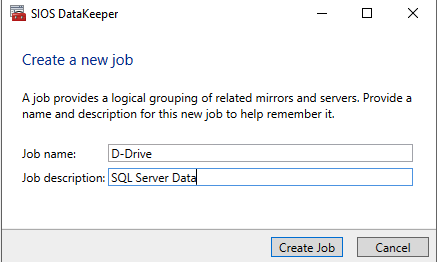
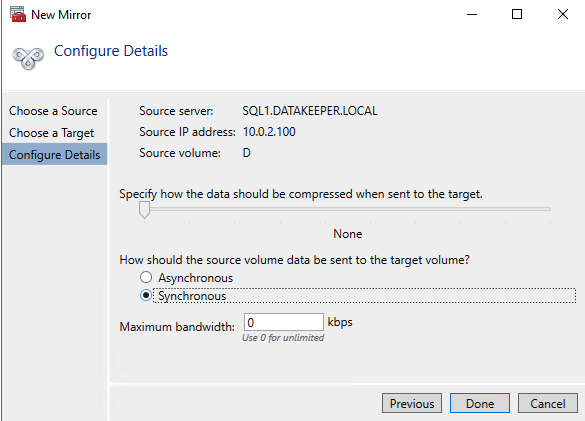
Click Create Job to start the Job Creation Wizard
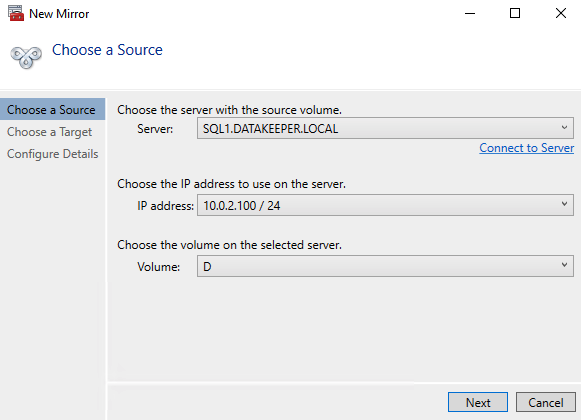
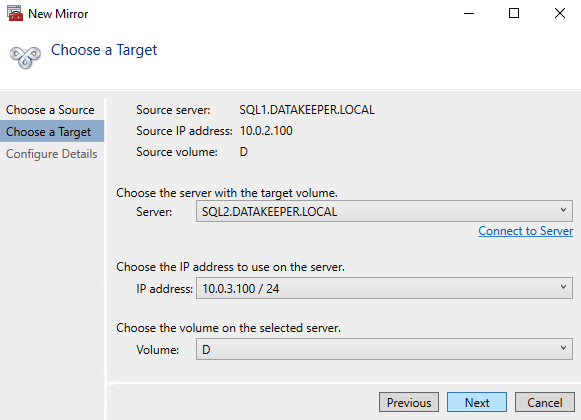
DataKeeper supports both synchronous and asynchronous replication. For replication between availability zones in the same region, choose synchronous. If you want to replicate across regions or even across cloud providers, choose asynchronous
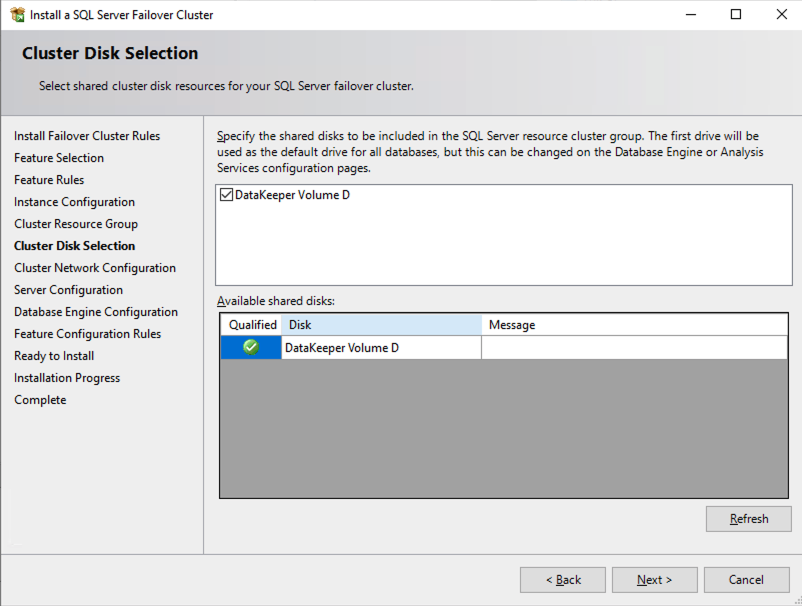
Click “Yes” here to register the DataKeeper Volume resource in Available Storage in the cluster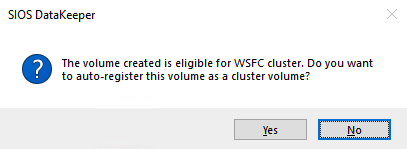
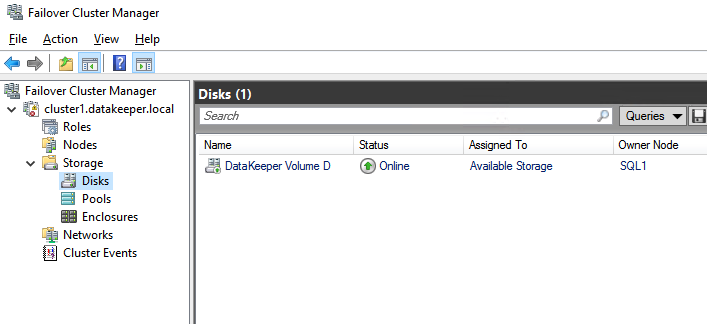
The DataKeeper Volume D now appears in Failover Cluster Manager in Available Storage.
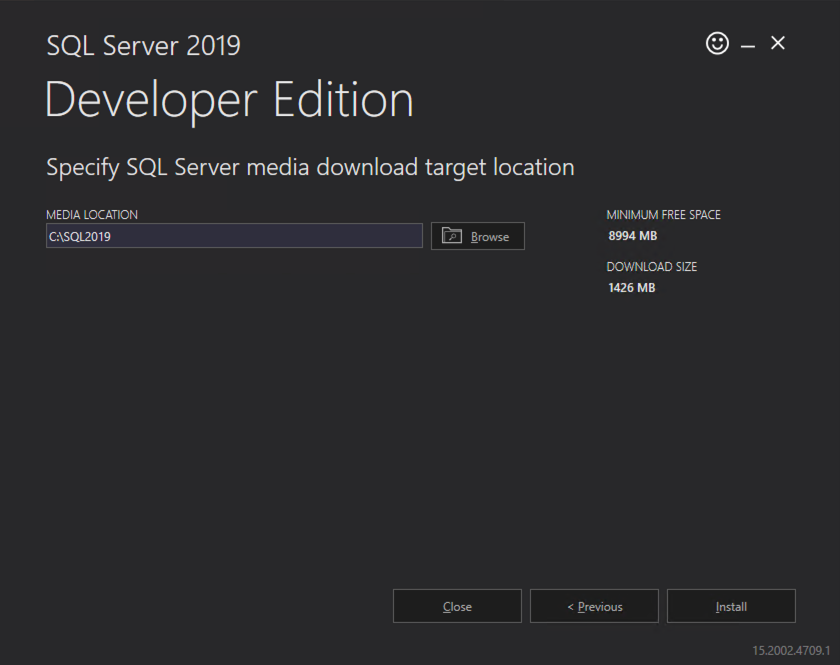
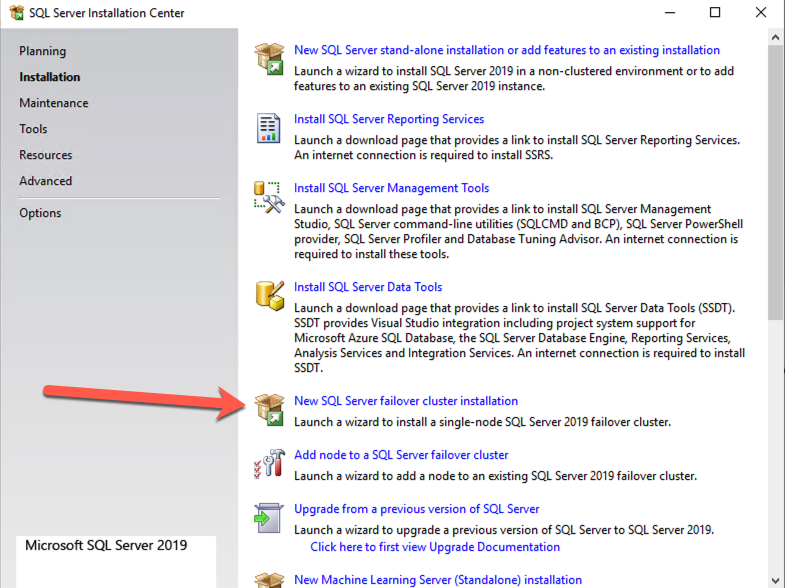
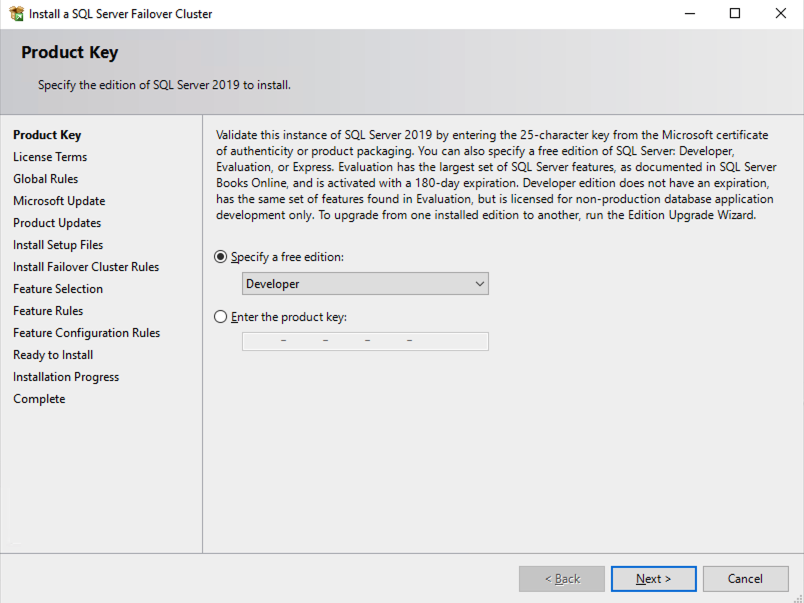
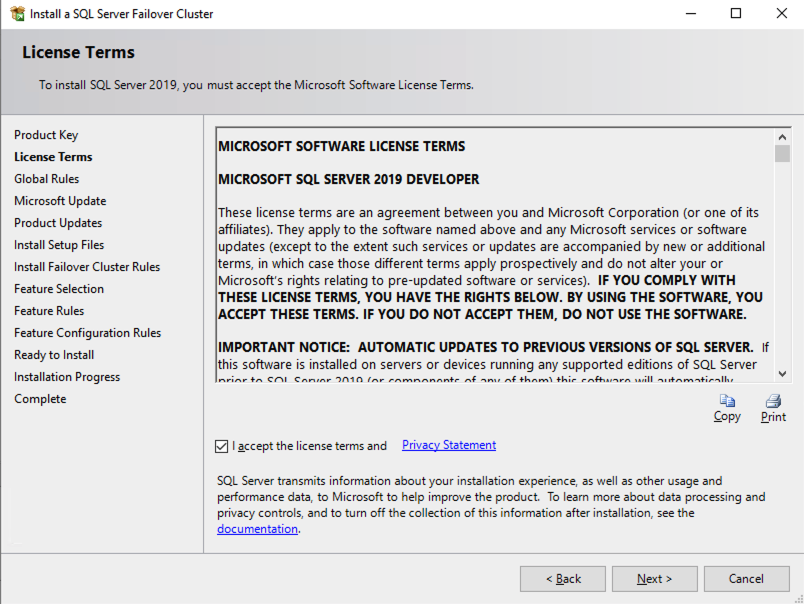
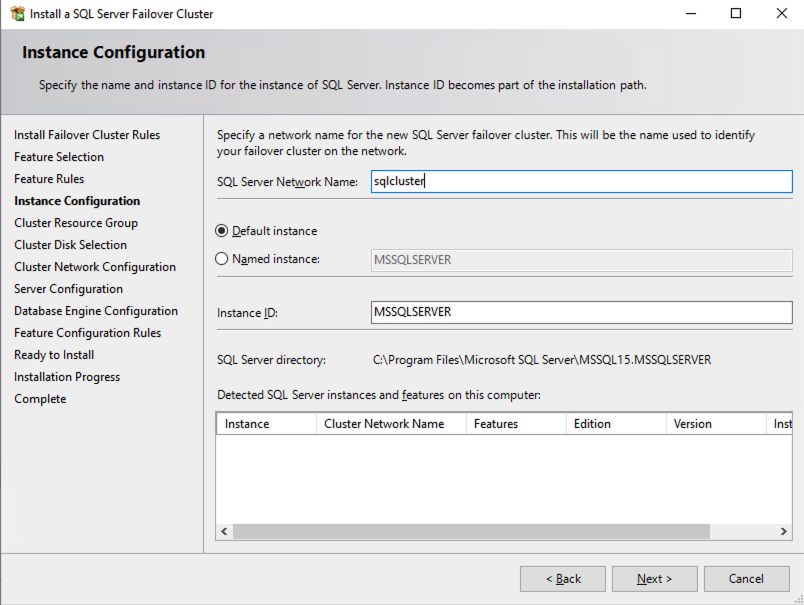
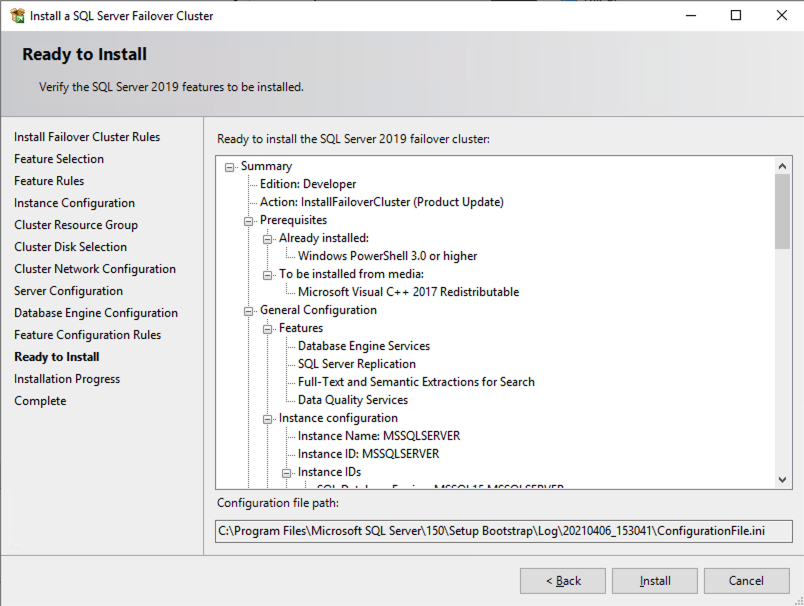
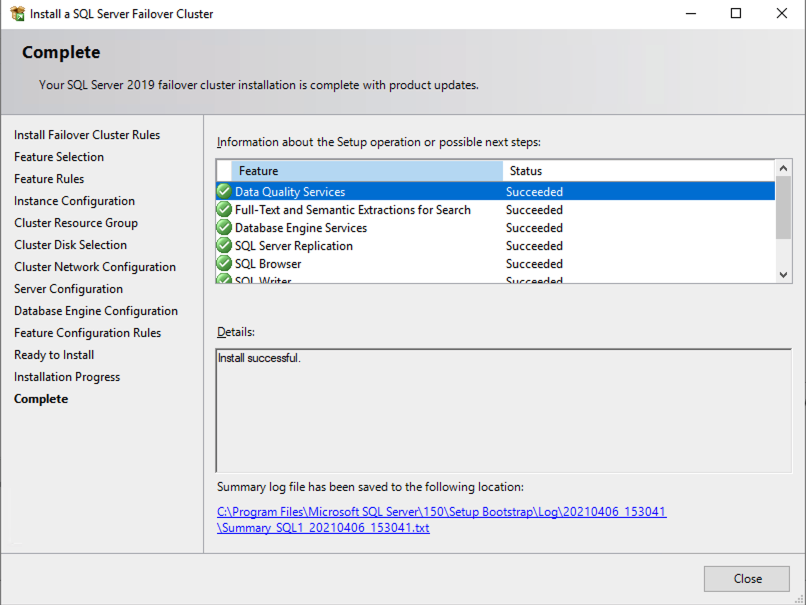
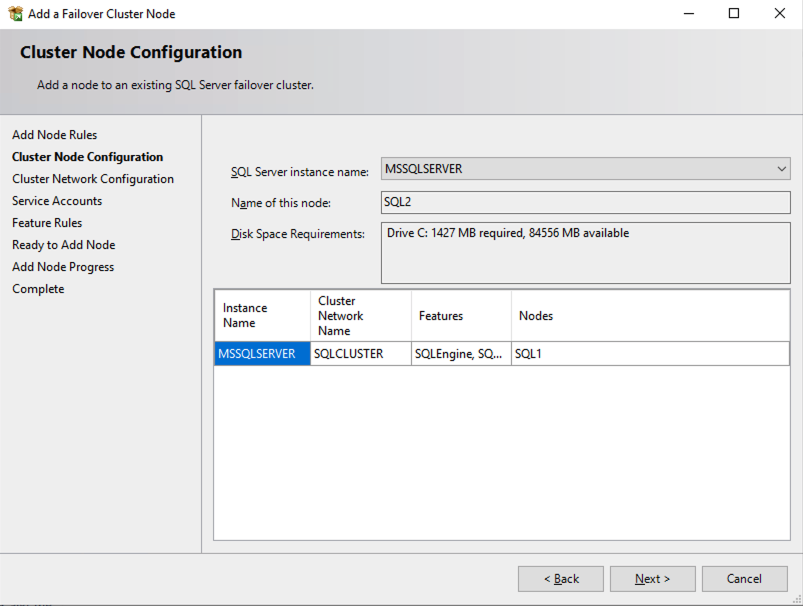
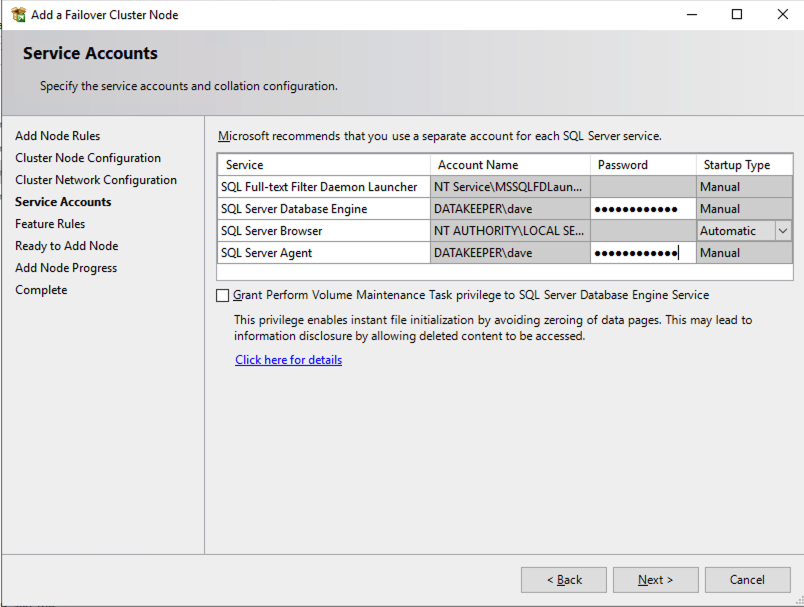
Install the First Node of the SQL Server FCI on SQL1
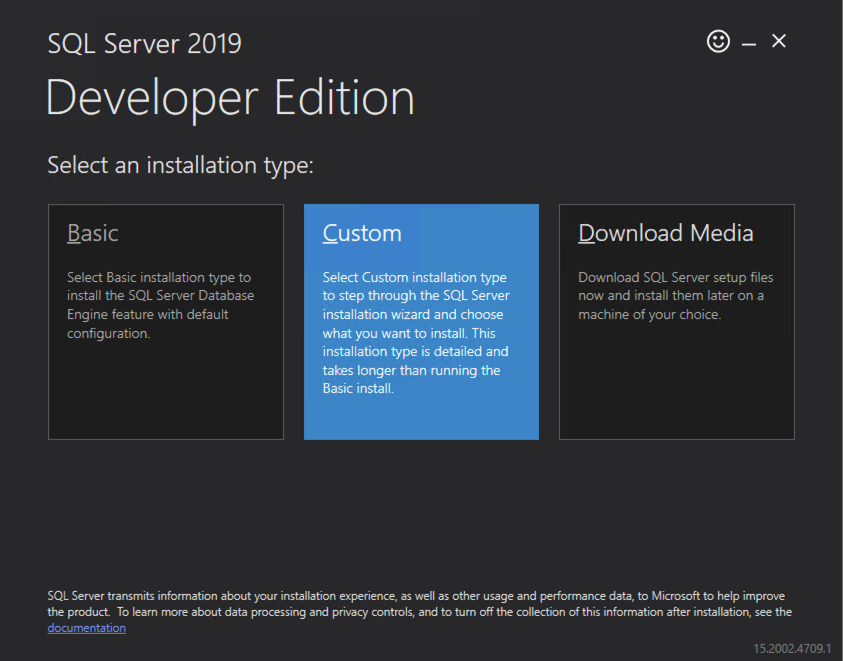
Now that the core cluster has been created and the DataKeeper volume resource is in Available Storage, it is time to install SQL Server on the first cluster node. As mentioned earlier, the example here illustrates a cluster configuration using SQL 2019 and Windows 2022, but all the steps described in this example are virtually identical, regardless of which version of Windows Server or SQL Server you are trying to deploy.
Follow the example below to install SQL Server on SQL1
The name you specify below is the client access point. This is the name your application servers will use when they want to connect to the SQL Server FCI.
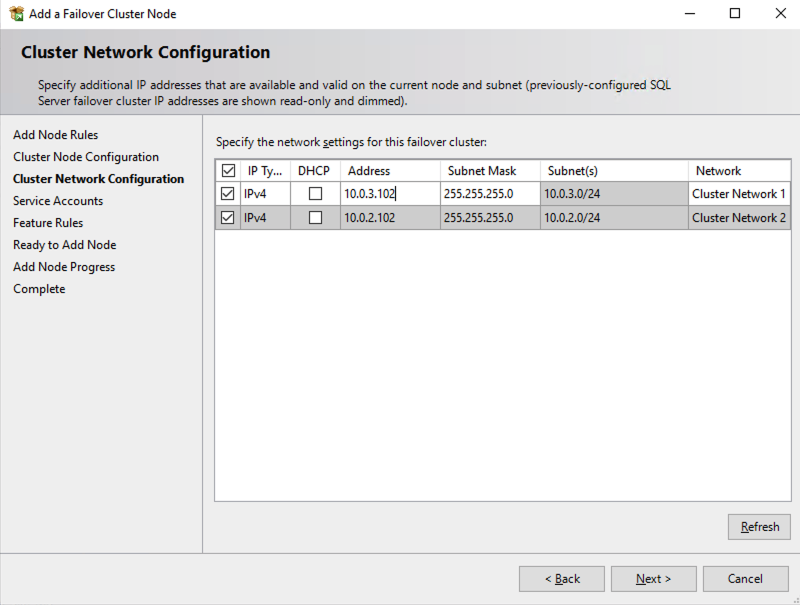
On this screen you will add the SQL1 secondary IP address we identified earlier in the planning section of Part 1 of this series.
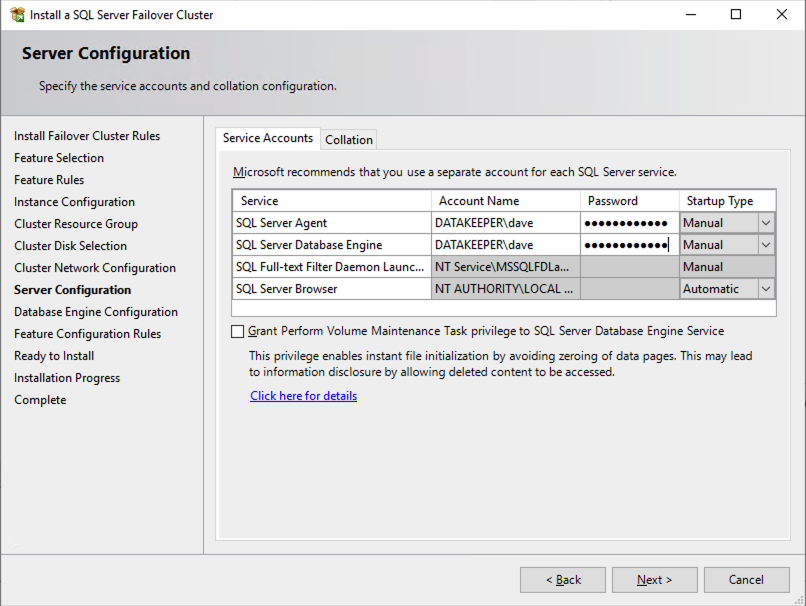

In this example we left tempdb on the D drive. However, for best performance it is recommended that you locate tempdb on a non-replicated volume. 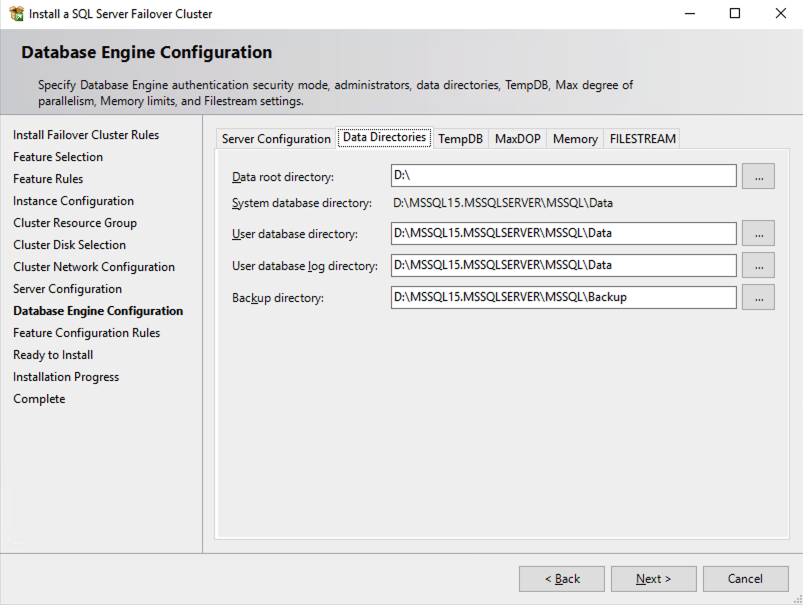
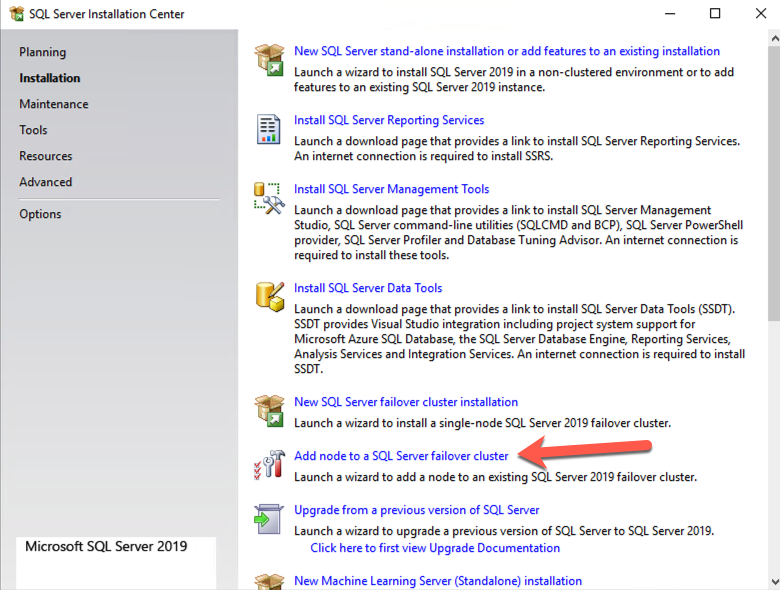
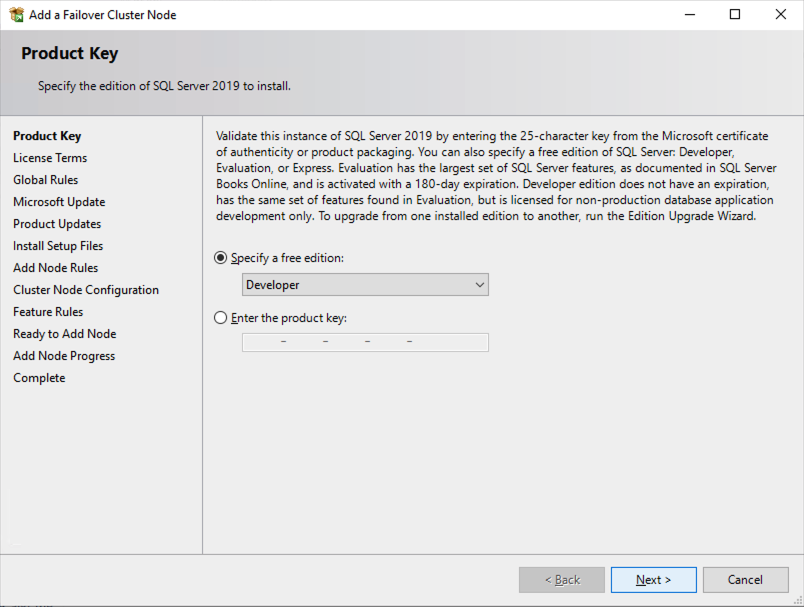
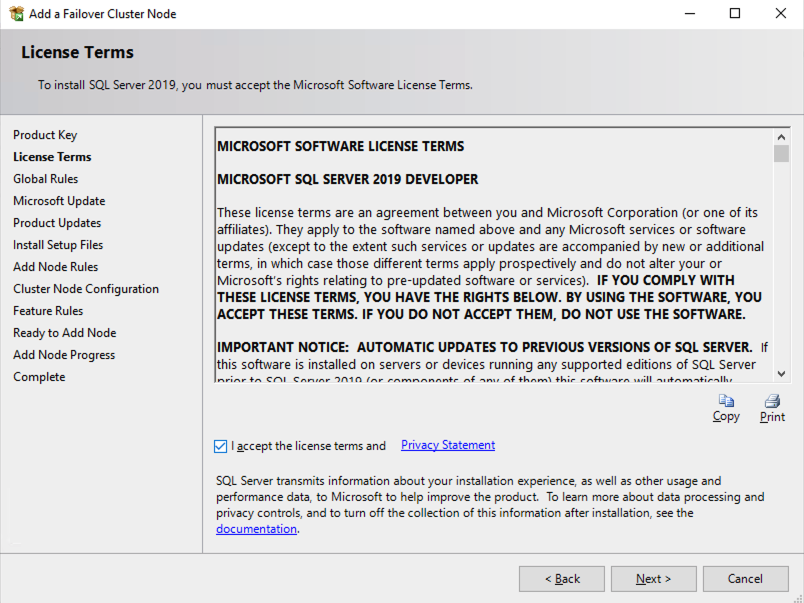
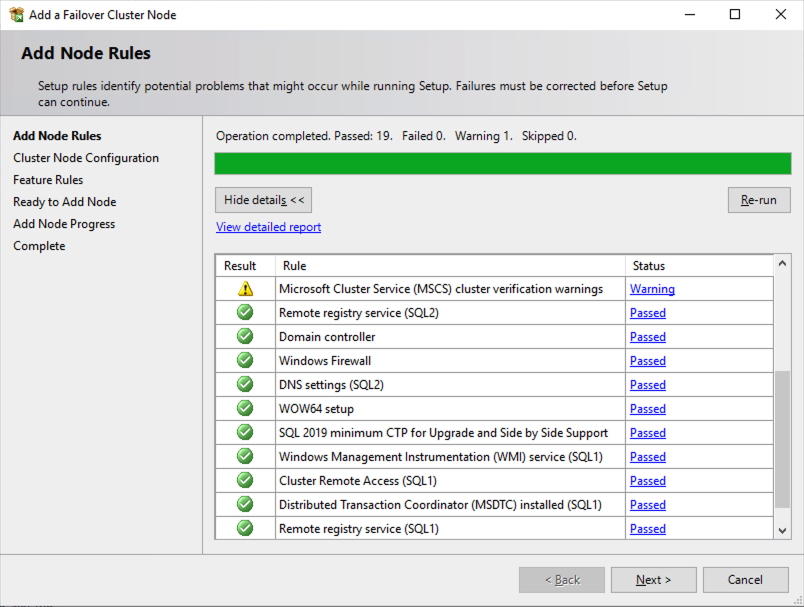
Install the second node of the SQL Server FCI on SQL2
It is now time to install SQL Server on SQL2.
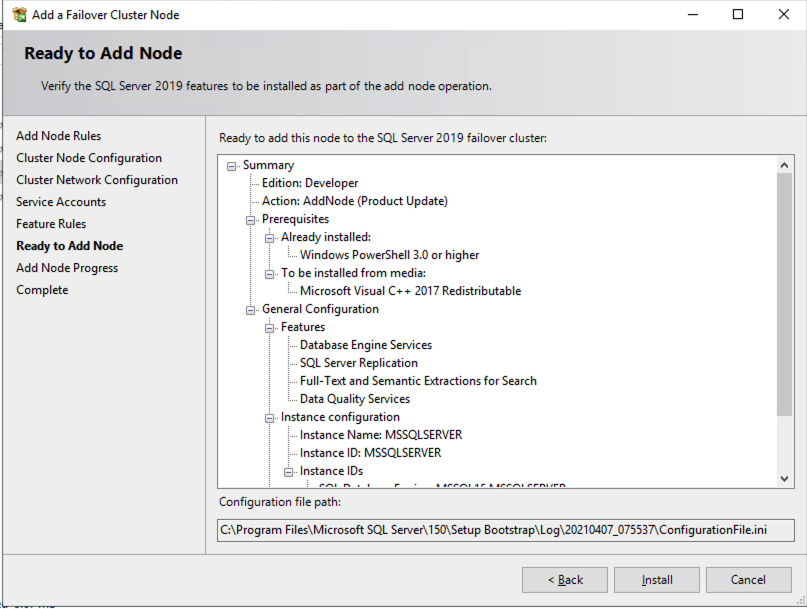
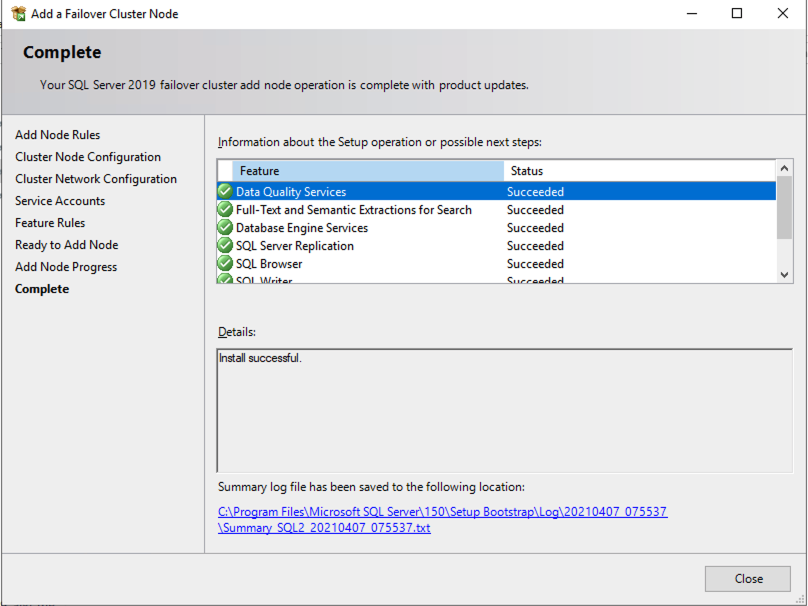
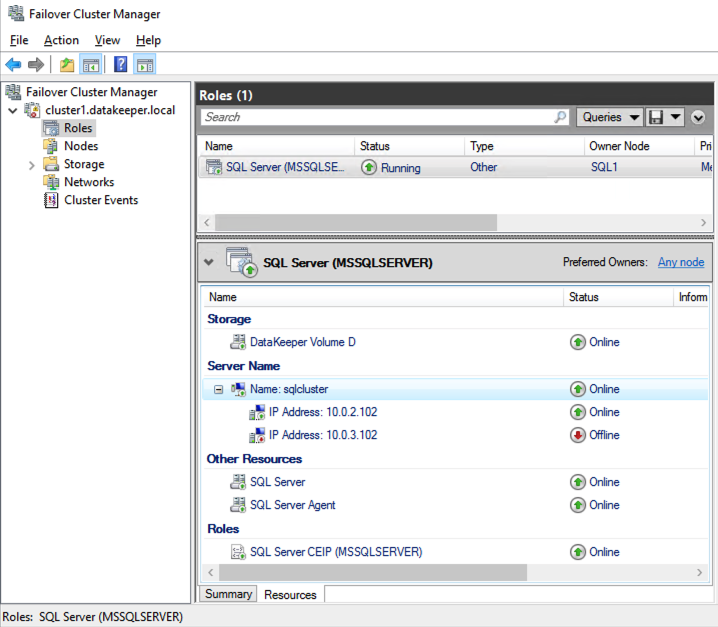
Once you have installed SQL Server on both cluster nodes, Failover Cluster Manager should look like this.
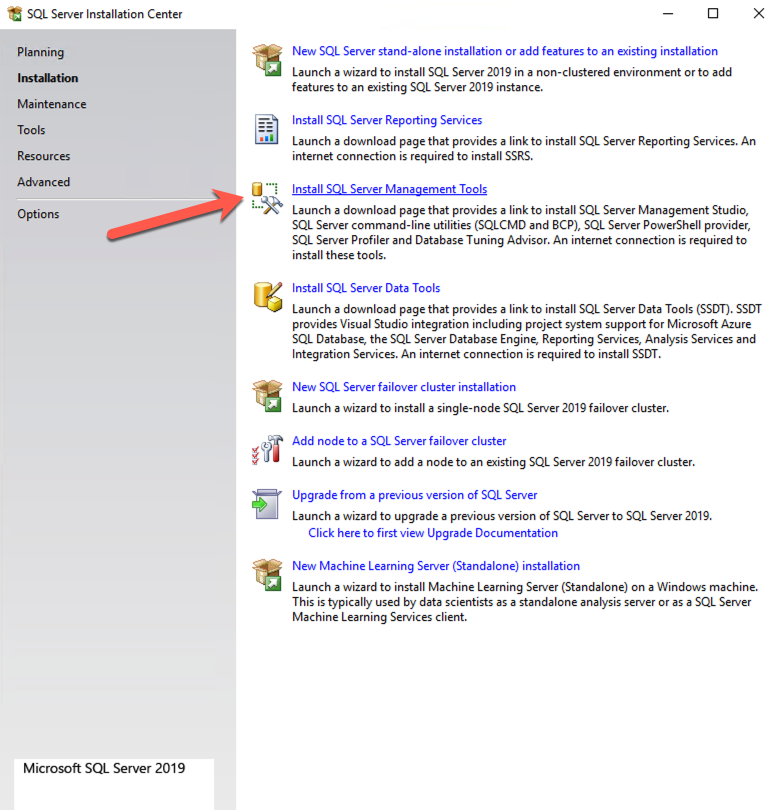
Install SQL Server Management Studio
On SQL Server Versions 2016 and later, you must download and install SSMS as a separate option as shown below. Note: In earlier versions of SQL Server, SQL Server Management Studio (SSMS) was an option that you could choose to install during the SQL installation.
Once SSMS installs, connect to the cluster via the client access point. Your SQL Server FCI should look like this.
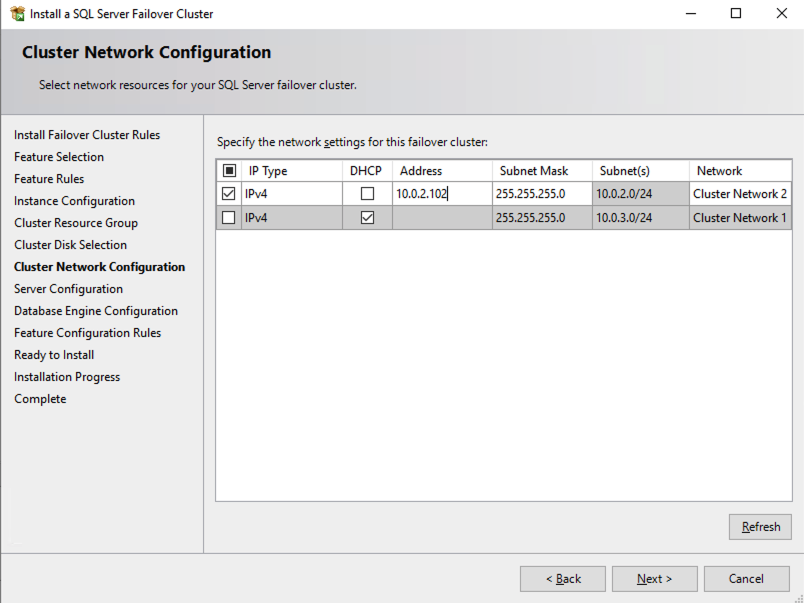
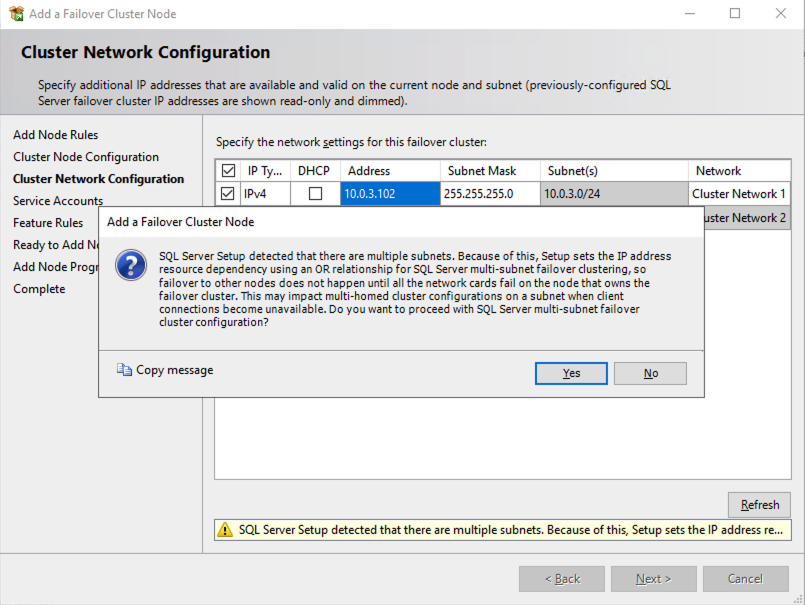
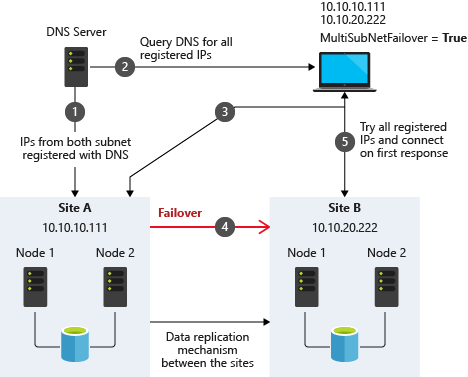
Multi-Subnet Considerations
One of the biggest considerations for running a SQL Server FCI in OCI is the fact that the cluster nodes reside in different subnets. Microsoft started to account for the fact that cluster nodes might reside in different subnets by adding the “OR” functionality in Windows Server 2008 R2 as described in the Microsoft documentation.
Taken from SQL Server Multi-Subnet Clustering (SQL Server)
The important thing described in the documentation is the concept of the RegisterAllProvidersIP on the network name resource, which is enabled by default when you create a SQL Server FCI. As described, when this is enabled, two A records will be registered in DNS with the network name resource, one for each IP address.
Using the “OR” functionality, only the IP address associated with the active subnet will ever be online and the other one will be shown as offline. If your client supports adding multisubnetfailover=true to the connection string, then both IP addresses will be tried at the same time and the client will automatically connect to the active node. That is the easiest, and the default method of client redirection in a multi-subnet cluster.
The documentation goes on to say that if your client does NOT support the multisubnetfailover=true functionality, that you should “try to adjust the connection timeout in the client connection string by 21 seconds for each additional IP address. This ensures that the client’s reconnection attempt does not timeout before it is able to cycle through all IP addresses in your multi-subnet FCI.”
Disabling RegisterAllProvidersIP is another option that will work. By disabling the RegisterAllProvidersIP you will only have a single A record in DNS. The DNS A record will be updated each time the cluster fails over with the active cluster IP address associated with the name resource.
The downside of this scenario configuration is that your clients will cache the old IP address until the time to live (TTL) expires. To minimize the delay in reconnection, it is recommended that you change the TTL on the name resource. This process is described here and an example is shown below that sets the TTL to 5 minutes.
Get-ClusterResource -Name sqlcluster | Set-ClusterParameter -Name HostRecordTTL -Value 300
Keep in mind that it also may take some time for the changes to your AD-integrated DNS server to propagate across your entire forest.
Summary
This technical guide provides a comprehensive overview of setting up a SQL Server 2019 Failover Cluster Instance (FCI) in Oracle Cloud Infrastructure (OCI). It begins by highlighting the importance of understanding OCI’s availability SLAs, which differ based on deployment strategies: 99.99% for deployments across Availability Domains, 99.95% across Fault Domains, and 99.9% for single VM deployments. The guide emphasizes that the SLA covers VM availability, not the applications or services running on it, thus necessitating additional measures for application availability.
The guide details the initial steps of creating a Virtual Cloud Network (VCN) and subnets in OCI, emphasizing the need for a network plan that accommodates at least three Availability Domains for clustering purposes. Each Availability Domain must be in a different subnet, a requirement applicable to clusters spanning Fault Domains as well. It provides specific configurations for setting up three subnets across different Availability Domains within a single VCN.
Further, the guide describes the process of creating an internet gateway and editing default security lists and route tables to facilitate access and security across Availability Domains. It also covers the configuration of DHCP options for Active Directory compatibility and outlines the steps for provisioning VMs with Windows Server 2022 and SQL Server 2019, emphasizing the importance of planning server names, IP addresses, and availability zone placements.
The guide then delves into adding additional volumes for SQL Server FCI storage needs, detailing the process of creating and attaching block volumes to instances. It also instructs on configuring secondary IP addresses for Windows Server Failover Clustering in OCI.
Next, the guide addresses domain controller setup, including enabling Active Directory Domain Services and promoting the server to a domain controller. It walks through the preparation of storage and enabling of the Failover Clustering feature on SQL1 and SQL2, along with cluster validation and creation processes.
The guide further discusses adding a File Share Witness to maintain cluster quorum and installing DataKeeper Cluster Edition for volume replication. It provides a step-by-step approach to installing SQL Server on the cluster nodes and SQL Server Management Studio, along with considerations for multi-subnet deployments.
In summary, this guide offers a detailed blueprint for deploying and configuring a SQL Server 2019 FCI in OCI, covering aspects from network setup and VM provisioning to clustering, storage configuration, and domain control setup, ensuring maximum uptime and reliability for business-critical applications.