I created a partition on an attached drive to use as a place to extract and execute software installers, mounted on /mnt/software
This document is a useful reference to use during the installation and configuration processes. Pay particular attention to the required support packages.
Step 1: System Prep
For this installation I used a second 500GB drive attached to the instance. I created the following partitions:
Disk /dev/xvdf: 500 GiB, 536870912000 bytes, 1048576000 sectors
Units: sectors of 1 * 512 = 512 bytes
Sector size (logical/physical): 512 bytes / 512 bytes
I/O size (minimum/optimal): 512 bytes / 512 bytes
Disklabel type: gpt
Disk identifier: 691F3320-5AEE-CF43-802B-A121C0A27B7B
Device Start End Sectors Size Type
/dev/xvdf1 2048 419432447 419430400 200G Linux filesystem
/dev/xvdf2 419432448 524290047 104857600 50G Linux filesystem
/dev/xvdf3 524290048 528484351 4194304 2G Linux filesystem
I created XFS filesystems on each of these partitions.
I mounted the disks:
/dev/xvdf1 to /mnt/software – 200GB of space to hold installation media etc
/dev/xvdf2 to /opt/sybaseiq – 50GB to hold the Sybase IQ installation, this can be smaller e.g. 5GB
/dev/xvdf3 to /opt/demodb – 2GB to hold the Sybase demo database
The demo database requires csh and ksh to run the install script. You should install these as root with the command “yum install csh” and “yum install ksh”. This is for RHEL, other Linux distributions have different package installers, replace yum with whichever package installer is available.
Step 2: Download Sybase IQ
Download the Sybase install packages from SAP
Copy the SybaseIQ rar files into /mnt/software
Step 3: Install unrar
Install the RAR/UNRAR tools, this is required to extract the RAR files that SAP so likes to use
- For RHEL, grab the package
- cd /mnt/software/
- wget https://www.rarlab.com/rar/rarlinux-x64-5.6.1.tar.gz
- tar -zxvf rarlinux-x64-5.6.1.tar.gz
- cd rar
- cp -v rar unrar /usr/local/bin
Unrar the SybaseIQ installer into /mnt/software/Sybase
- /usr/local/bin/unrar x 51052038_part1.exe /mnt/software/Sybase
Step 4: Create Sybase Admin User
Sybase recommends not installing IQ as root. Thus I created a new user called sapiq
- “useradd -g 4 -b /home -u 1500 sapiq”, group 4 on my system was the adm group
- “passwd sapiq”, change the password for the new sapiq user
- Edit /home/sapiq/.bashrc, add source “/opt/sybaseiq/SYBASE.sh” to this file and add /opt/sybaseiq/IQ-16_1/bin64/ to the PATH variable
- Edit /home/sapiq/.bash_profile, add source “/opt/sybaseiq/SYBASE.sh” to this file
Step 5: Create location for Sybase IQ
I created a second partition on the attached drive from above, Sybase IQ is <2GB – I made my drive 5GB just to be on the safe side. Mount this to your preferred location, I used /opt/sybaseiq
- “sudo chown sapiq.adm /opt/sybaseiq”, make sure that the sapiq user owns the installation directory
Step 6: Running Sybase IQ Setup
cd /mnt/software/Sybase/51052038/Sybase IQ Server 16.1/Linux on IA64 64bit/
./setup.bin
If you have your X-Windows display setup correctly this will automatically launch a GUI installer, if setup.bin doesn’t find an expected X-Display method then it will drop back to an interactive CLI installer.
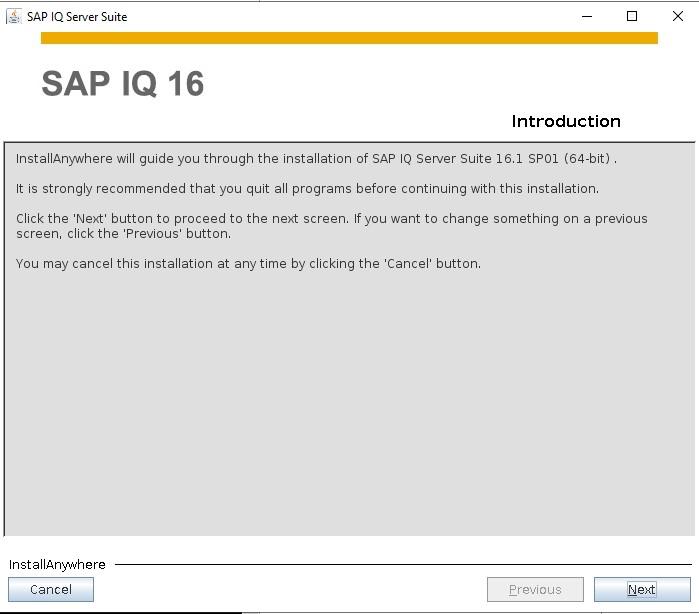
Introduction splash screen, simply select Next.
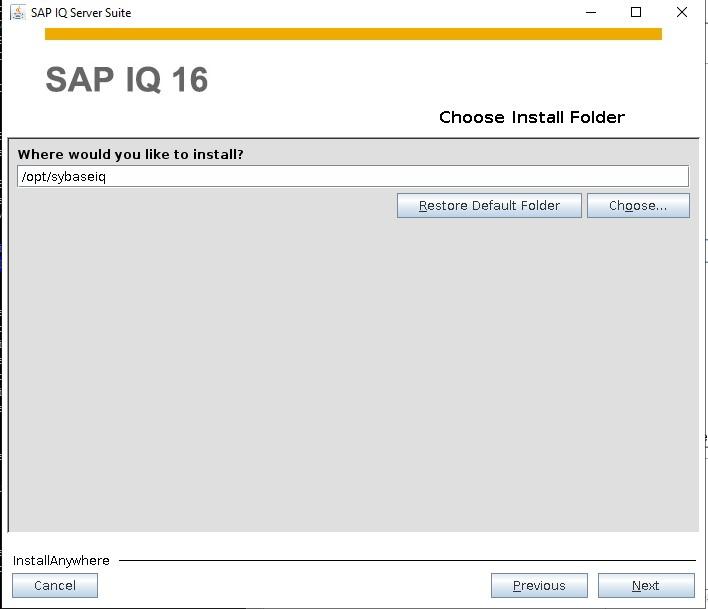
This is the installation location, you can use the “choose” option to navigate to a folder or simply type in a path.
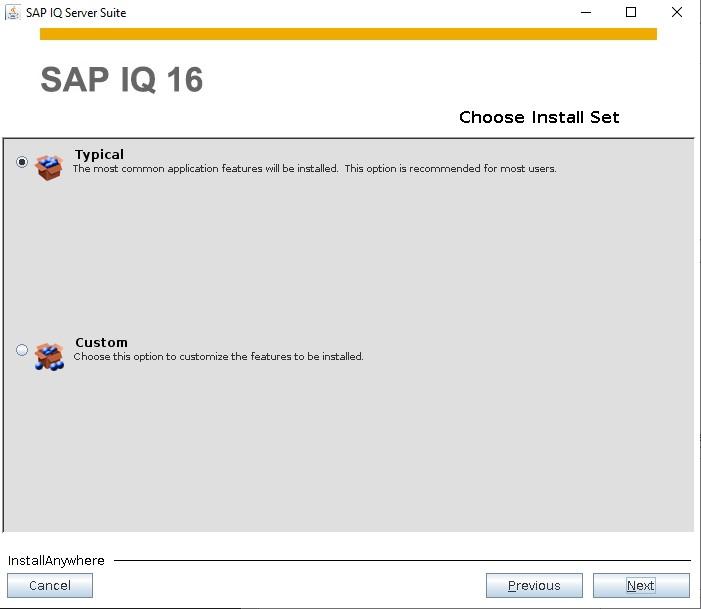
I chose typical here, but if you have specific packages you want to omit or include then you may want to choose Custom.
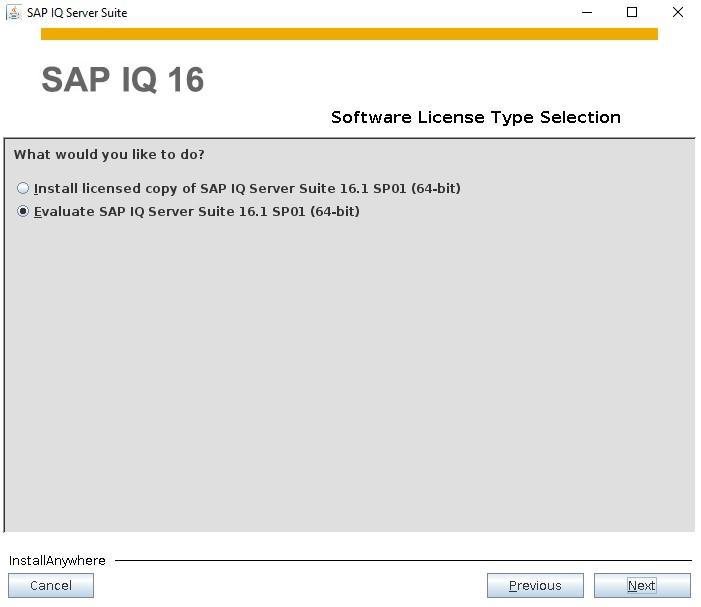
I will use an evaluation license for my demo.
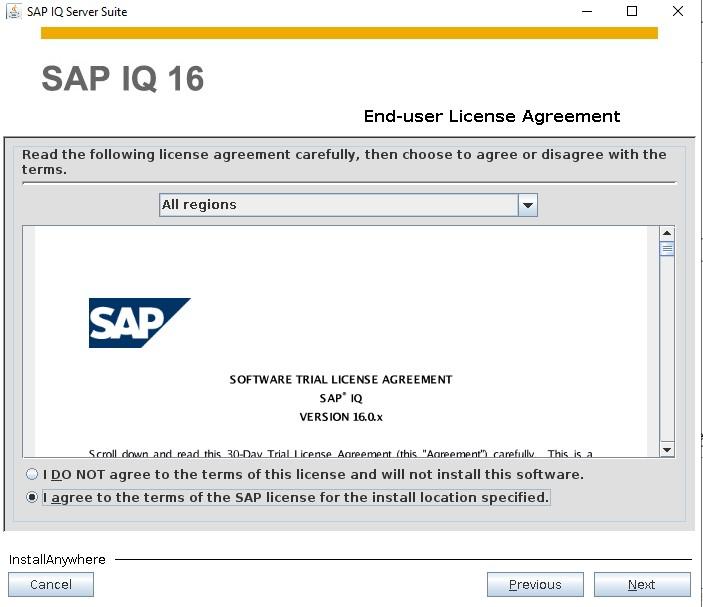
Agree to the license terms.
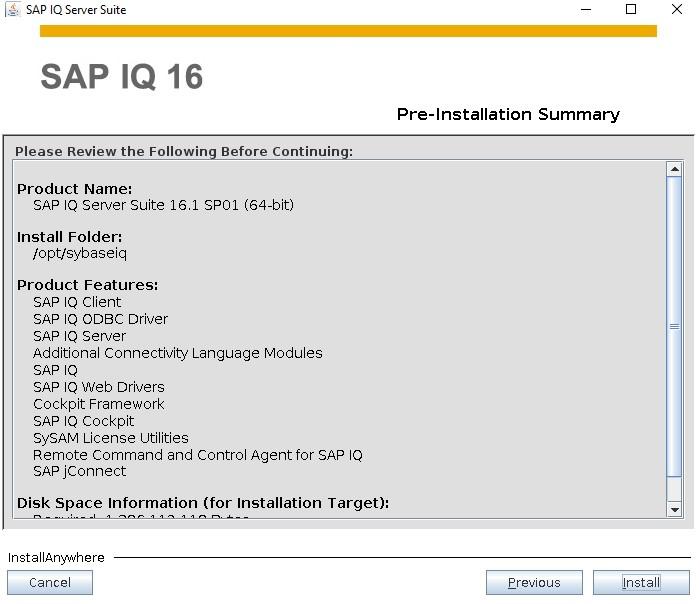
You can verify that what you chose is what you want.
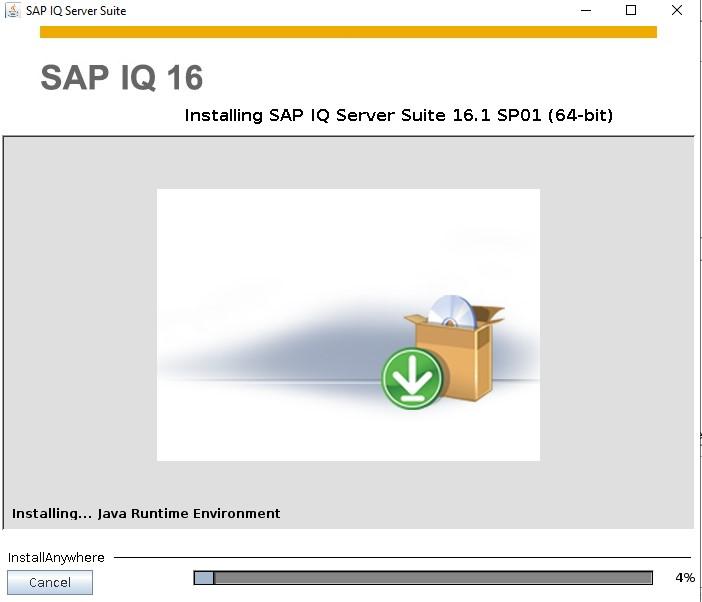
Once you verify that your selections are correct, install will begin – this should take several minutes.
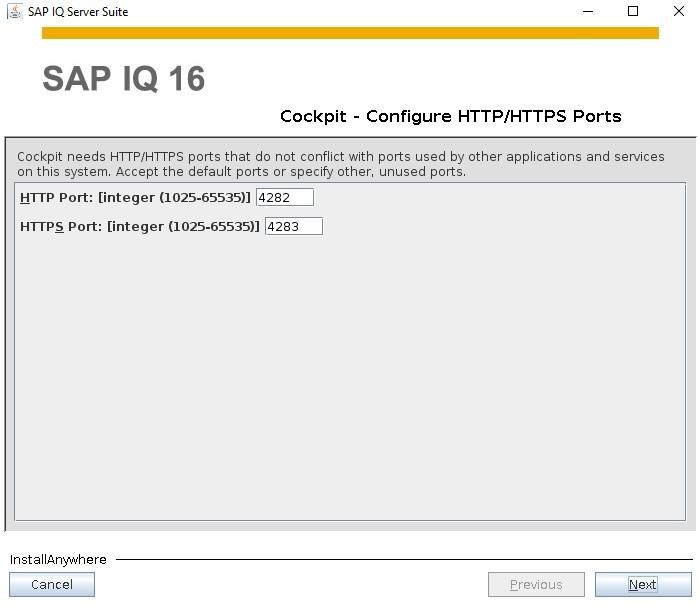
Configure HTTP/HTTPS ports for the cockpit.
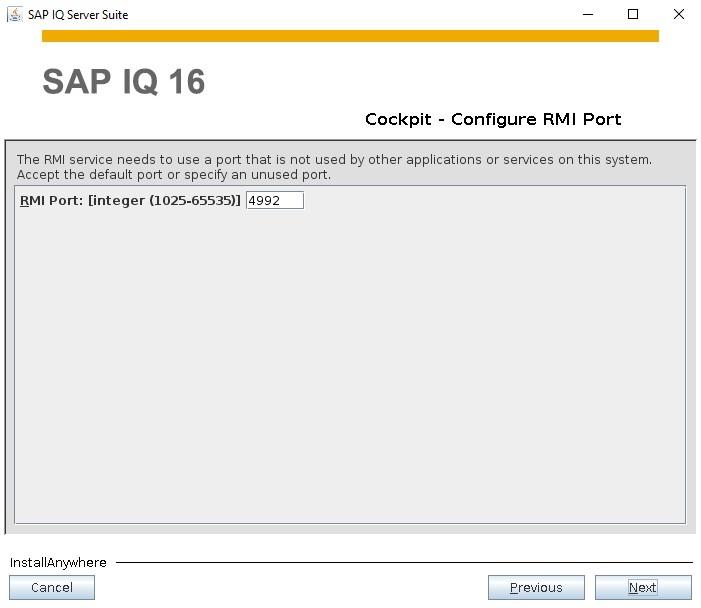
Configure the Cockpit RMI port to use.
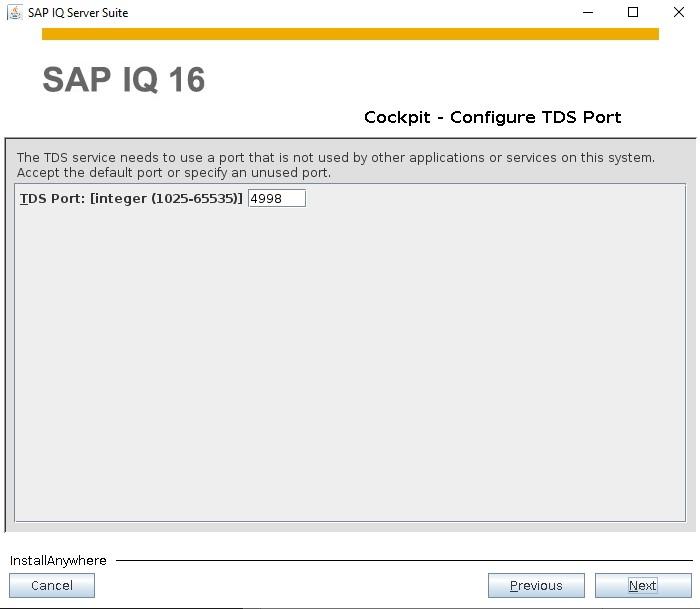
Configure the Cockpit TDS port to use.
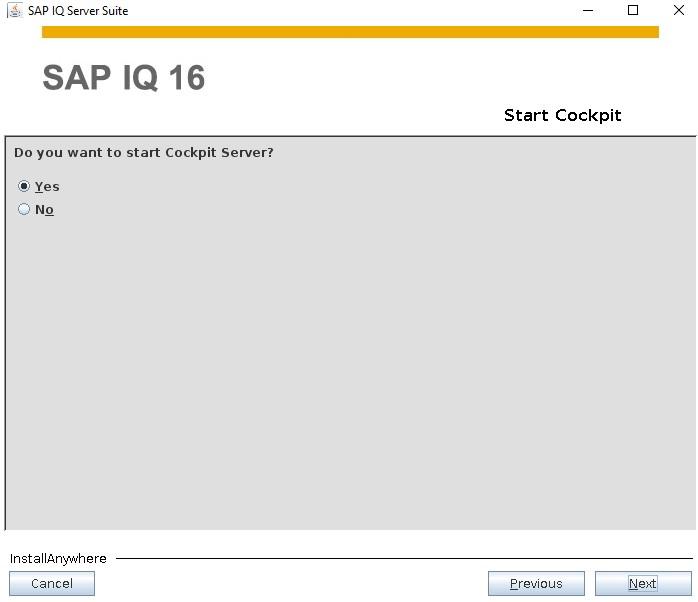
After configuring the ports then we get asked if we want to install Cockpit, I assume we do.
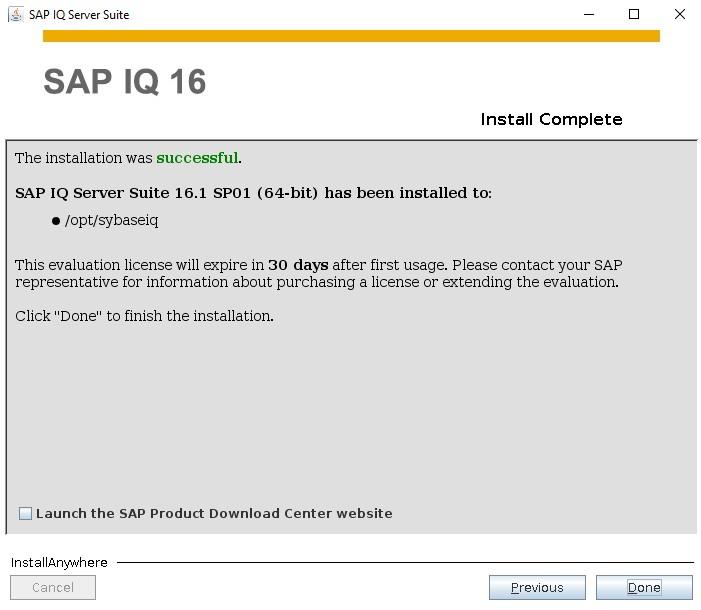
Assuming that everything was configured correctly then you should get a successful message. This concludes the installation of Sybase IQ.
Uninstalling Sybase IQ
If you want to uninstall Sybase IQ then you can use the uninstaller that get installed. This is found in <Sybase Path>/sybuninstall/IQSuite e.g. /opt/sybaseiq/sybuninstall/IQSuite and is called “uninstall”, run it as follows:
- /opt/sybaseiq/sybuninstall/IQSuite/uninstall
Again, If X-Forwarding is correctly configured then you will get a GUI uninstaller, if not then you will once again get an interactive CLI.
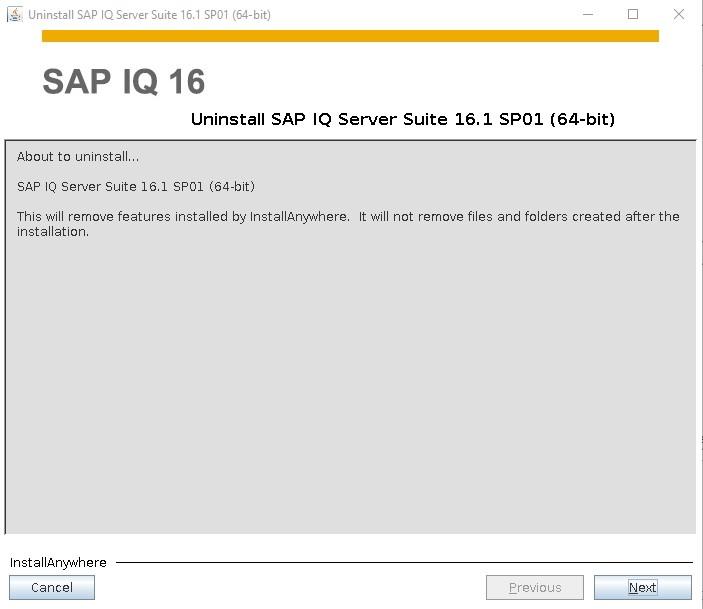
If we want to uninstall, then select Next.
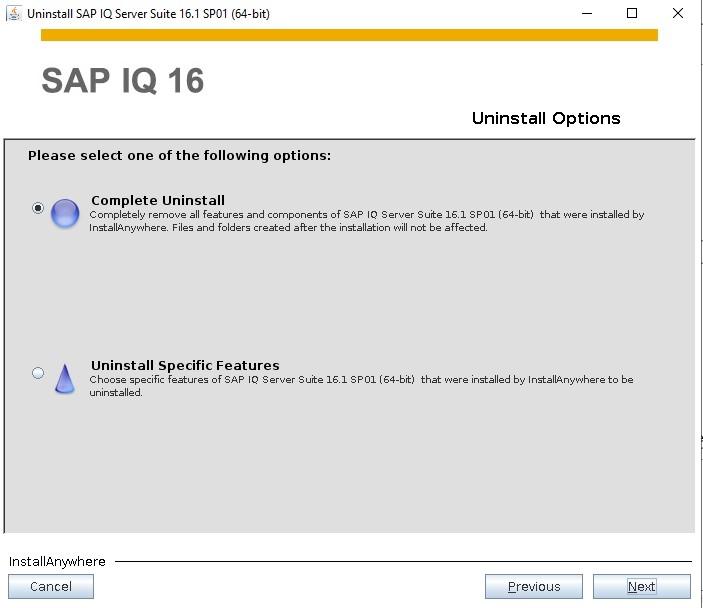
You can choose to remove just some features or in most cases I’d imagine you would want to perform a complete uninstall.
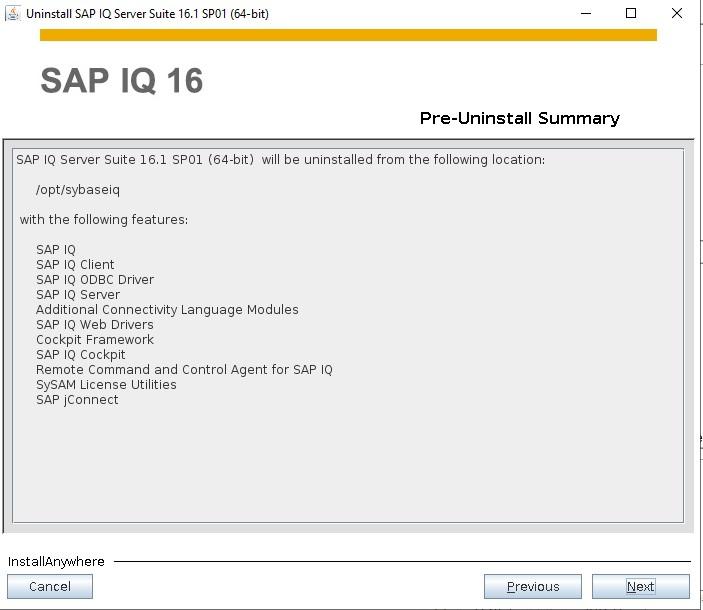
The uninstaller lets us know what it’s going to remove.
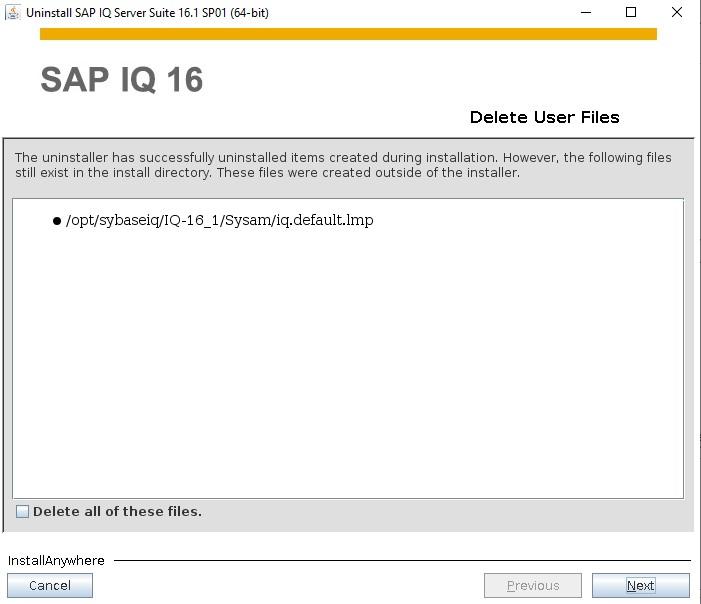
I selected to remove these user installed files too, because I wanted all the contents or /opt/sybaseiq removed.
Step 7: Configuring the demo database
Once you have installed Sybase IQ you will most likely want to configure the demo database so that we can use it with SIOS Lifekeeper.
Ensure that your Database Server has a correct entry in /etc/hosts, in my case I added a VIP to my system and then created an entry in /etc/hosts using the hostname IMA-SYBASE.
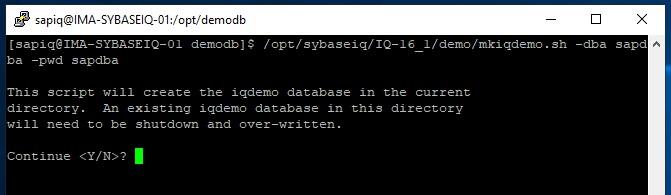
To install the demo, you need a location to install the database into e.g. /opt/demodb. You need to create this location and make sure it’s owned by the user who installed Sybase IQ. Change directory to that location e.g. “cd /opt/demodb”.
Run script to install the demo db; you need to pass a dba name and a dba password, “/opt/sybaseiq/IQ-16_1/demo/mkiqdemo.sh -dba sapdba -pwd sapdba”.
During the demo db installation, IQ is started and a database listener is started. You can use dbisql to test connectivity.
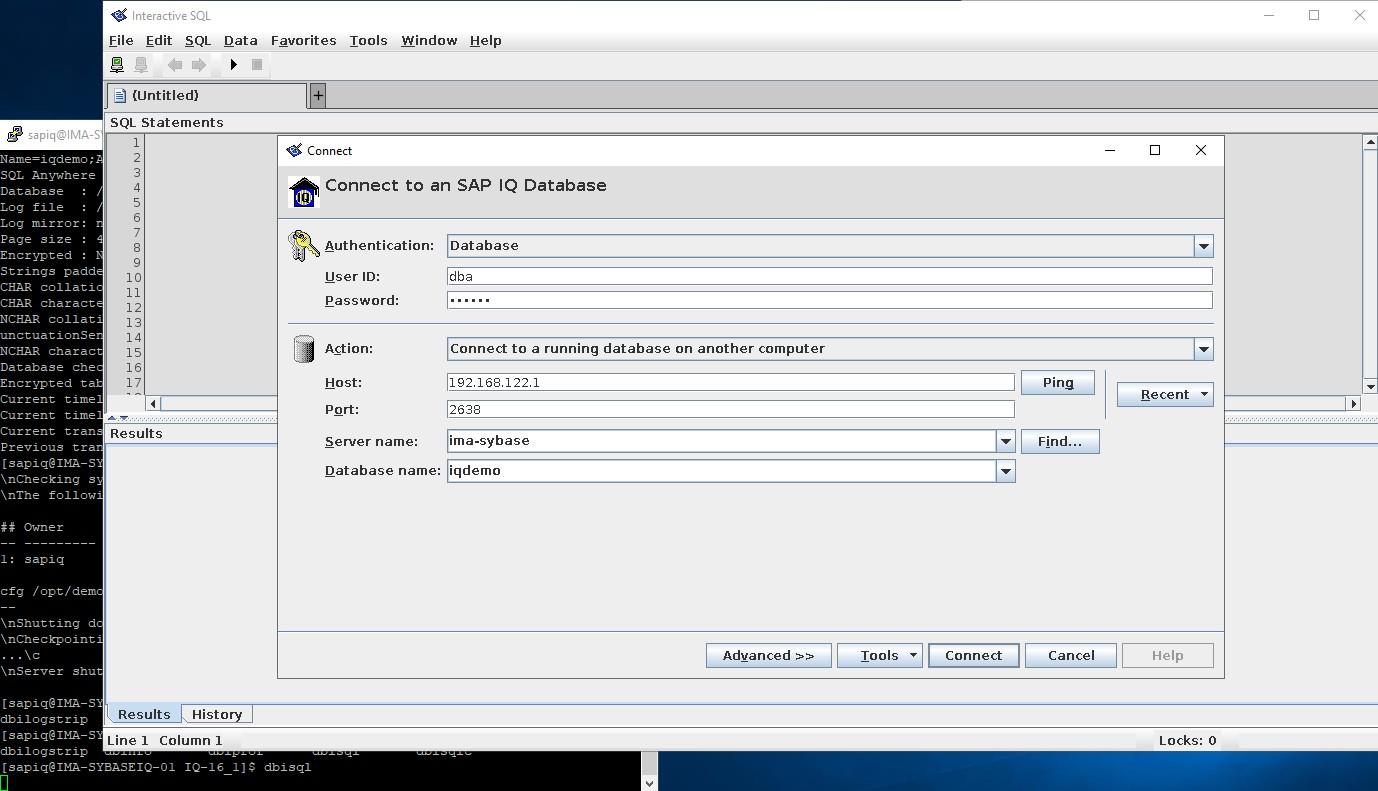
You can use Tools->Test Connection to make sure that you have the right connection details.

Once you successfully connect then you are ready to use SybaseIQ and your database.
If you need assistance with installing Sybase IQ or integrating it with SIOS Lifekeeper, feel free to reach out to our experts at SIOS for guidance.