Introduction
As a developer tasked with creating a POC for a business critical application that requires a highly available (HA) instance of Oracle I need to set up an Oracle EC2 HA cluster in AWS EC2. Where do you start? If you are like most of us you will spend endless hours googling your next task, reading articles, installation guides, documentation and questions on stack overflow. You will find lots of almost right answers, but they never quite fit your version or environment. Worse you go down a rabbit hole and end up wasting days building an environment that will not work.
I am going to structure a series of blogs that focus on setting up HA environments for developing Proof of Concepts using the various SIOS HA solutions like: DataKeeper, LifeKeeper, and SIOS Protection Suite. If you have an immediate need that I have not yet covered, let me know, and I will move your configuration up in my backlog.
Thank you for reading this. I hope it makes your life easier. I have a list of tasks below that you can just run through if you already are familiar with how to accomplish those tasks. Then below is a step-by-step guide for performing each task.
AWS HA Oracle database SIOS Protection Suite for Linux
- Launch 2 instances of Oracle on Linux
- Get Xwindows working
- Connect to instance and mount additional disk
- Install AWS cli kit
- Configure Security/Access
- Create route entry for the virtual IP
- Disable Source/Destination Check for ENI’s
- Edit /etc/hosts
- Configure the Listener with the VIP hostname
- Disable SELinux
- Install SIOS Protection Suite for Linux
- Start LifeKeeper
- Connect to second server
- Build communication paths
- Create a DataKeeper resource
- Create Hierarchy with Virtual IP resource
- Create an Oracle listener resource
- Create Hierarchy with Oracle Database
- Create Hierarchy with EC2
- Change Shutdown Behavior
- Test Failover
1. Launch 2 instances of Oracle on Linux
In this first blog we are going to set up a HA environment in AWS for an Oracle Cluster using SIOS LifeKeeper for Linux. This means getting all the prerequisites out of the way. I will be using the aws-marketplace/Oracle Database 19.8.0 Enterprise Edition on Oracle Linux 8 AMI. These change frequently and it can be difficult to find the correct one that will fit your needs. This AMI was my 3rd attempt because installing anything, especially something like Oracle, in the cloud is very difficult due to the repositories, licensing, enrollment and security issues. This AMI actually works because Oracle is already installed on the image. Make sure the OS version and the Oracle DB version are supported by SIOS. That can be checked here.
My instance has:
- Single VPC
- Single Region
- Different Availability Zones for each server
- Additional drive(s) for database storage
- 2 Network interfaces for each instance in different subnets
- Create 2 Elastic IP addresses and attach one to each server
I am attaching an additional disk to the instance for the database and an additional NIC for redundant communication paths. Make sure the two NICs are on different subnets. This will also mean you will have to manually create and assign Elastic IP addresses in order to connect to the instances.
Connect to the instance and mount the additional disk. I am using Putty and Xming to connect with my instance. If using Xming make sure to run Xlaunch prior to trying to make a connection.
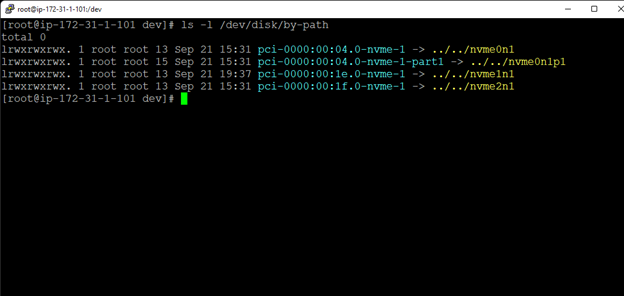
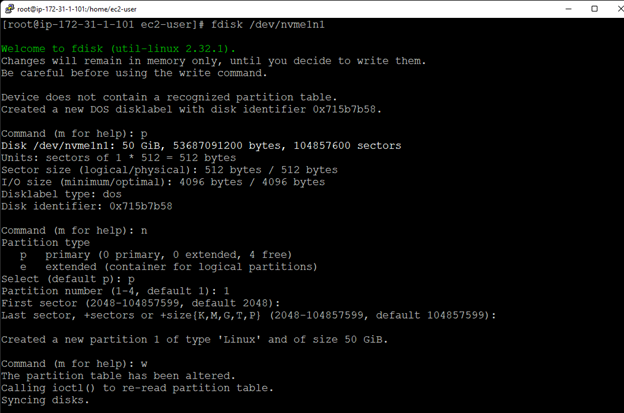
After launching the instance, you will need to partition the new disk. It is easiest to find by [ ls /dev/disk/by-path ]:

Now you need to partition the disk with fdisk:

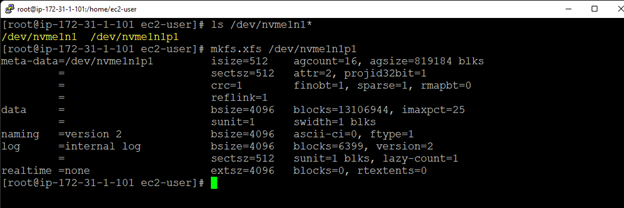
Next create the file system on the new partition with mkfs.xfs:
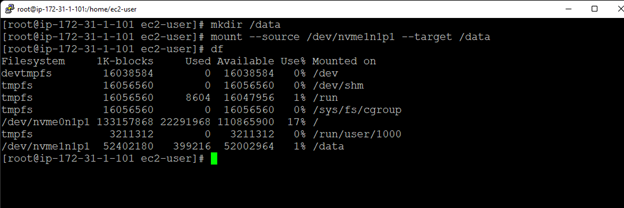
We will now mount the file system with mount:
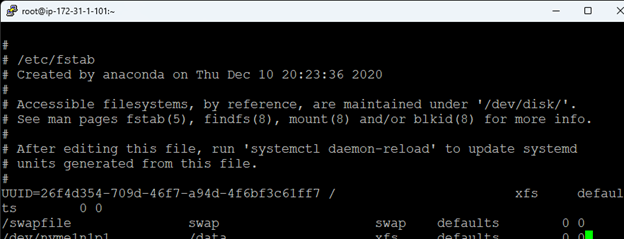
Finally we will add the entry to automatically mount the disk in fstab:

It is important to note that you do not need to run the install for Oracle. The AMI has done that and created a database for you. I deleted the database that is pre-configured with this AMI and created a new one on the /data disk using DBCA. I started up the database and I created a schema and added data using SQLPLUS. This all requires that you get Xwindows working.
2. Get Xwindows working
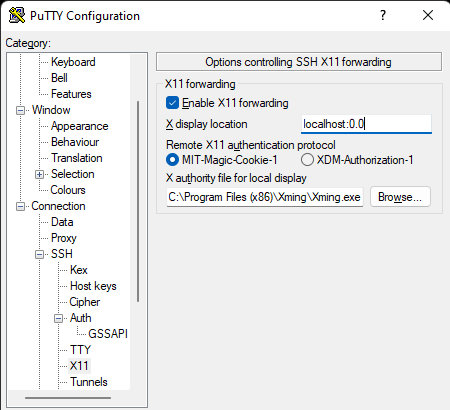
Xdisplay using Putty can be setup using Xming for Windows. Install Xming first. Then ensure that you enable X11 forwarding, enter localhost:0.0 in the x display location and the path and xming.exe executable in the x authority file for local display:
That takes care of the Windows side, but you still need to fix the Linux side. First edit /etc/ssh/sshd_config and uncomment “X11Forwarding yes”. Finding and adding the correct key to Xauthority is next. You may have to start a new session if you have done any user switching. After logging in as ec2-user run xauth list which will provide you the hex key you need to add to your Xauthority file. Switch to the oracle user: su – oracle. Then run xauth add $DISPLAY . <hexkey copied from xauth list> . This stores the information into the /home/oracle/.Xauthority file. Exit back to ec2-user.
3. Connect to instance and mount additional disk
I am using Putty and Xming to connect with my instance. If using Xming make sure to run Xlaunch prior to trying to make a connection.
After launching the instance you will need to partition the new disk. It is easiest to find by [ ls /dev/disk/by-path ]:
Now you need to partition the disk with fdisk:
Next we create the file system on the new partition with mkfs.xfs:

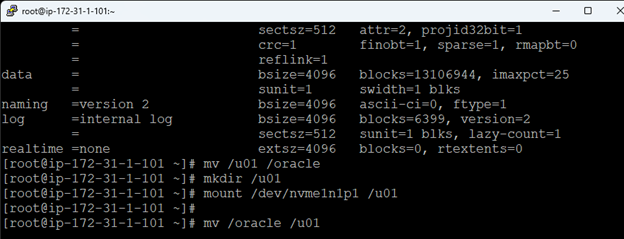
At this point we want to rename the /u01 to the /oracle directory so that we can mount the new filesystem on /u01 which is where Oracle resides on our server built with the AMI.
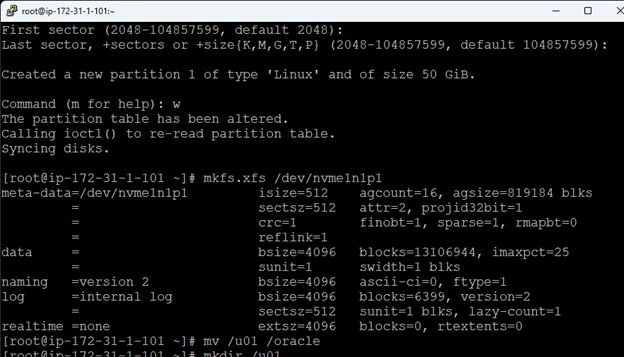
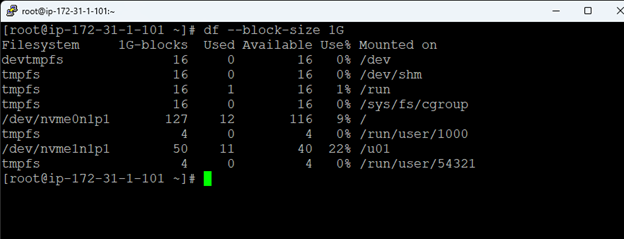
Create the mount point with mkdir /u01 and mount the volume with mount. Move the files to the new disk with mv /oracle /u01. This will take some time because it is approximately 11GB of data.
Finally we will add the entry to automatically mount the disk in fstab:
It is important to note that you do not need to run the install for Oracle. The AMI has done that and created a database for you. I started up the database, created a schema, and added data using SQLPLUS.
4. Install AWS cli kit
We need the awscli kit; so, while we are root download the file with curl “https://awscli.amazonaws.com/awscli-exe-linux-x86_64.zip” -o “awscliv2.zip”

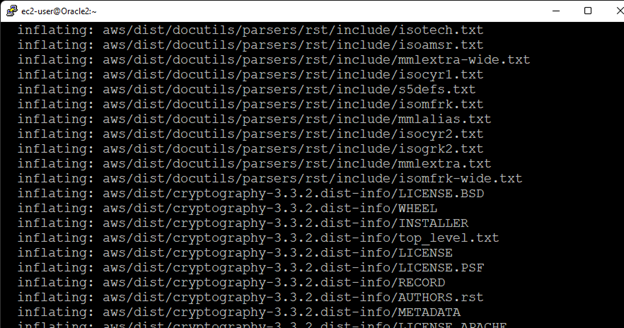
Unzip the file with unzip awscliv2.zip
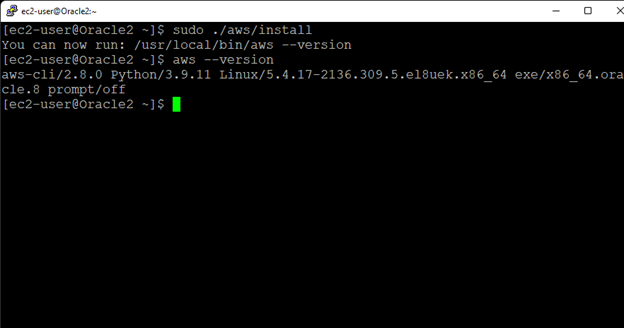
Install the application with sudo ./aws/install
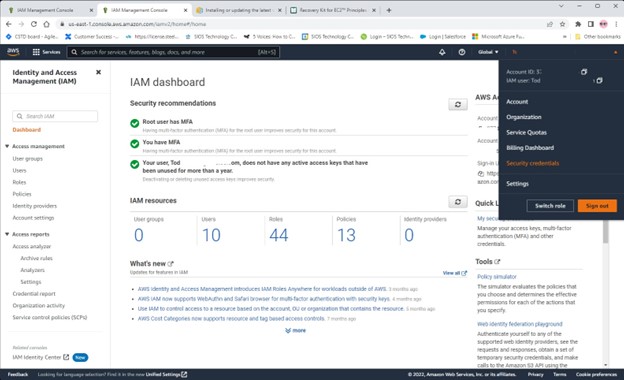
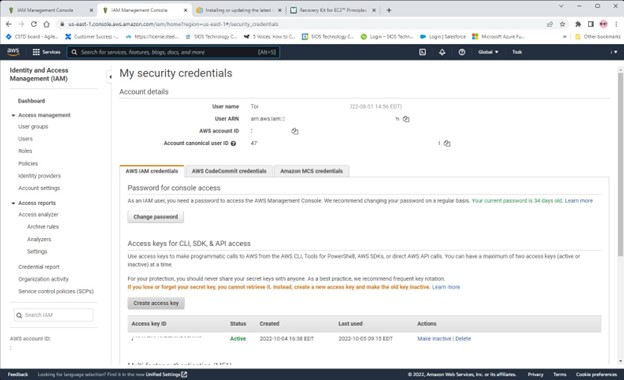
Next setup the Access Key in AWS by clicking on your account on the top right of the console and then select Security Credentials
Click on Create access key:
Then click on Download .csv file:
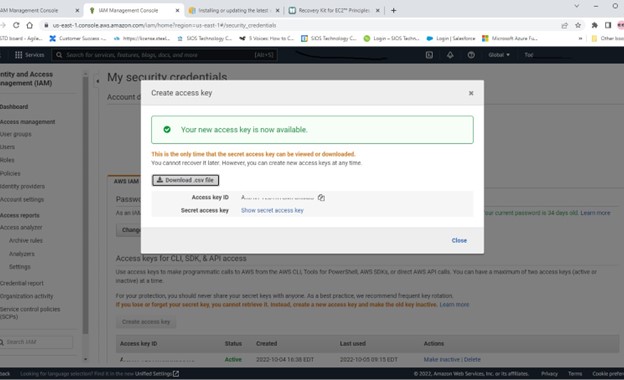
Transfer this file onto your servers and the configure AWS using the Key ID and access key from your csv file with the aws configure command:
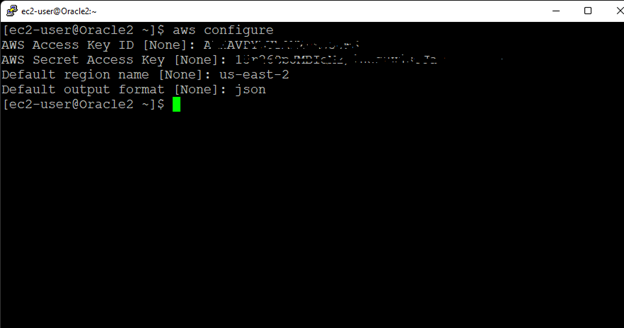
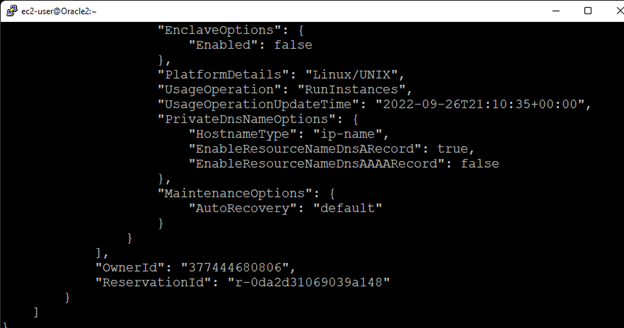
Test that it is working with something like: aws –no-paginate –no-cli-pager ec2 describe-instances
5. Configure Security/Access
First, I added the Oracle user to the root and wheel group giving it pseudo privileges (Usermod -aG wheel oracle). This will make life easy by making the Oracle account the lkadmin account. I downloaded the sps.img and license files onto both servers.
Before installing the software there are a few more prerequisite steps that need to be done. First configure the security group for the servers so that they can communicate by opening up TCP ports 5900-59010. Open TCP ports 81 and 82 as well. Also make sure that the ports are open for the Virtual IP.

6. Create route entry for the virtual IP
The route table will need to be updated in order for the cluster’s Virtual IP to work. In this multi-subnet cluster configuration, the Virtual IP needs to live outside the range of the CIDR allocated to your VPC. Define a new route that will direct traffic to the cluster’s Virtual IP (172.30.0.101) to the primary cluster node (Oracle1)
From the VPC Dashboard, select Route Tables, click Edit. Add a route for “172.30.0.101/32” with a destination of the primary Elastic Network Interface (ENI) on the primary server:
7. Disable Source/Destination Check for ENI’s
Under the Network Interfaces select each interface one at a time and then Under Actions select change source/dest.
As long as you don’t get an authentication error, it is installed and configured correctly.
Uncheck the Enable box:
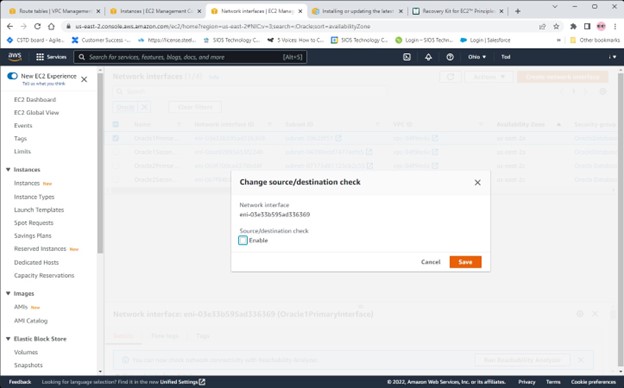
Repeat for all interfaces.
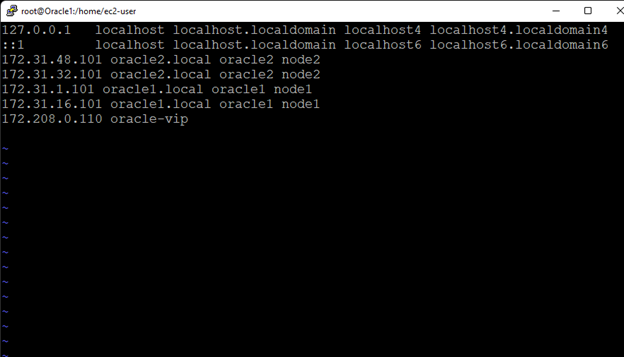
8. Edit /etc/hosts
Unless you already have a DNS server setup, you’ll want to create host file entries on both servers so that they can properly resolve each other by name.
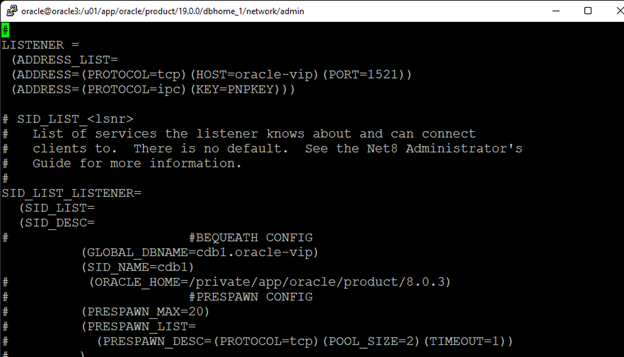
9. Configure the Listener with the VIP hostname
Edit or create the $ORACLE_HOME/network/admin/listener.ora file to point to the oracle-vip:
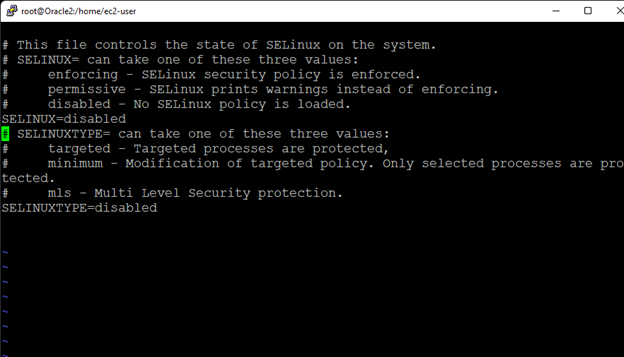
10. Disable SELinux
Edit the /etc/sysconfig/selinux file and set “SELINUX=disabled”
Reboot the server(s). If at this point the server does not come back up, it is possible that you left the SELINUX setting at permissive and set SELINUXTYPE to disabled, which will brick the instance. Just disassociate the volume in AWS from your instance and mount it with the mount -o rw, nouuid {device} {mount directory} command to a new or existing working instance. Edit the /{mount directory]/etc/sysconfig/selinux file and correct the error. Save the file, unmount and disassociate the volume with this instance and re-attach it to the old instance.
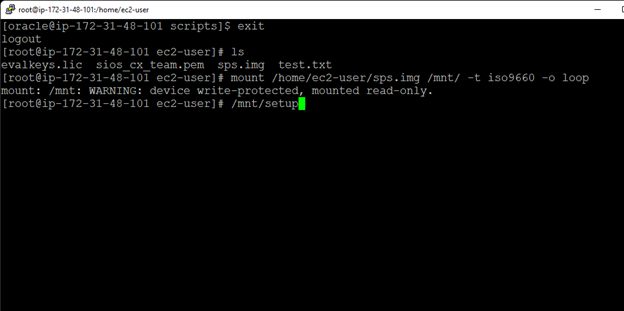
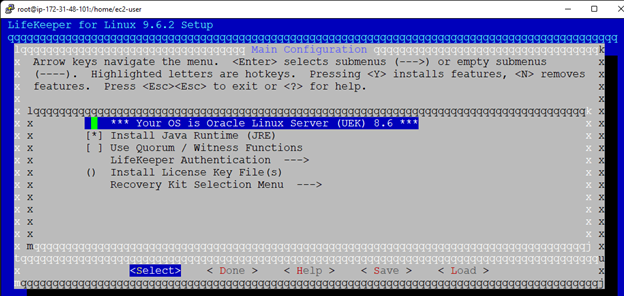
11. Install SIOS Protection Suite for Linux
Next, as root I installed SIOS protection suite by mounting the image file with mount /home/ec2-user/sps.img /mnt/ -t iso9660 -o loop. Run the setup with /mnt/setup:
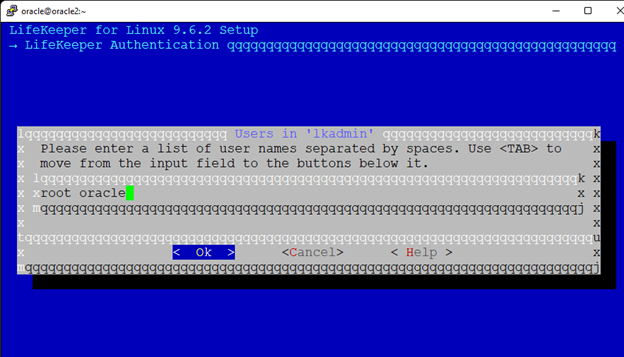
Under LifeKeeper Authentication I scroll down to the lkadmin group, hit enter and add oracle to the ‘lkadmin’ group:
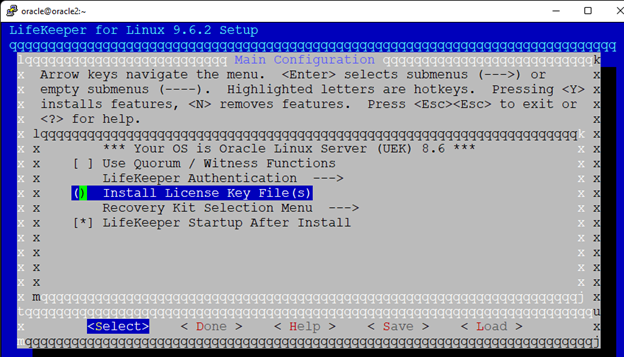
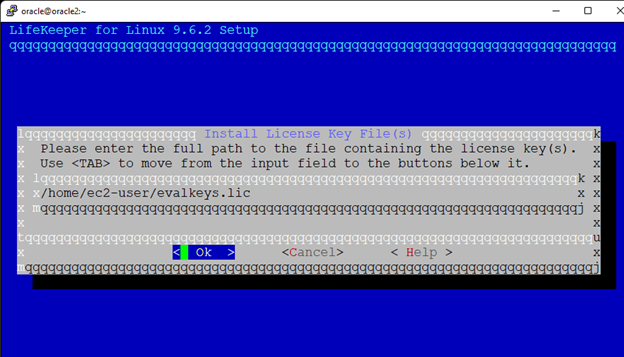
Select OK and then tab to Done and hit enter. Next Scroll to Install License Key File and hit enter:
From here type in the location and name of your license file:
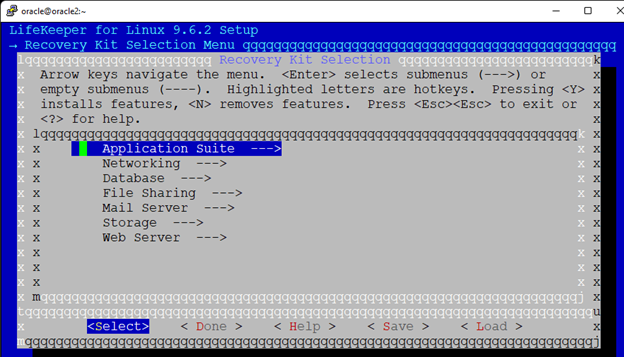
Next I select the Recovery Kit Selection Menu and hit enter:
Here I select Networking:
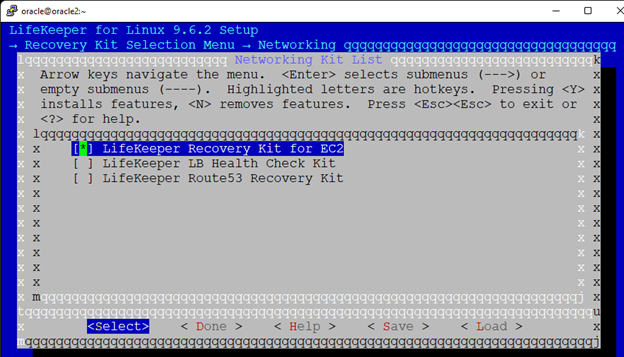
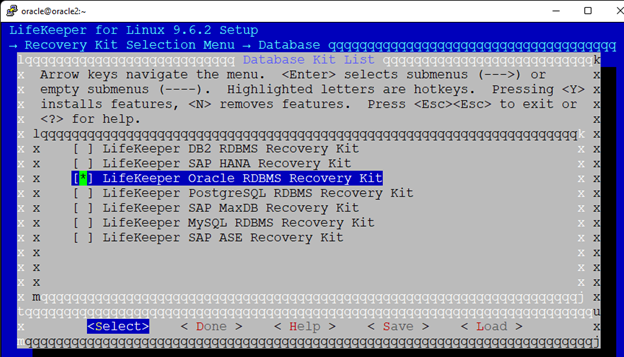
Hit the spacebar to select the LifeKeeper Recovery Kit for EC2. Tab to Done and hit enter. Next I selected the Database menu, scroll down and hit spacebar on LifeKeeper Oracle RDBMS Recovery Kit:
Tab to Done or hit D and scroll down to Storage and hit enter. Next I hit the spacebar and select DataKeeper for Linux:
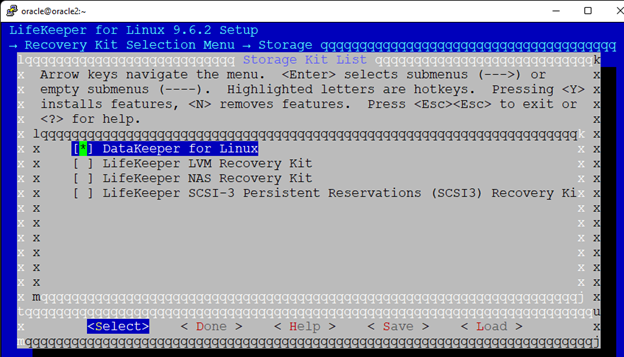
Tab to Done and hit enter or hit d backing out to the Recovery Kit Selection and then tab to Done or hit D to back out the Main Configuration menu:
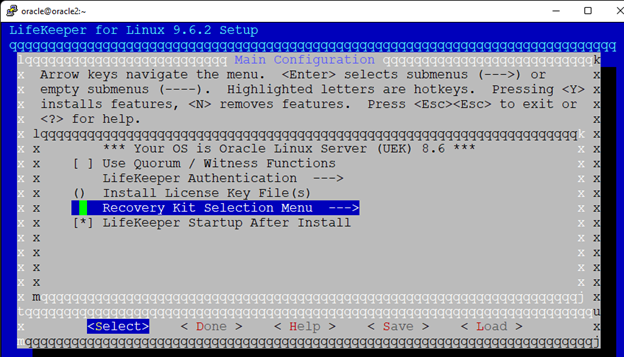
Make sure LifeKeeper Startup After Install is selected and then finally one last tab to done or hit d and we get the Install confirmation screen:
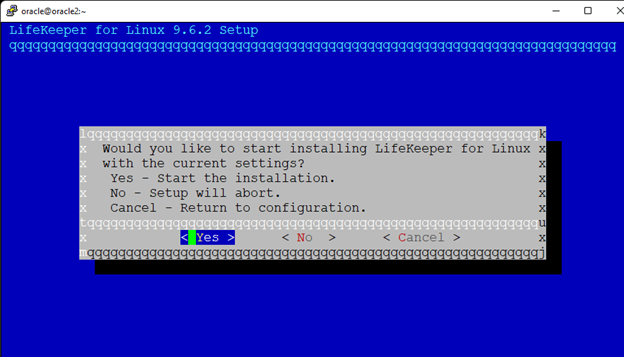
Here hit enter or y and the install will start.
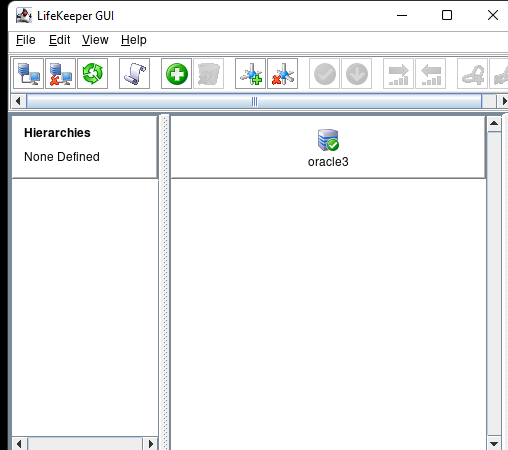
12. Start LifeKeeper
Startup the LifeKeeper GUI with /opt/LifeKeeper/bin/lkGUIapp if it fails it is likely because you don’t have the magic-number for the account you logged in the .Xauthority file. I logged in as oracle and then did an sudo -i to get to root. So, if my gui doesn’t load I will copy the /home/oracle/.Xauthority file to /root :
Here I login as oracle:
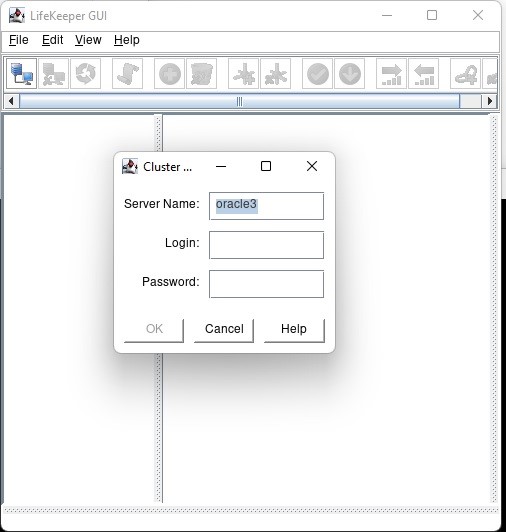
13. Connect to second server
And then click on the Cluster Connect button
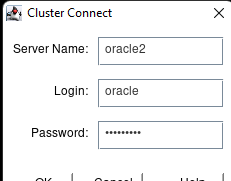
Login as oracle:

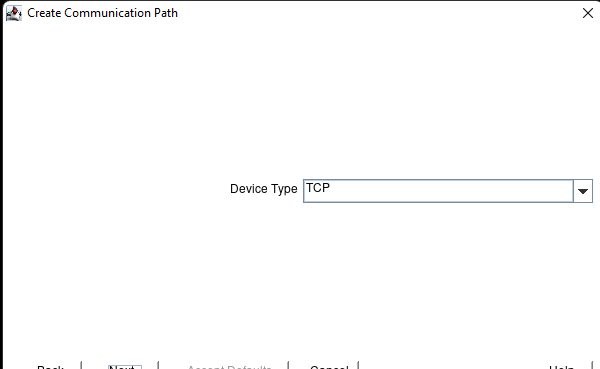
14. Build communication paths
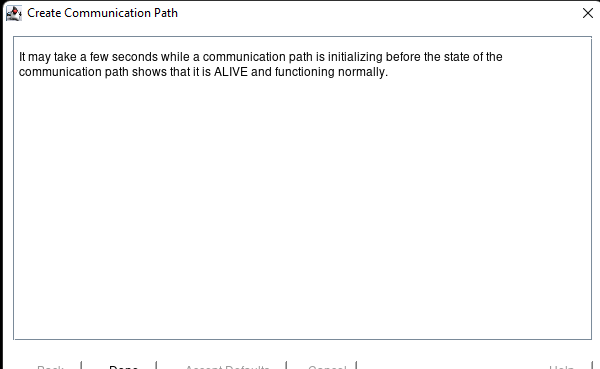
Click on the Create Comm Path button :

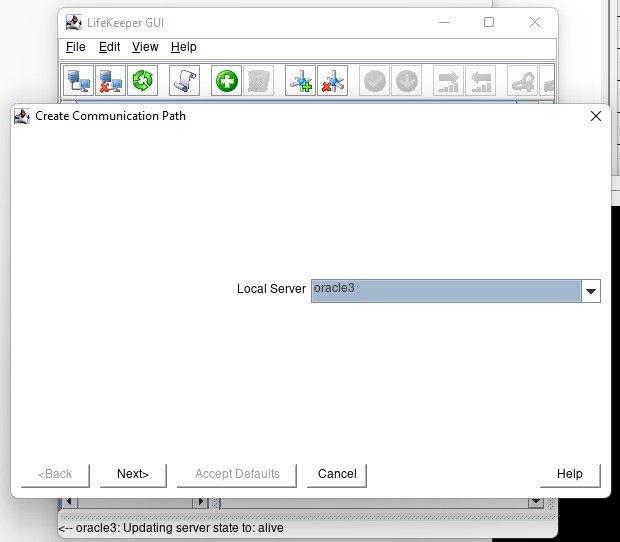
If there is a failure, make sure firewall and iptables are disabled. Hit next:
Hit next:
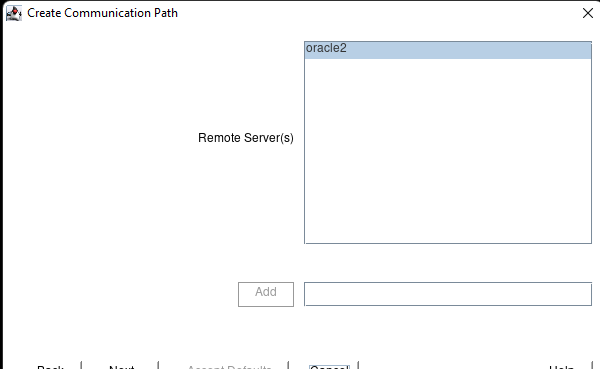
Pick your first IP address and hit next:
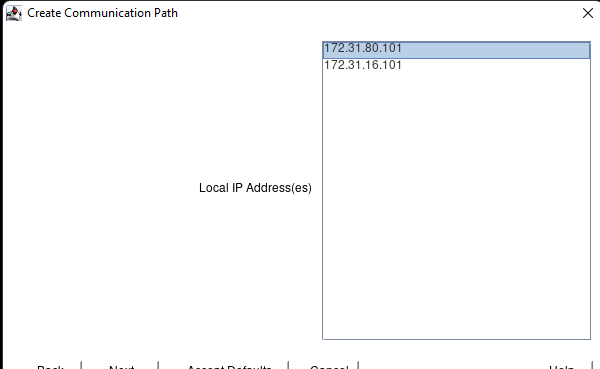
Select the remote IP:

Hit next:
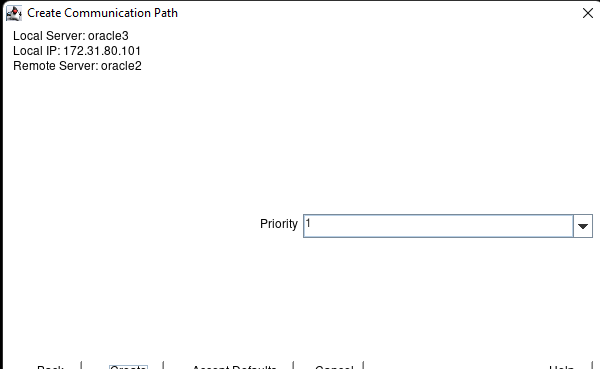
Hit Create:
Hit next:
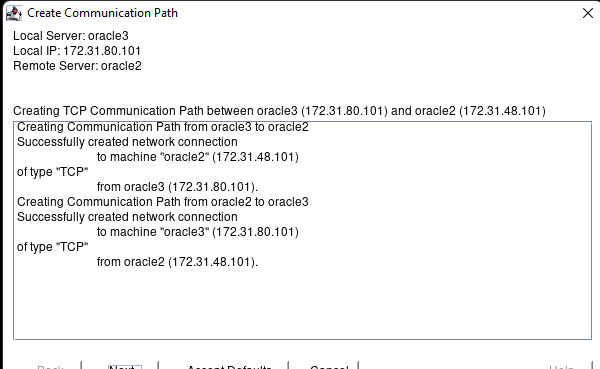
Now hit done:
Next we need to create the second comm path by repeating step 14 with the secondary addresses.
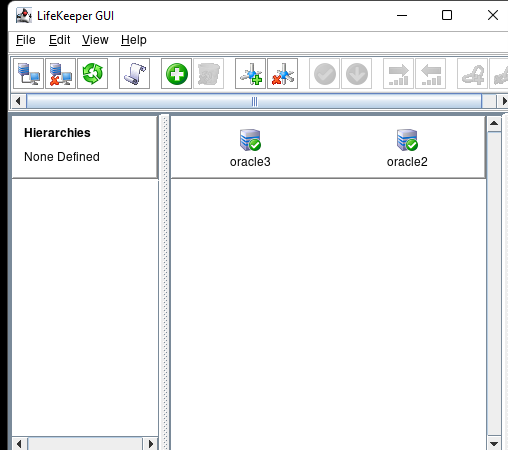
Once two paths have been successfully established the servers should go green.
15. Create a DataKeeper resource
Click on the Create Resource Hierarchies button:
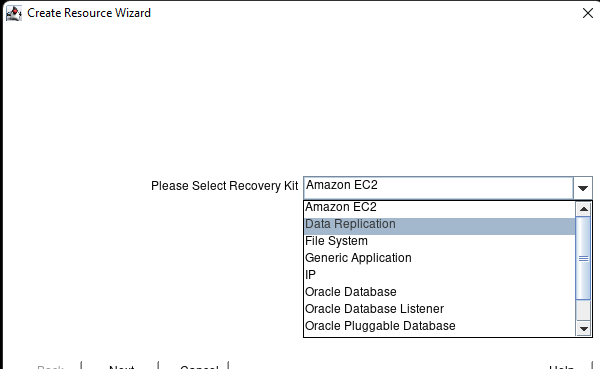
Select Data Replication and hit Next:

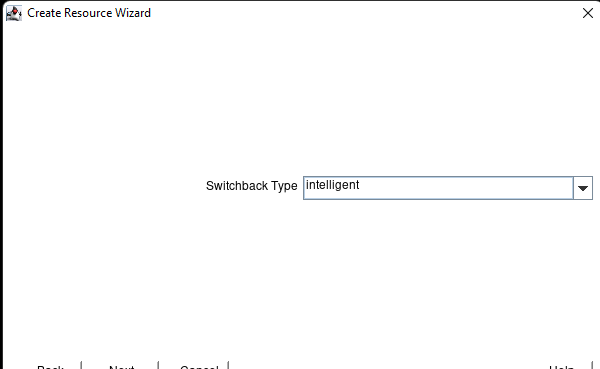
Hit next (Intelligent means that after a failover you need to manually fail back):
Hit next:

Select your primary server and hit next:
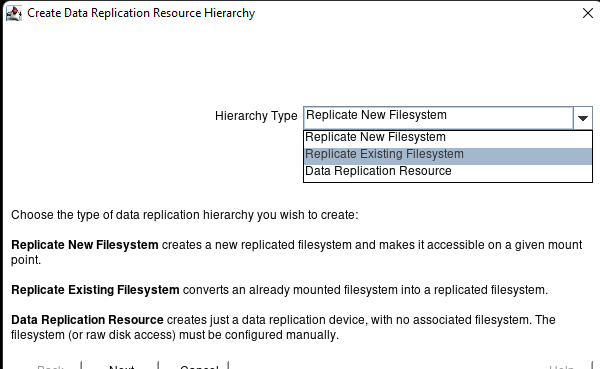
Select Replicate Existing Filesystem and hit next:
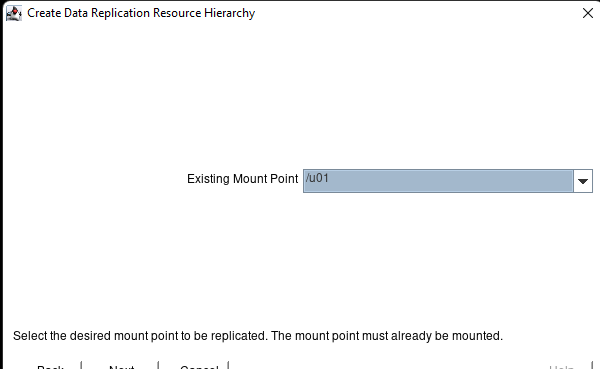
Select the Existing mount point and hit next:
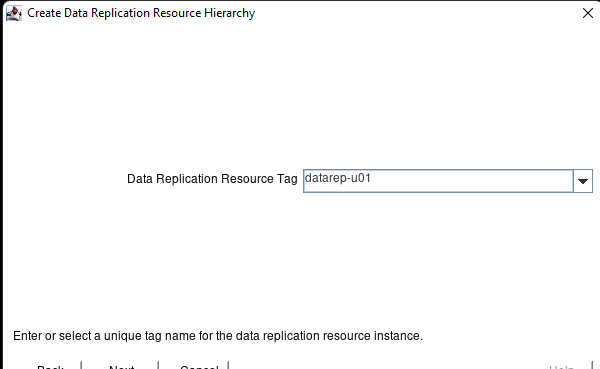
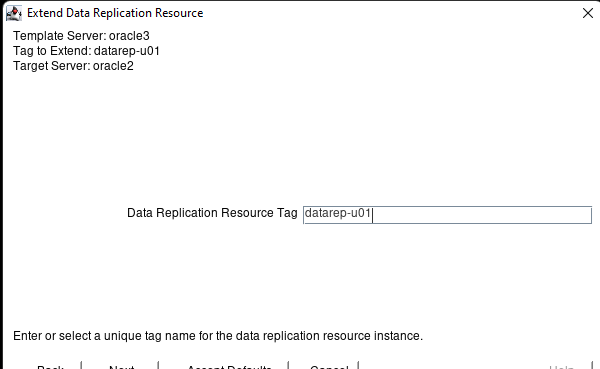
Create a Data Replication Resource Tag and hit next:
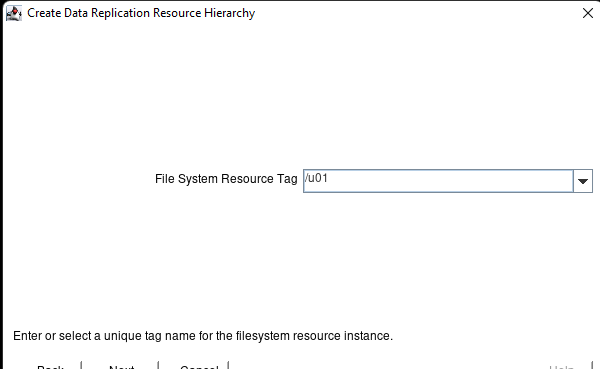
Select a File System Resource Tag and hit next:[1]
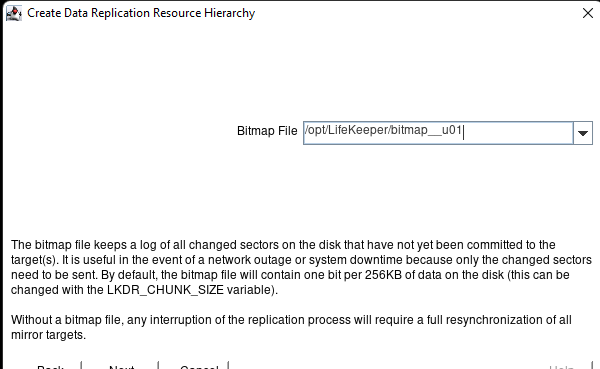
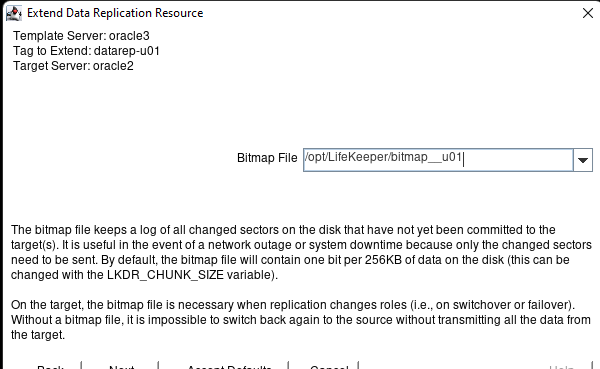
For optimal performance the bitmap file should be placed on an ephemeral volume. For testing purposes the bitmap can be placed on the OS disk as shown above. Select the bitmap file location and hit next:
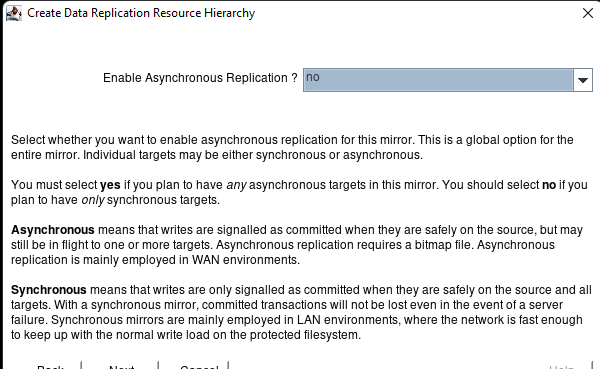
Select no for Enable Asynchronous Replication and hit next:
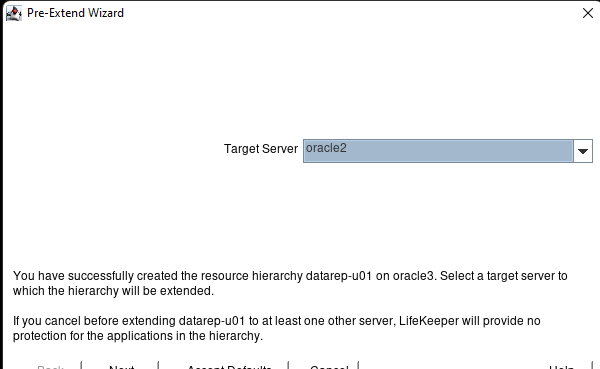
Select the Target Server and hit next:

Select Switchback Type and hit next:
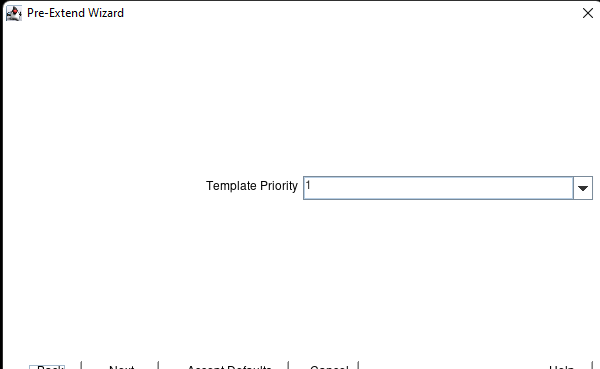
Select Template Priority and hit next:
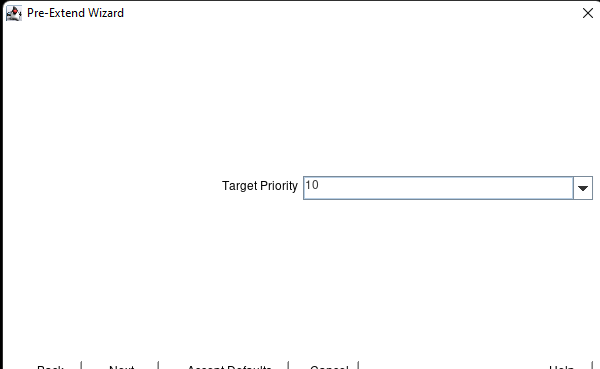
Select Target Priority and hit next:
HIt next:
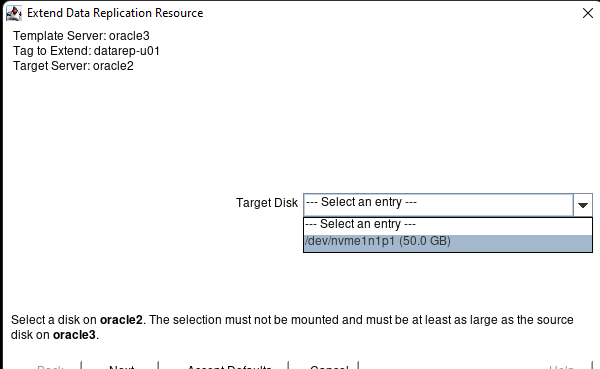
Select the Target Disk and hit Next:
Hit next:
Hit next:
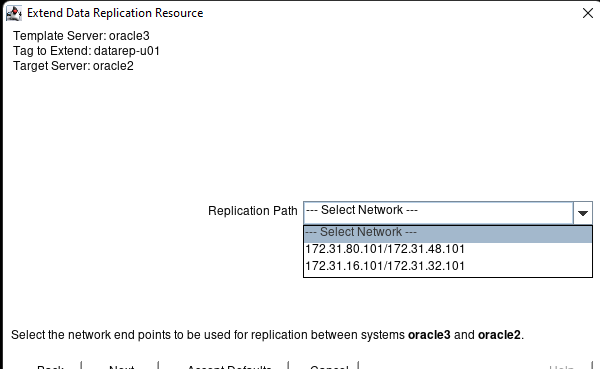
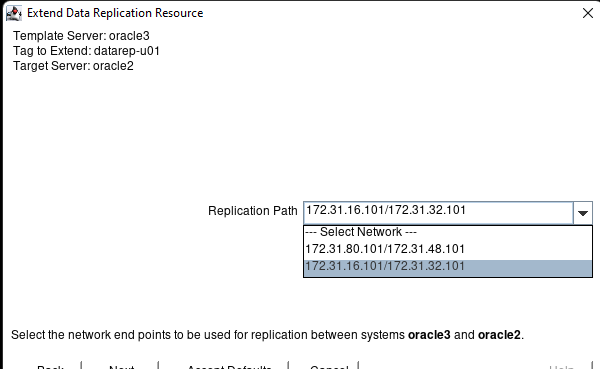
Select which network endpoints you want to use for replication and hit next:
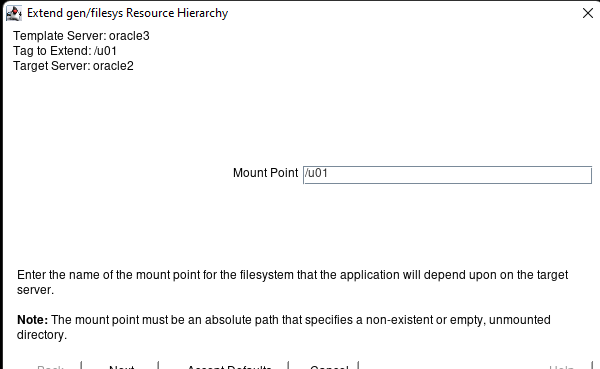
Select the mount point and hit next:
Select resource tag and hit next:
Hit Finish:
Hit Done:
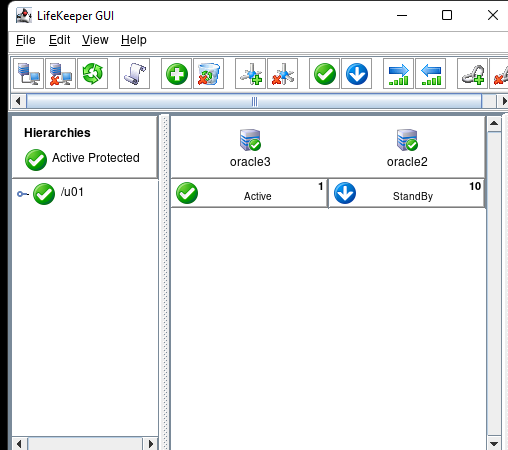
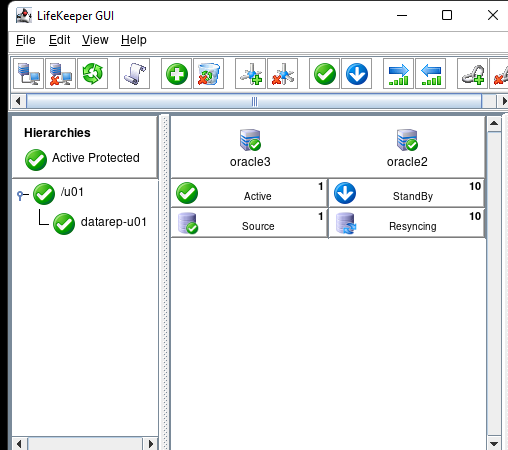
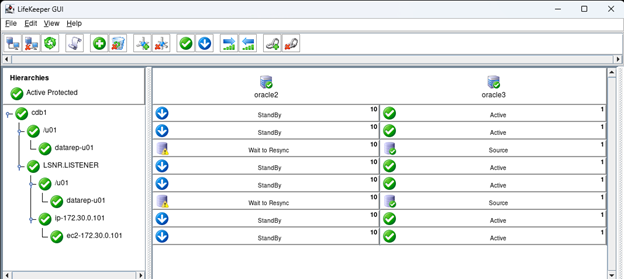
If you click on the /u01 you will see the volume syncing:
16. Create Hierarchy with Virtual IP resource
Click on the create resource button:

Select IP and hit next:
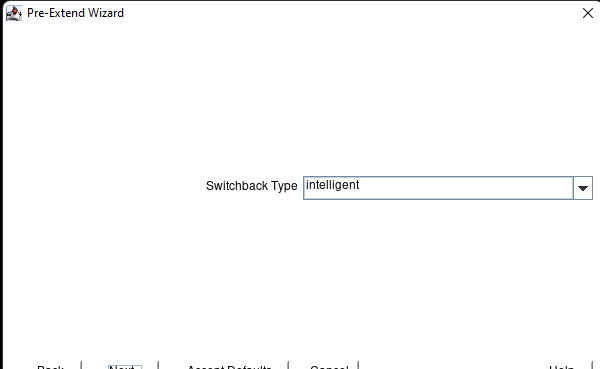
Select Switchback Type and hit next:

Select the Primary server and hit next:

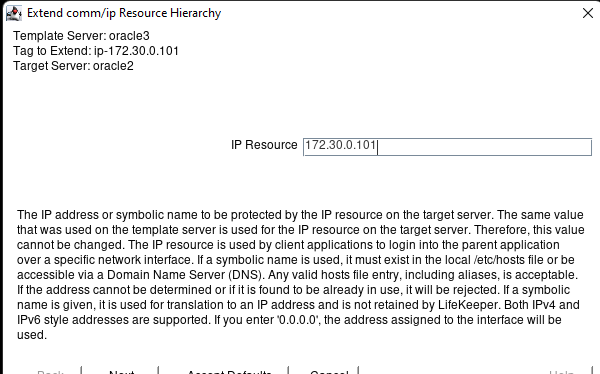
Enter the Virtual IP address from step 6 and hit next:
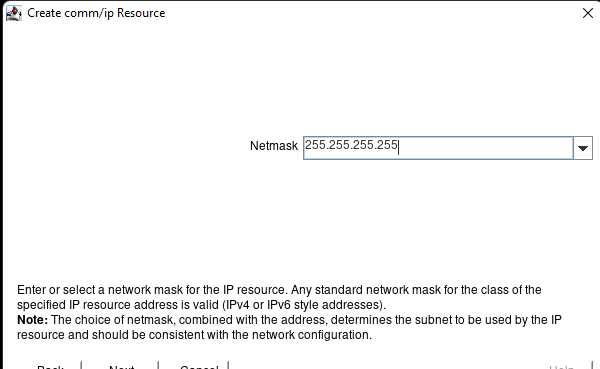
Enter the subnet mask for the VIP and hit Next:
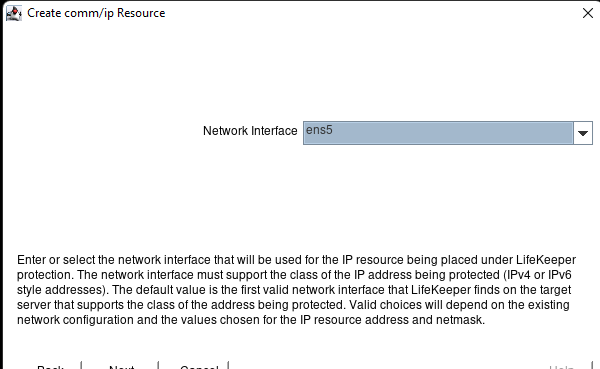
Enter the network interface and hit next
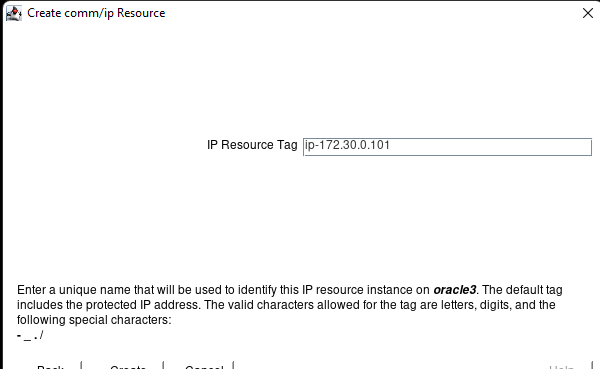
Enter the resource tag and hit next:
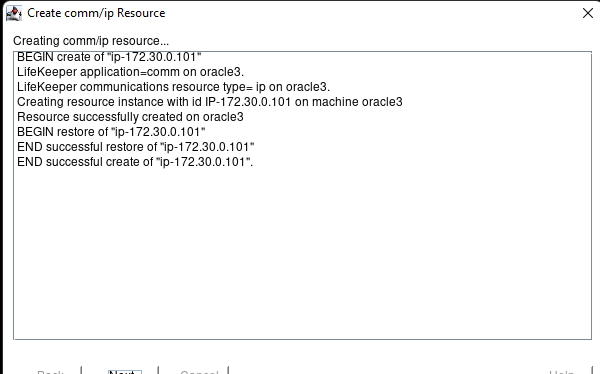
After successful creation hit next:
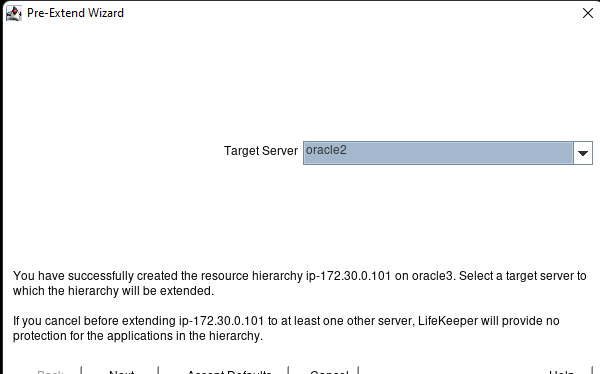
Select the Target Server and hit next:
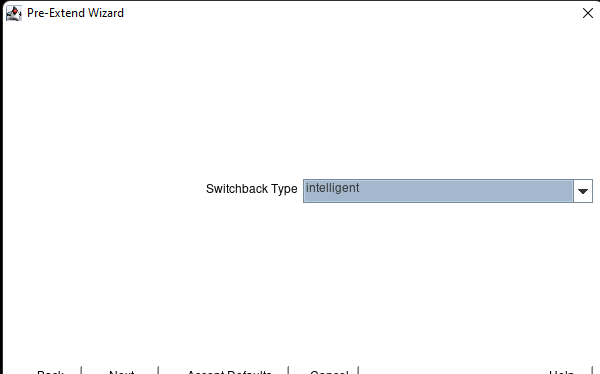
Select switchback type and hit next:

Select priority and hit next:

Select priority and hit next:
Upon completion hit next:
Hit next:
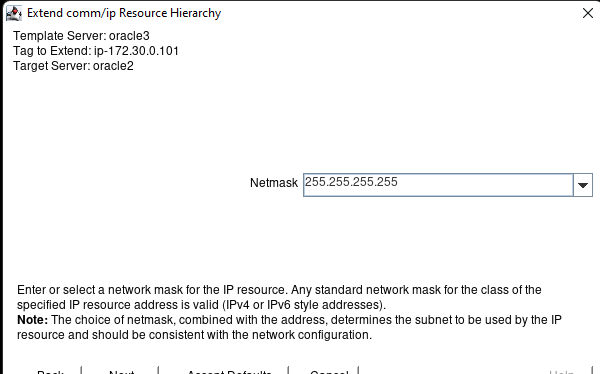
Select the appropriate netmask and hit next:
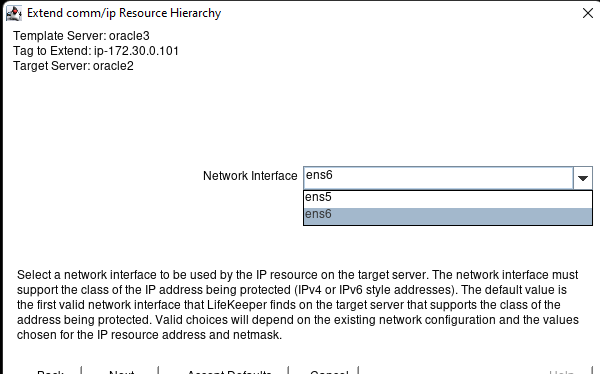
Select the interface and hit next:
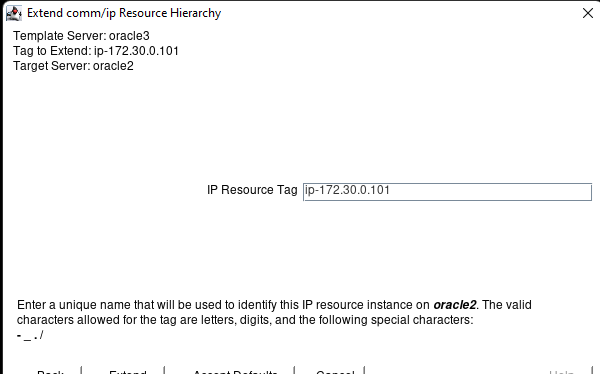
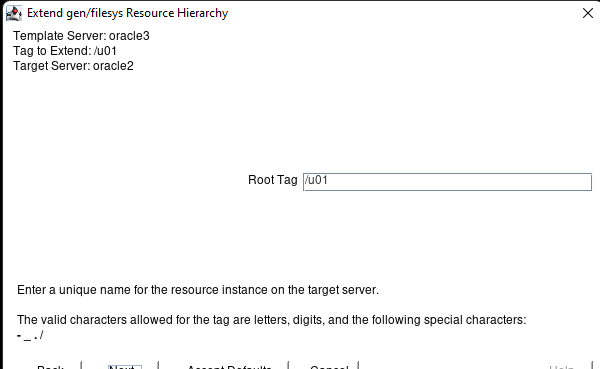
Select the resource tag and hit extend:
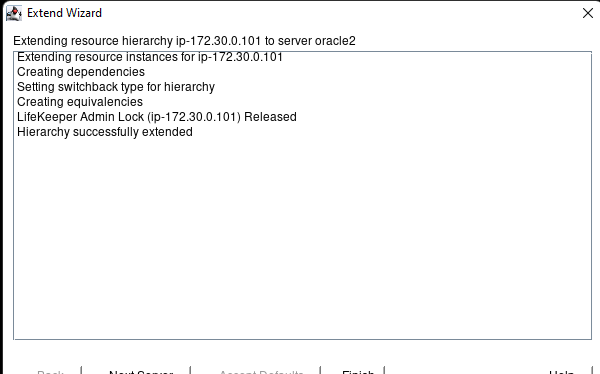
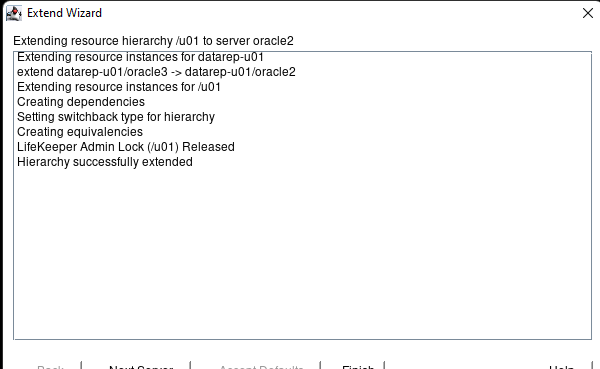
Hit finish upon successful completion:

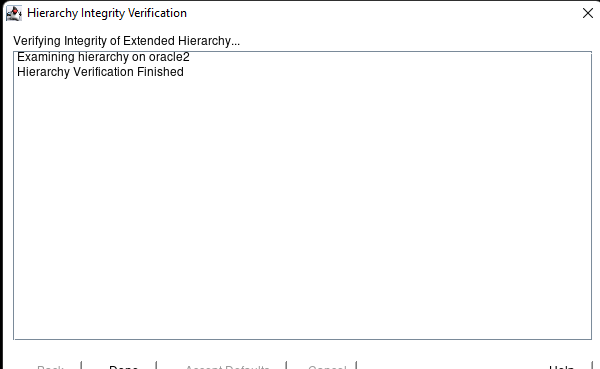
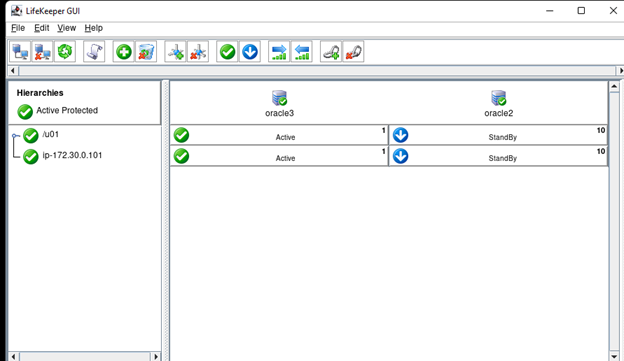
Hit done after verification.
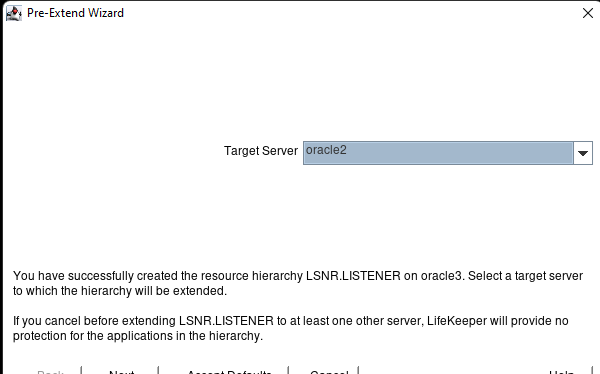
17. Create an Oracle Listener resource
Make sure the database and listener are running prior to attempting to configure these resources in LifeKeeper. Click on the create resource button:
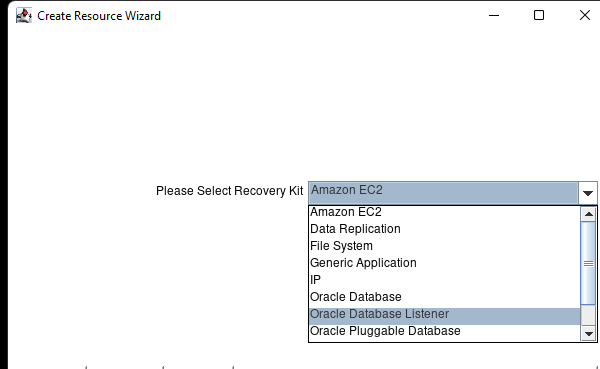
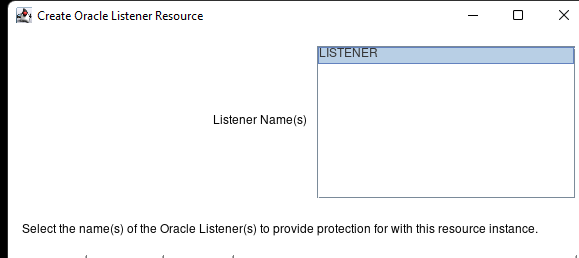
Select Oracle Database Listener and hit next:

Select the primary server and hit next:
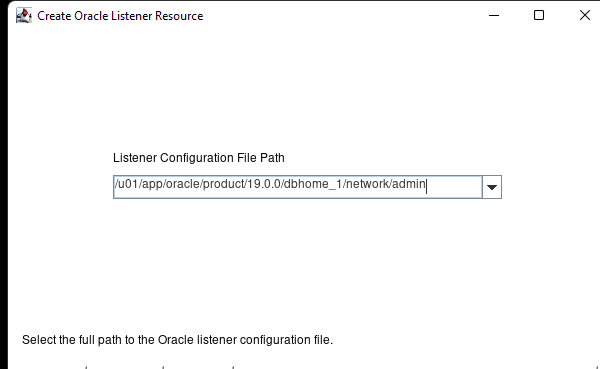
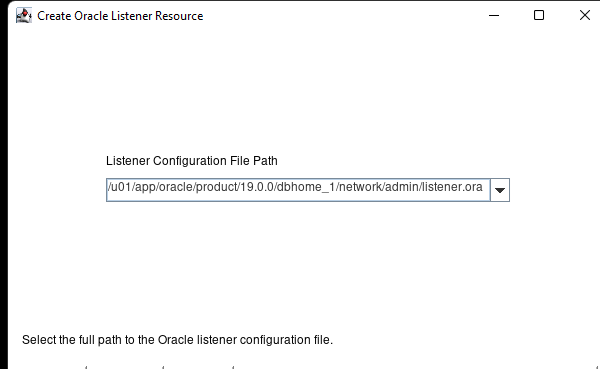
Enter the Listener configuration file path and filename and hit next:
Hit next:
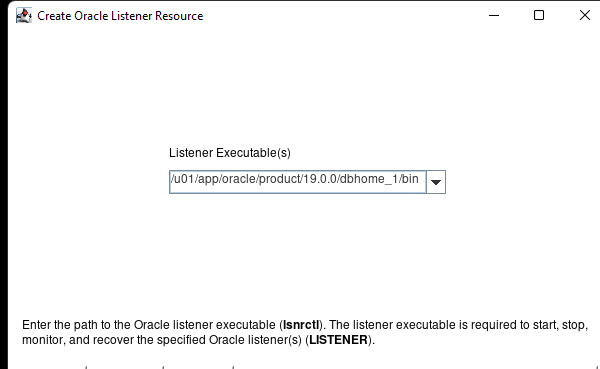
Enter the path for the Listener Executables and hit next:
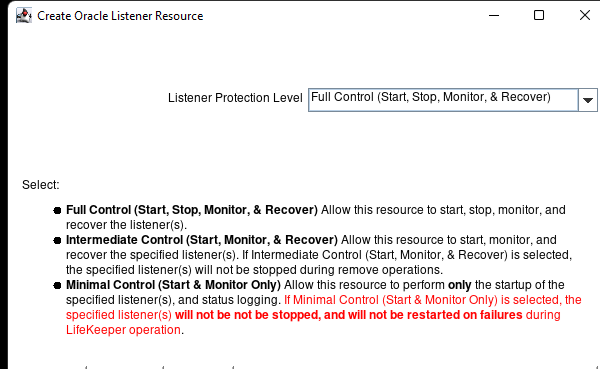
Select protection level and hit next:
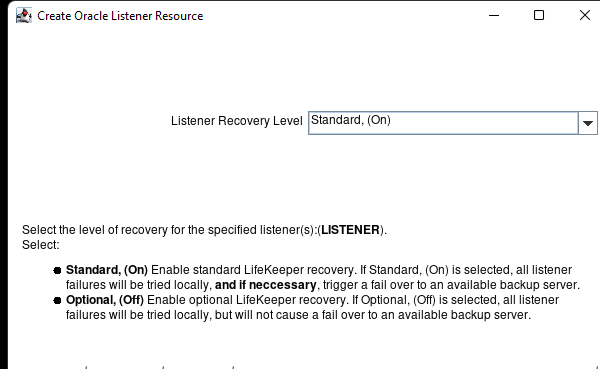
Select recovery level and hit next:

Select the IP Address associated with the Listener if required and hit next:
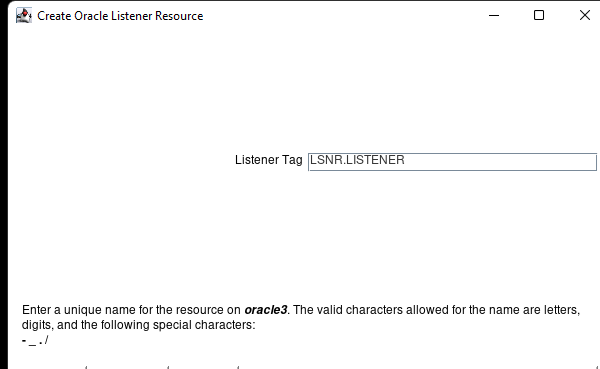
Enter the listener tag name and hit Create:
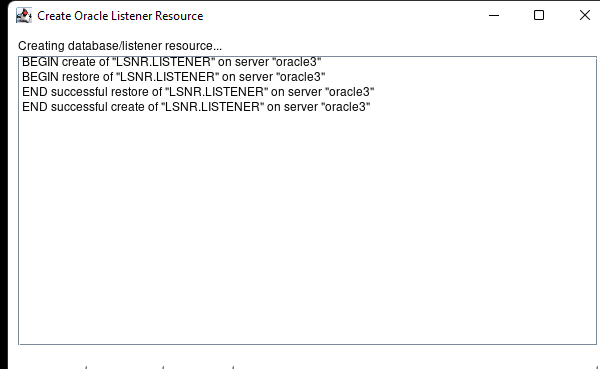
Hit next:
Hit accept defaults to build the resource on your second server:
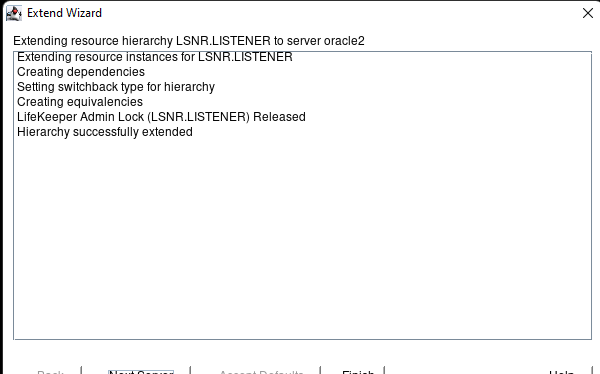
Click on finish:

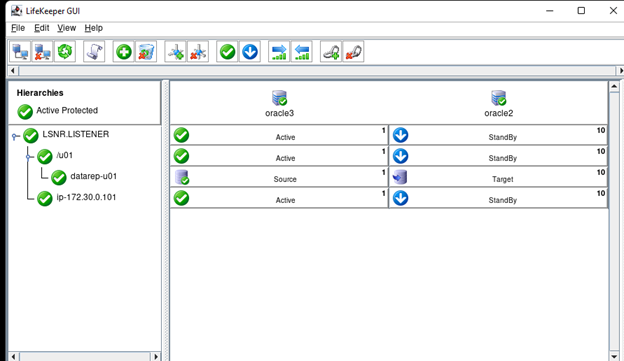
Click on Done and expand the LSNR and /u01:
18. Create Hierarchy with Oracle Database
Click on the Create Resource Hierarchy button :
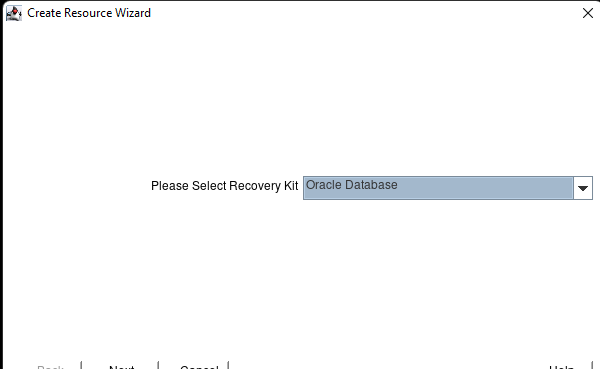
Select Oracle Database and hit Next:
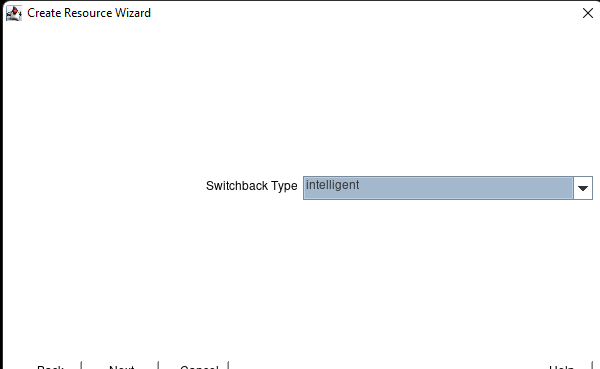
Select Switchback type and hit next:
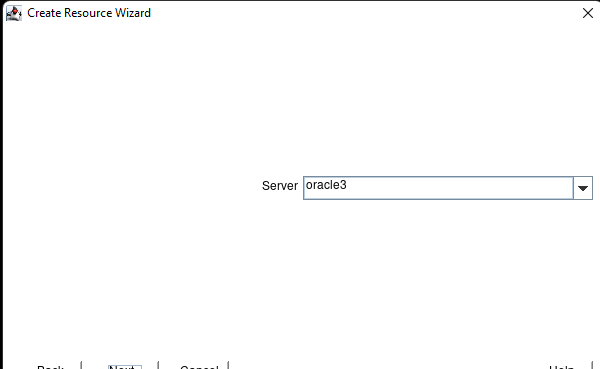
Select Server and hit next:

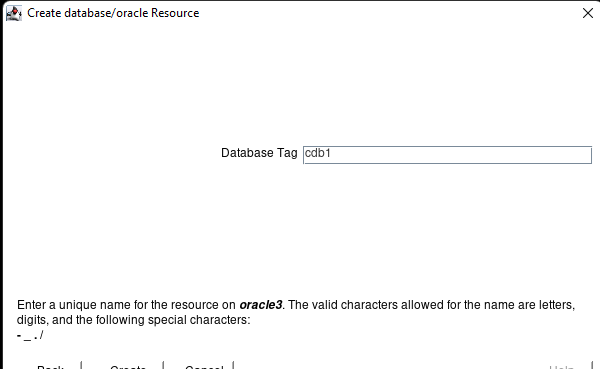
Select the Database name and hit next (If you get an error unable to find home directory, make sure database is running):
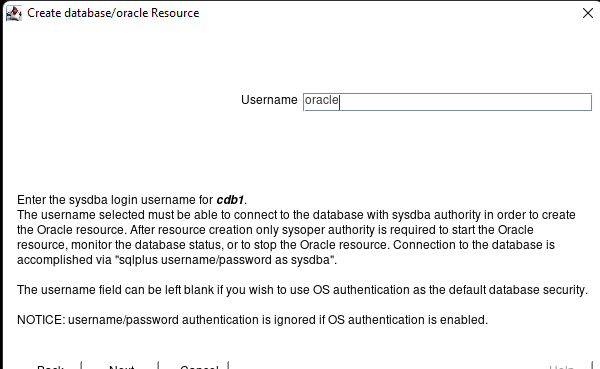
Enter the sysdba username and hit next:
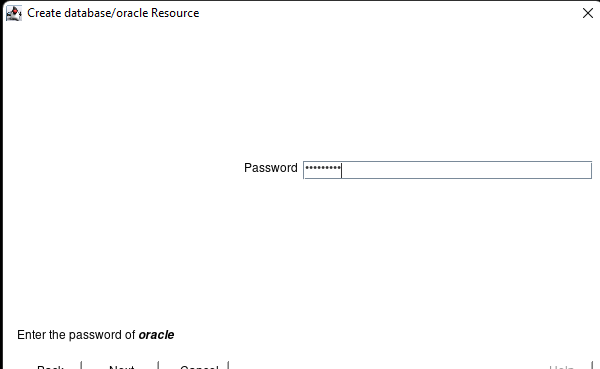
Enter the password for the account and hit next:
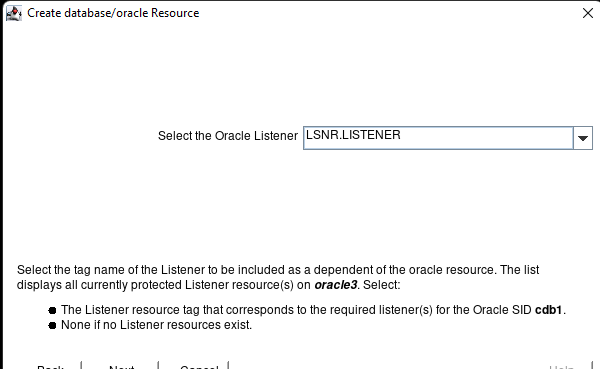
Select the Oracle Listener and hit next:
Hit Create:
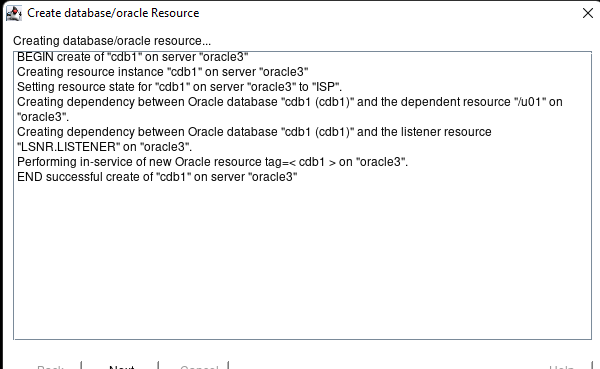
Upon successful creation select Next:
Select Accept Defaults:

Select Finish:
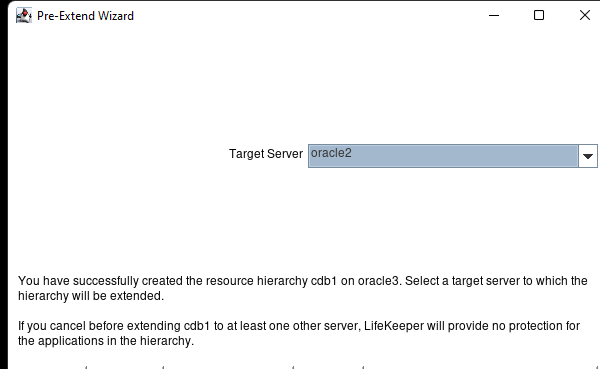
Hit Done:
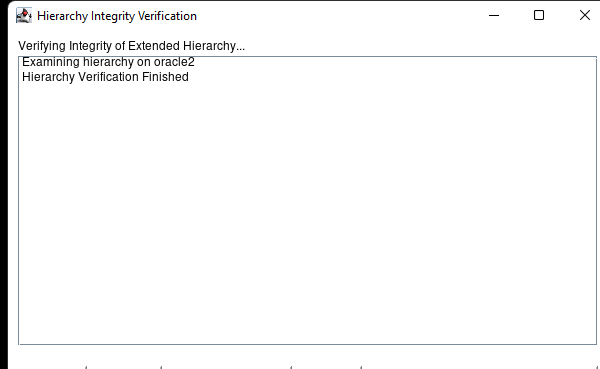
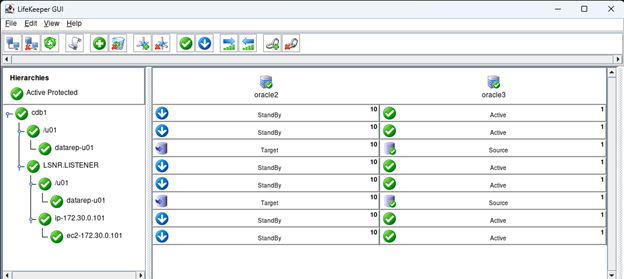
Extend the trees to see all resources:

19. Create Hierarchy with EC2
Click on the Create Resource Hierarchie button :
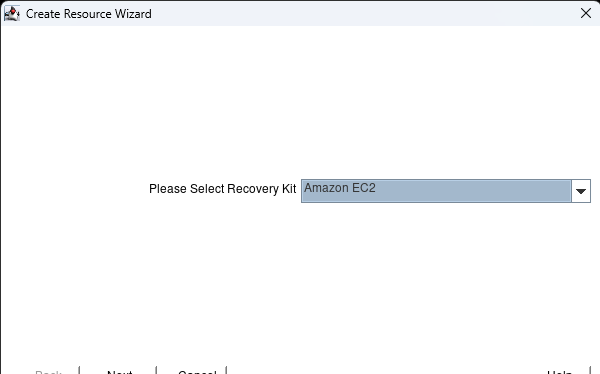
Select Amazon EC2 and hit Next>

Select Intelligent and hit Next>
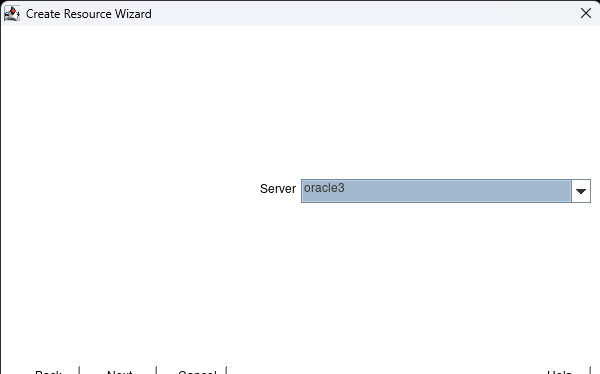
Select your primary server and hit Next>
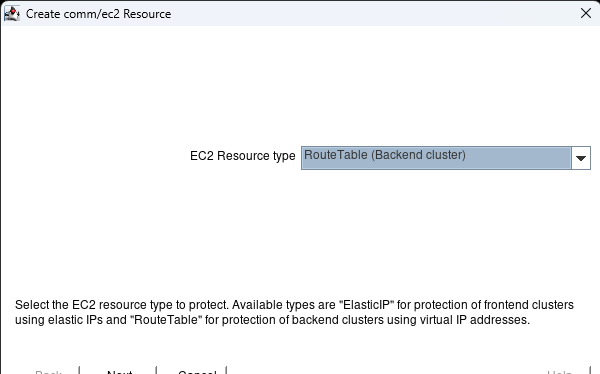
Select the EC2 Resource type (we are using Backend cluster for this example) and hit Next>
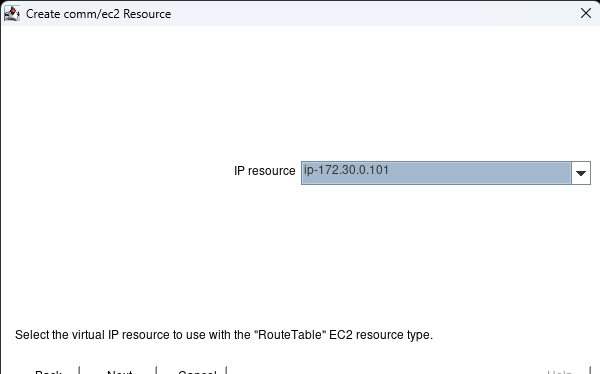
Select the IP resource and select Next>
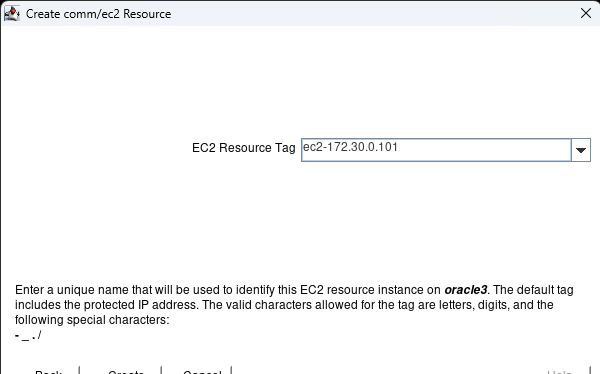
Select the EC2 Resource Tag name and hit Create

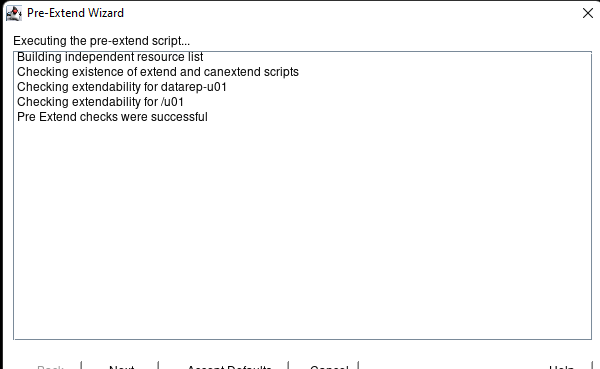
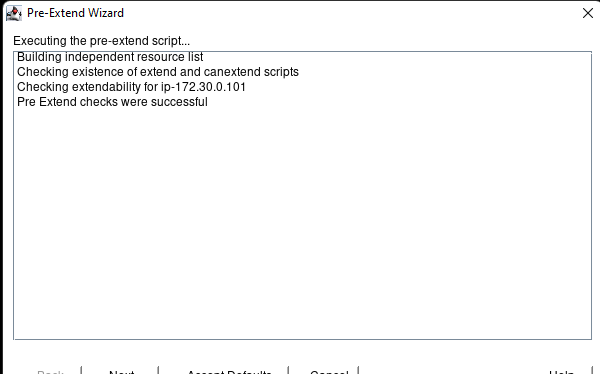
Upon successful creation of the resource hit Next> after a few seconds the pre-extend wizard will pop up. Hit accept defaults:
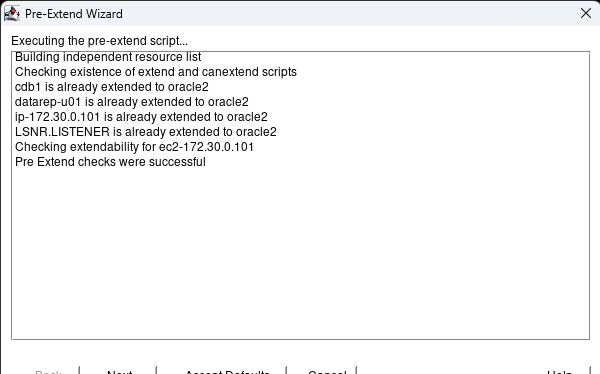
Once the checks are completed successfully hit Accept Defaults again:
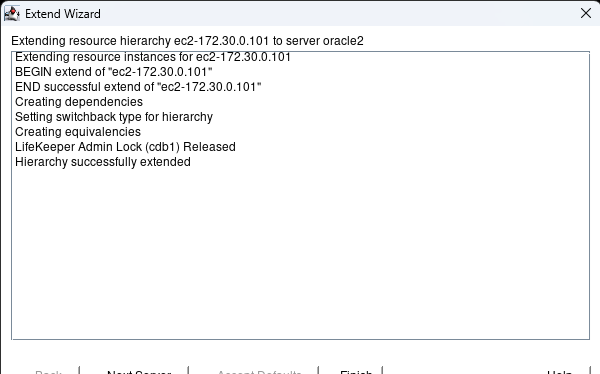
Hit Finish and after verification hit Done:

The configuration is complete. Now we can test the failover.
20. Change Shutdown Behavior
By default, LifeKeeper will not failover resources if you simply shutdown or reboot the server. If you want to move a workload prior to shutting down the server you should manually move the resources to the standby server before shutting down the active node. However, you may wish to change the default behavior to facilitate testing. That is controlled by changing the Shutdown Strategy as shown below.
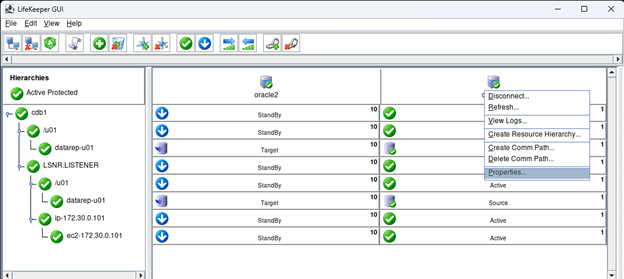
Right click on your Primary Server and Select Properties:
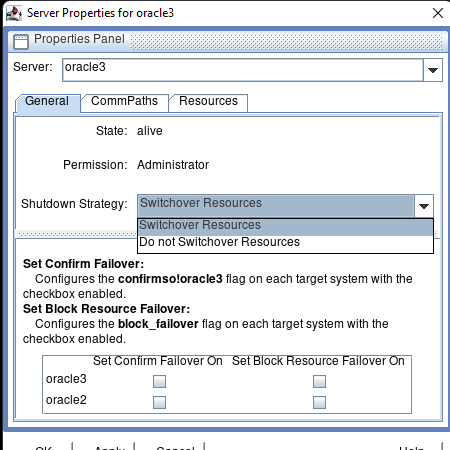
Under the General Tab change the Shutdown Strategy to Switchover Resources and then hit Apply:
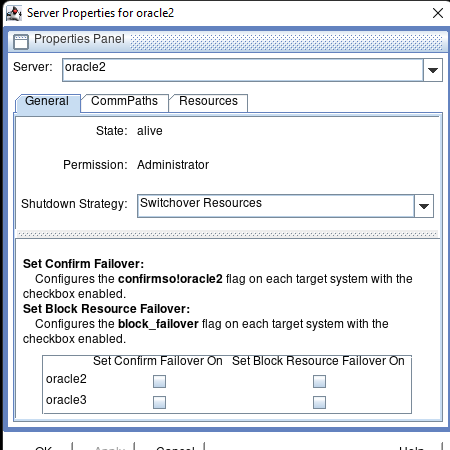
Next select the secondary server from the server pull down and verify the setting change:
Hit Ok:
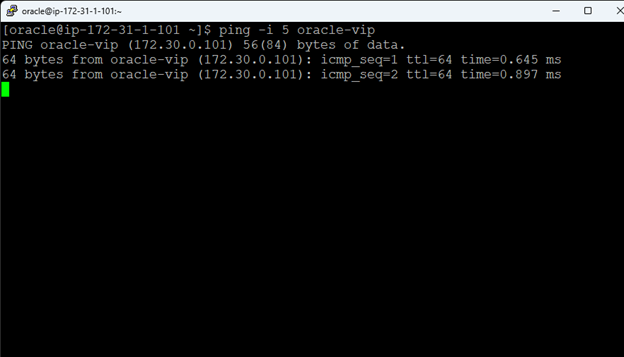
21. Test Failover
I am running the lkGUIapp from the secondary server. If you are on the primary server exit out of the LifeKeeper GUI and run it from the secondary server.

Expand all the Resource Hierarchies and open a SSH session to your primary server.
I am also running a ping -i 5 to the oracle-vip:
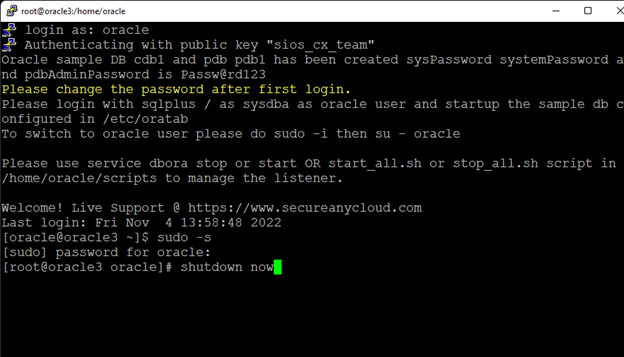
Shutdown the primary server:
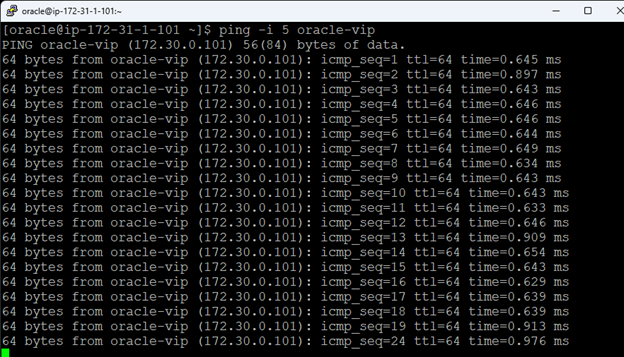
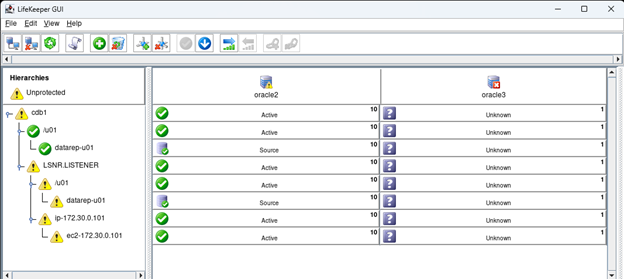
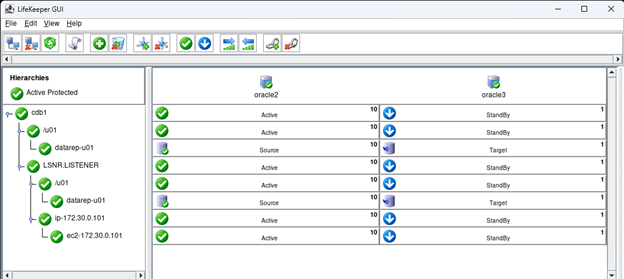
You can see in my case the IP stopped responding for < 25 seconds. I missed 4 pings 20-23 at 5 second intervals. Everything is now active on the backup server. Because our primary is still down we get warnings on the hierarchy.
Once you bring up the Primary server if you left the switchback to intelligent, you will have to manually bring the service up on the primary. Make sure that the Primary server is InSync before trying to bring it into service:
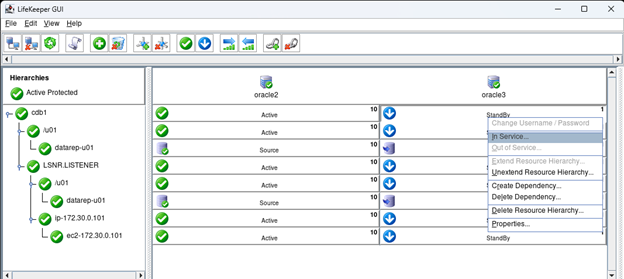
Right click on the StandBy button for cdb1 and select In Service…
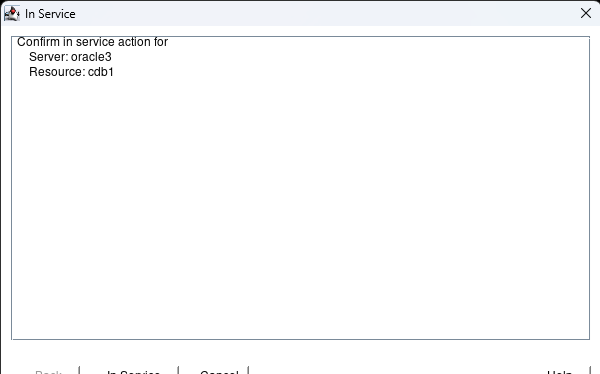
Click In Service
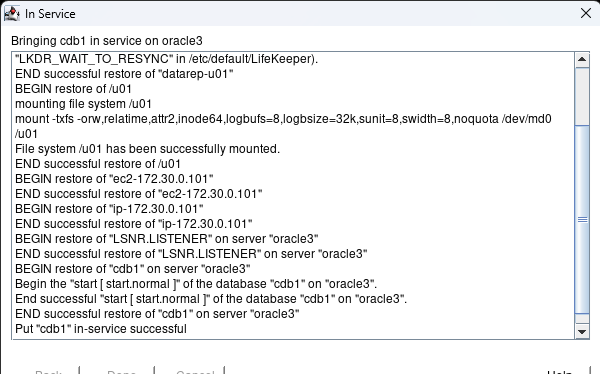
Hit Done.
It will take a few minutes for the disk to resync, but eventually it will.

Upon restoring everything we now have an HA Oracle database in AWS that is ready for development.